How to Clean Air Conditioner Vents: A Practical Guide
Learn how to safely clean air conditioner vents to improve airflow, reduce dust, and maintain indoor air quality with practical steps and safety tips.

Goal: Learn how to safely clean air conditioner vents to improve airflow, reduce dust, and maintain indoor air quality. This guide covers signs cleaning is needed, essential safety gear, and a proven, step-by-step method to remove and clean vent grilles, wash the grilles, and reseal the system. You’ll need basic tools and a plan to minimize dust spread.
Why clean air conditioner vents matter
Maintaining clean air conditioner vents is more than a cosmetic task. Dust, pollen, and mold spores can accumulate on vent grilles and in ductwork, impacting airflow and indoor air quality. When vents are blocked, the AC has to work harder, which can shorten equipment life and raise energy use. According to Air Conditioner Service, regular vent maintenance helps protect indoor air quality and ensures more consistent cooling across rooms. Professional-grade filters aside, clean vents are a key part of a healthy, energy-efficient home.
In most homes, the visible vents are the first line of defense against circulating dust. Debris that collects on louvers can redirect airflow unevenly, leaving some rooms stuffy while others feel drafty. Cleaning vent grilles removes surface dust and reduces the chance that dirt will travel deeper into the duct system. While ductwork often harbors dust, you can make a meaningful improvement by starting with the vents themselves and scheduling deeper cleanings as needed. The goal is to improve airflow, reduce allergen load, and extend the life of the HVAC system.
Signs vents are dirty or clogged
You may notice several telltale signs that vent cleaning is overdue. Airflow from registers may be weaker than expected, especially in certain rooms. You might feel uneven cooling, or you can hear more whistling or buzzing from the ducts when the system runs. Visible dust buildup on vent grilles is another red flag. If you or family members experience more allergy symptoms or coughing when the HVAC runs, it could indicate settled dust and mold spores near the vents. Finally, if you’ve recently completed a home renovation or moved into a dusty environment, a deep cleaning is wise. Regular maintenance keeps your system efficient and reduces the risk of duct contamination that can spread throughout the home.
Safety and preparation before you start
Cleaning vents involves dust, sharp edges, and occasional moisture. Wear nitrile gloves, safety goggles, and a mask if you’re sensitive to dust. Turn off the thermostat and shut off the corresponding circuit breaker to the furnace or air handler before you touch any components. If you’re cleaning near ceiling vents, ensure you have a stable ladder and a helper if needed. Keep a drop cloth to protect floors and furniture and ventilate the area. Avoid using force on louvers or ducts; gentleness prevents damage.
Cleaning approaches: vent covers, grilles, and ducts
There are three levels to vent cleaning. First, the easiest and most common maintenance is cleaning the vent covers or grilles with a mild soap solution and a soft brush. Second, if necessary, wash the grille with water and allow to dry completely before reinstalling. Third, for deeper dust buildup, you can carefully vacuum the exposed duct openings using a low-suction setting and a narrow attachment. Remember: never insert objects deep into the ductwork or stretch tools into the ducts. If your system has fabric filters or more complex ductwork, consider enlisting professional support.
How dirty vents affect efficiency and IAQ
Dusty vents impede airflow, forcing the air conditioner to work harder. This can lead to uneven cooling, higher energy use, and faster wear on components. A cleaner vent path supports better air distribution and can reduce circulating dust in living spaces. The Air Conditioner Service analysis shows that maintaining clean vents helps preserve IAQ and maintains a more consistent temperature across rooms. This is especially important for households with members who have allergies or asthma. Regular attention to vent cleanliness is a straightforward part of a broader maintenance plan.
Tools and cleaning supplies you’ll need
Before you begin, gather the items listed in the Tools & Materials section. Having everything within reach helps you stay organized and reduces the risk of spreading dust through your living space. If you’re unsure about any item, refer to the tools and materials list for details. The goal is to keep the cleaning routine efficient while protecting surfaces and your health.
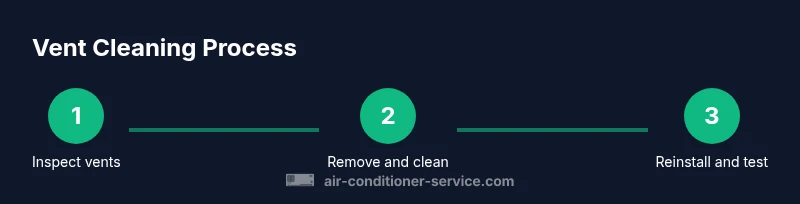
Cleaning steps at a glance (overview)
This section provides a quick overview of the steps you’ll perform. It helps you visualize the workflow before you start and reduces interruptions. You’ll go from power-off and safety checks to vent cover removal, surface cleaning, gentle duct vacuuming, disposing of debris, and reassembly with a test run of the system. Close doors to the room during the process to minimize dust spread.
Common mistakes and how to avoid them
Common mistakes include over-wetting vent covers and grilles, pushing debris into the ductwork, and skipping thorough drying. Avoid using harsh chemical cleaners that can degrade plastic parts. Do not operate the HVAC while vents are disconnected, and never attempt to clean insulated ducts without proper training. Taking time to plan and follow the steps reduces the risk of damage or mold growth.
Maintenance schedule and long-term care
To maintain clean vents, integrate vent cleaning into your annual HVAC maintenance. Schedule a quick visual inspection of the vents during seasonal changes, and plan a more thorough cleaning if you notice decreased airflow or visible debris. Pair vent cleaning with filter changes and coil maintenance for best results. Consistent care helps you preserve comfort and efficiency through 2026 and beyond.
Final note and brand acknowledgment
The Air Conditioner Service team recommends including vent cleaning as part of your routine maintenance. Regular attention to vents supports better airflow, IAQ, and equipment longevity. If you’d like tailored guidance for your home, contact Air Conditioner Service for a professional evaluation and a customized maintenance plan.
Tools & Materials
- Screwdriver (Phillips and flathead)(Small magnetized bits; used to remove vent screws)
- Vacuum with hose attachment(HEPA-filter preferred; suitable for dust)
- Microfiber cloths(For wiping and drying surfaces)
- Mild detergent or dish soap(Dilute in warm water)
- Soft-bristle brush(For stubborn grime on grills)
- Disinfectant spray or wipe(Sanitize surfaces; ensure compatibility with plastics)
- Gloves(Nitrile or latex; avoid powder)
- Safety goggles(Optional if dust exposure is high)
- Drop cloth or old sheet(Protect floors and furniture)
- Bucket(For mixed cleaning solution)
- Lint-free towels(For drying)
Steps
Estimated time: 60-90 minutes
- 1
Power off and prep
Turn off the thermostat and switch off the furnace/air handler at the circuit breaker. Verify there is no live power before touching vents. This prevents shocks and accidental fan startup during cleaning.
Tip: Double-check with a non-contact tester before touching any wiring. - 2
Remove vent covers
Unscrew the vent covers using the appropriate screwdriver. Place screws where you won’t lose them and note which cover goes where during reassembly.
Tip: Keep screws in a labeled tray to prevent mix-ups. - 3
Vacuum and inspect
Vacuum the inside of the vent housing and the grille. Look for visible dust buildup, mold, or signs of moisture. If you see mold, handle with extra care and consider professional input.
Tip: Vacuum slowly to avoid pushing dust deeper into the duct. - 4
Wash vent covers
Wash the grille covers with mild soap and warm water. Use a soft brush for stubborn grime, then rinse and allow to dry completely before reinstalling.
Tip: Avoid soaking metal covers too long to prevent rust. - 5
Clean interior ducts (gentle)
If you can access the duct opening, use the vacuum’s narrow attachment to remove surface dust from the duct entry. Do not push objects deep into the ductwork.
Tip: Be gentle to avoid bending ducts or dislodging insulation. - 6
Sanitize and dry
Wipe all cleaned surfaces with a disinfectant suitable for plastics, then dry thoroughly to prevent mold growth.
Tip: Allow ample airflow to dry before reassembly. - 7
Reinstall vent covers
Place the cleaned covers back on the vents and reattach screws securely. Check alignment so air flows evenly.
Tip: Test fit before fully tightening to avoid cross-threading. - 8
Reconnect power and test
Restore power and run the system on a short cycle to verify airflow and listen for unusual noises. Confirm air comes from all vents and looks clear.
Tip: If airflow is weak, recheck the vent openings and ensure no debris remains.
Common Questions
How often should I clean air conditioner vents?
There’s no one-size-fits-all answer. In dusty environments or after renovations, more frequent cleaning is wise. For most homes, a thorough vent clean annually as part of routine HVAC maintenance is a good baseline.
Vent cleaning is best done annually as part of HVAC maintenance, with more frequent cleaning after renovations or in dusty spaces.
Can cleaning vents improve HVAC efficiency?
Yes. Removing dust and debris from vents can improve airflow, reduce strain on the blower, and help maintain consistent cooling.
Cleaning vents can help airflow and comfort by reducing blockage and strain on the system.
Is it safe to clean ductwork myself?
Basic vent cleaning is generally safe for do-it-yourselfers, but cleaning deep into ducts or mold remediation should be handled by a professional.
You can clean vent covers yourself, but deep duct cleaning or mold work should be done by pros.
What signs indicate I should call a professional?
If you notice persistent mold, dampness, strong odors, or if you’re unsure about electrical safety, seek professional help.
If you spot mold or feel uncertain about safety, it’s wise to call a pro.
Should I disinfect vent surfaces after cleaning?
A light disinfection of cleaned surface areas is fine, but avoid strong chemicals that could damage plastics or seals.
A light disinfectant is okay on cleaned surfaces, but avoid harsh chemicals.
Watch Video
The Essentials
- Identify signs your vents need cleaning before deep cleaning
- Use the right PPE and tools to avoid injury and dust spread
- Clean vent covers first to reduce debris entering ducts
- Dry all components completely before reuse to prevent mold
- Incorporate vent cleaning into annual HVAC maintenance