Best Way to Clean Air Conditioner Coils: A Practical Guide
Discover the best way to clean air conditioner coils with a practical, step-by-step guide. Learn safe techniques, essential tools, and maintenance tips to boost efficiency and extend your system’s life.

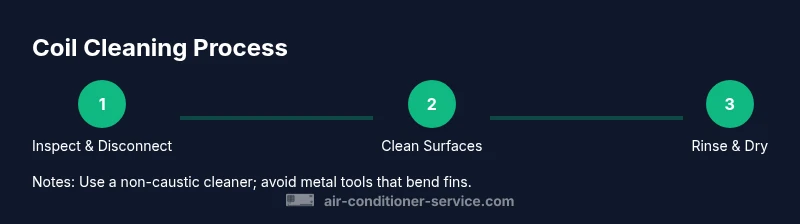
Unplug the unit and access the coils. Remove the grille, gently brush loose debris, and apply a coil cleaner following the label. Rinse with low-pressure water, then dry completely before reassembly. For outdoor coils, rinse from the inside out and avoid spraying electrical components. See our detailed steps below.
Why Clean AC Coils Matter
Coils are the heart of your air conditioner’s heat exchange. When dust, pollen, pet hair, and grime accumulate on evaporator coils (inside the air handler) or condenser coils (outdoor unit), airflow is restricted and heat transfer slows. The result is reduced cooling capacity, higher energy use, and more wear on the compressor. Regular coil cleaning helps maintain efficiency, improves cooling performance, and can extend the life of the system. If you’re looking for the best way to clean air conditioner coils, this guide will walk you through practical steps, safety considerations, and maintenance strategies that homeowners and renters can perform with basic tools. According to Air Conditioner Service, proactive cleaning is a cornerstone of reliable comfort.
The Impact of Dirty Coils on Efficiency and Comfort
When coils are coated with dust and grime, the refrigerant has to work harder to achieve the same cooling effect. This leads to longer run times, higher electricity bills, and accelerated wear on components such as the compressor and fan motors. You may notice reduced airflow, warmer rooms, or frost on the evaporator in extreme cases. Air Conditioner Service analysis notes that neglecting coil maintenance can erode system efficiency and shorten the life of your equipment. Keeping coils clean helps restore heat transfer, improves humidity control, and stabilizes indoor temperatures, making your home more comfortable while reducing strain on your HVAC system.
Tools and Safety Essentials
Before you begin, assemble the right tools and protective gear. Working with coil cleaners and fans can be messy, so wear eye protection and gloves. Have a spray bottle, a soft brush, a non-metallic scrub brush, a low-pressure hose or sprayer, and a set of screwdrivers to remove access panels. Use a non-caustic coil cleaner designed for HVAC systems, and read the label for dilution ratios and contact times. Never mix cleaners or spray near electrical connections. Practice good safety: power down at the breaker, and if you’re unsure about electrical components, call a pro. This is a great task for a DIY homeowner when approached with care.
Indoor Evaporator Coils: Cleaning Steps Overview
Evaporator coils live inside the air handler and are most often cleaned during routine maintenance. A typical approach involves removing the access panel, inspecting fins, and applying coil cleaner to the fins and coil surface. Let the cleaner foam and dwell for the recommended contact time, then rinse with a gentle, low-pressure spray from the top down. Avoid chipping fins or bending them with metal tools. After rinsing, gently dry the coils with a soft cloth or allow natural air drying before reassembling the panel. This reduces the chance of moisture-induced damage and prepares the system for safe operation.
Outdoor Condenser Coils: Cleaning Considerations
Condenser coils sit outside and are exposed to harsher conditions, including windborne debris and outdoor contaminants. Cleaning outdoor coils requires careful handling to protect the fins. Use a broad, low-pressure rinse from the inside out and avoid blasting directly at the fins with high pressure. Inspect the coil surface for bent or damaged fins and straighten with a fin comb if you have one. Keep electrical connections dry, and avoid cleaning during extreme heat or rain. Outdoor cleaning is usually less frequent but equally important for peak performance.
Choosing Cleaners: Chemical vs. Non-Chemical
There are chemically formulated HVAC coil cleaners and non-chemical methods that rely on diluted soap and water. Chemical cleaners come in foaming or spray formats and are designed to break up grease and dust without harming aluminum fins when used as directed. Non-chemical approaches are gentler but may require more physical scrubbing. Bleach is generally not recommended for aluminum coils because it can cause corrosion and discoloration. Always follow the product instructions and test a small area first. If you’re unsure, start with a milder cleaner and work up as needed. The choice depends on coil material, dirt level, and whether you have indoor or outdoor coils.
Maintenance Between Cleanings: Schedule and Tips
Create a simple maintenance calendar that fits your HVAC usage. Quick checks include inspecting for ice on evaporator coils, listening for unusual noises, and verifying airflow from vents. Change or clean air filters regularly, since clogged filters accelerate coil fouling. Keep surrounding outdoor areas free of debris, trim vegetation, and clear the condensate drain line to prevent standing water. Regularly scheduling coil cleanings—whether by you or a professional—helps avoid costly repairs and keeps your system running efficiently.
Troubleshooting Common Issues After Cleaning
If after cleaning you notice reduced airflow, frost buildup, or water leaks, recheck that panels are properly seated and that there is no moisture intrusion near electrical components. Ensure the condensate pan is clear and that the fan motor spins freely. If coils still look dirty after cleaning, you may need a more professional-grade cleaner or a deeper cleaning, which could be beyond DIY comfort. In that case, consult Air Conditioner Service or another qualified tech for a thorough inspection.
Reassembly, Testing, and When to Call a Pro
Reinstall the access panel and grille securely, restore power at the breaker, and run the system on a cool cycle to verify proper operation. Listen for unusual noises and check that vents deliver cold air. If there is no improvement, or if you observe leaking refrigerant, freezing coils, or signs of electrical trouble, it’s time to call a professional. Regular coil maintenance is a smart investment in energy efficiency and long-term reliability. The Air Conditioner Service team recommends keeping a simple maintenance log to track when coils were cleaned and when next service is due.
Tools & Materials
- Safety gloves(Nitrile or latex, snug fit)
- Safety goggles(Eye protection rated for chemical use)
- Face mask(Optional for dust protection)
- Soft brush(Non-metallic for gentle bristle action)
- Non-metallic scrub brush(For scrubbing coils without scratching fins)
- HVAC coil cleaner(Follow label dilution and dwell times)
- Low-pressure hose or sprayer(Avoid high-pressure on fins)
- Screwdrivers (Phillips/flathead)(To remove access panels)
- Towels or rags(Drying and cleanup)
Steps
Estimated time: 45-60 minutes
- 1
Power down and access the coils
Locate the correct power source and switch it off at the breaker. If accessible, unplug the unit and remove the exterior grille or access panel to expose the coils. This first step prevents electric shock and sets the stage for a thorough cleaning.
Tip: Verify power with a non-contact tester before touching any electrical components. - 2
Inspect coil area and plan approach
Take a quick look at whether you’re dealing with evaporator coils (inside) or condenser coils (outside). Note bent fins or heavy buildup. Plan your cleaner choice and whether you need to protect nearby electronics before applying.
Tip: If fins are bent, avoid forcing tools through; use a fin comb later for straightening. - 3
Brush away loose debris
Gently brush away loose dust and debris from the coil surface using a soft brush. Start at the top and work downward to minimize dirt falling into clean sections.
Tip: Keep the brush at a light angle to prevent bending fins. - 4
Apply coil cleaner per label directions
Apply the HVAC coil cleaner evenly across the coil surface. Allow it to foam and dwell for the recommended time to break down grime. Never mix cleaners.
Tip: Test a small area first if you’re unsure about compatibility with your coil material. - 5
Rinse with low-pressure water
Rinse from the top down or from inside to outside (for condensers) using a gentle, low-pressure spray. Avoid blasting water directly into electrical components or onto exposed wiring.
Tip: Do not use a high-pressure nozzle; it can bend fins and push cleaner into seals. - 6
Dry, reinstall, and test
Dry the coils completely with towels or allow natural air drying, then reassemble the access panel and grille. Restore power and run a cooling test to confirm normal airflow and temperature.
Tip: Listen for unusual noises and check for vibrations during the test run.
Common Questions
Can dirty coils cause the AC to blow warm air?
Yes. Dirty coils impede heat transfer, which makes the system work harder and can result in warm air.
Dirty coils block heat transfer, causing warm air; cleaning restores proper cooling.
Is it safe to clean coils myself?
It can be safe if you follow safety steps: power off, use proper cleaners, and avoid wiring or electrical components.
You can clean coils yourself if you follow safety steps and use HVAC-approved cleaners.
How often should coils be cleaned?
Most systems benefit from an annual inspection, with additional cleanings as needed based on dirt levels and climate.
Typically annual cleaning is good, with more frequent cleanings in dusty environments.
Can you use bleach on coils?
Bleach is not recommended for aluminum coils as it can cause corrosion and discoloration.
Bleach can damage coils; use HVAC-approved coil cleaners instead.
Do I need a professional for outdoor coils?
If outdoor coils have heavy buildup, bent fins, or risky access, a pro is advisable.
If you’re uncomfortable with outdoor access or see extensive damage, call a pro.
What about using water pressure?
Use only low-pressure water to avoid damaging fins and seals; high pressure can cause costly harm.
Low-pressure water is safest for coils; avoid high-pressure sprays.
Watch Video
The Essentials
- Power down before starting and protect yourself with PPE
- Choose the right coil cleaner and follow label instructions
- Rinse gently with low pressure and avoid high-pressure water
- Dry coils completely before reassembly and testing
- Incorporate coil cleaning into annual maintenance for best results