Home Air Conditioner Service: A Practical Maintenance Guide
Learn practical, step-by-step methods for servicing your home air conditioner, including safety checks, cleaning, filter replacement, and when to call a pro. Build a year-round maintenance plan to save energy and extend your system’s life.

With this guide you will learn how to perform essential upkeep on your home air conditioner and identify when professional service is needed. You will learn safety steps, basic cleaning, filter changes, coolant-related issues to watch for, and how to plan a routine maintenance schedule that extends equipment life and improves efficiency. We’ll also outline what to expect from a technician and how to prepare for a service visit.
Why regular home air conditioner service matters
According to Air Conditioner Service, regular maintenance helps prevent unexpected breakdowns and keeps the system running efficiently. When you invest a little time in seasonal checks, you reduce the risk of major failures during peak usage and extend the lifespan of critical components like the compressor and fan motors. Regular service also helps preserve efficiency, which translates to lower energy bills and more consistent cooling. A well-maintained system runs more quietly, responds more reliably to temperature changes, and creates better indoor air quality because the evaporator coil stays clean and the filter remains free of dust. Homeowners and renters can benefit from establishing a predictable maintenance routine that fits their schedule and budget. The goal is prevention, not panic, and that mindset is what separates a well-cared-for system from one that demands costly emergency repairs.
As you plan service, consider the age of your unit, the climate you live in, and how often you use the AC. A short, annual check isn’t just about comfort—it’s a smart way to minimize hidden costs and avoid sudden outages. By treating maintenance as a routine rather than a reaction, you reduce the chances of disruptive repairs and keep your home comfortable year-round.
Understanding your HVAC system: components you should know
A typical home air conditioner system includes an outdoor condenser unit, an indoor air handler or furnace, refrigerant lines, a thermostat, and ductwork that distributes cooled air. The outdoor unit expels heat, while the indoor coil absorbs heat to be removed by the condenser. The blower, fans, and electrical controls coordinate performance. Familiarizing yourself with these parts helps you spot when something isn’t behaving as expected. If a component is failing, symptoms may appear as reduced cooling, unusual noises, or longer run times. While you should not disassemble critical components, knowing what each part does helps you communicate problems effectively to a technician and makes routine maintenance safer and more productive.
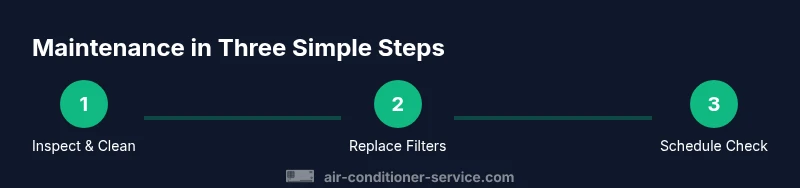
Preventive maintenance tasks homeowners can safely perform
Based on practical guidance from the Air Conditioner Service team, homeowners can tackle several low-risk tasks that improve efficiency and reliability. Start by inspecting the thermostat’s settings and accuracy, then clean or replace air filters regularly. Keep outdoor condenser fins clean and free of debris, and ensure there’s at least a couple of feet of clearance around the unit for proper airflow. Inspect visible electrical connections and tighten loose screws with the power off. Document any observations so you can compare performance over time. Remember: never open pressurized lines or reducer valves, and never bypass safety switches. These tasks are intended to reduce the risk of sudden failures and extend service intervals when done correctly.
Cleaning and inspecting the outdoor condenser unit
The outdoor condenser is exposed to weather, debris, and vegetation. Gently remove leaves, grass, and other debris from the surrounding area. Use a garden hose with a gentle spray to clean the fins from the outside, avoiding high-pressure blasts that could bend the fins. Check for oil stains or refrigerant lines that show signs of wear. Ensure the unit is level and stable; a tilted condenser can affect refrigerant flow and performance. If you notice bent fins, use a fin comb to restore airflow. A well-kept condenser operates more efficiently and lasts longer, especially in hot months.
Checking and replacing air filters correctly
Air filters protect your indoor air quality and the efficiency of your system. Start by turning off power to the unit, removing the old filter, and noting its size. Replace with the correct filter type and MERV rating as recommended by your system manufacturer. Make sure the filter is fully seated and oriented correctly for airflow. A clogged or incorrect filter increases energy consumption and reduces cooling effectiveness. If you have pets or allergies, you may need to change filters more frequently. Keep a maintenance log to remind you when filters were last changed and what type you used.
Inspecting electrical connections and thermostat accuracy
Electrical safety is critical. With the power off, visually inspect accessible wiring and connections for signs of wear, corrosion, or loose terminals. If you’re not trained in electrical work, do not attempt repairs beyond simple tightening. Calibrate or verify thermostat accuracy by comparing thermostat readings with an independent thermometer in the same room. Inaccurate readings can cause the system to run longer or shorter than needed, wasting energy and reducing comfort. If you observe tripped breakers or buzzing noises, contact a licensed technician promptly.
Ductwork and airflow basics you can assess at home
Check visible ductwork for obvious gaps, disconnected sections, or crushed ducts that impede airflow. Listen for whistling sounds at registers, which can indicate leaks or blockages. Ensure supply vents are open and unobstructed by furniture or drapes. While you can seal small leaks with approved tapes, large ductwork issues require a professional evaluation and possibly duct sealing or insulation. Proper duct health improves efficiency and comfort, particularly in older homes with legacy layouts.
Common issues that signal professional service needed
If you notice persistent ice formation on the evaporator coil, refrigerant smells, unusual noises, persistent cold/hot spots, or a dramatic spike in energy bills, these are red flags requiring professional service. Refrigerant leaks, in particular, demand immediate attention due to environmental and safety concerns. Inconsistent cooling and frequent cycling can also point to airflow, refrigerant, or control system problems that call for a licensed HVAC technician. Addressing these issues early reduces the risk of more extensive damage and expensive repairs.
How to communicate with a technician: what to tell them
Before a service visit, write down symptoms, dates when they started, and any unusual noises or smells. Note the model and serial number of your equipment, and share recent maintenance actions you performed. Provide access to the thermostat location and any remotely monitored systems. If you’ve completed DIY checks, describe what you did and the outcomes. Clear, concise communication helps technicians diagnose issues faster and reduces the need for multiple visits.
Scheduling routine service: best practices and timing
Most homeowners schedule routine service once a year, ideally ahead of the cooling season. Planning in spring or early summer gives technicians time to address issues before peak demand. If your system is older or has shown warning signs, consider a mid-year check. Maintain a record of all service visits, notes, and replacement parts. A proactive approach can minimize downtime and extend equipment life, providing steady comfort throughout the year.
Maintenance budget and cost-saving strategies
Developing a predictable maintenance plan helps manage costs and avoid surprise repairs. Schedule digital reminders for filter changes and routine inspections, and group tasks to reduce service calls. While DIY tasks save money, defer complex electrical or refrigerant work to licensed professionals for safety and compliance. A well-kept system consumes less energy and requires fewer expensive repairs, making routine maintenance a wise investment.
A year-round maintenance plan for peace of mind
Create a calendar that aligns with seasonal changes: light cleaning and filter changes in spring, outdoor condenser checks in late summer, thermostat verification in fall, and a cautious inspection of ductwork in winter. Maintain a simple log of dates, observations, and actions to spot trends over time. This approach reduces unexpected outages, avoids performance dips, and supports healthier indoor air quality for your household. Air Conditioner Service emphasizes that consistency is the key to long-term reliability.
Tools & Materials
- Screwdriver set (Phillips and flat-head)(Include magnetized bits; for service panels)
- Vacuum with brush attachment(For trimming dust from coils and blower area)
- Soft cloths or microfiber rags(Avoid abrasive cleaners)
- Spray bottle with water and mild detergent(Use for exterior coil cleaning (gentle spray))
- Replacement air filters (correct size)(Have the right MERV rating as recommended)
- Safety gloves(Protect hands during cleaning and lifting)
- Safety glasses(Eye protection when working near coils or debris)
- Multimeter (optional)(Used by some for basic electrical checks if qualified)
- Ladder or step stool(Access raised panels safely)
- Field flashlight(Helpful for dark corners inside equipment)
Steps
Estimated time: 60-90 minutes
- 1
Turn off power to the AC
Begin by turning off the power at both the thermostat and the main breaker. This step protects you from shocks and prevents the system from starting unexpectedly during maintenance.
Tip: Verify power is off with a non-contact tester before touching any components. - 2
Open service panels safely
Remove access panels on the indoor unit and outdoor condenser carefully. Keep screws in a labeled container to avoid loss, and avoid touching electrical components beyond the exterior.
Tip: Work one panel at a time to maintain organization. - 3
Inspect and clear the outdoor coil area
Clear leaves, debris, and obstructions from around the condenser. Ensure at least a couple feet of clearance for proper airflow and heat dissipation.
Tip: Use a leaf blower if stubborn debris is present, but avoid high pressure on the fins. - 4
Clean the condenser fins gently
Rinse fins with a light spray from the outside of the coil. Do not use high-pressure sprays as they can bend the fins and reduce efficiency.
Tip: Keep a safe distance to avoid bending the delicate fins. - 5
Check refrigerant lines visually
Look for oil stains or signs of wear on refrigerant lines. Do not attempt repairs or refrigerant handling if you’re not licensed.
Tip: If you see stains, note them for the technician. - 6
Replace indoor air filters
Remove the old filter, note the size, and install a new one with the correct orientation for airflow.
Tip: Always power off before handling filters to avoid shocks. - 7
Inspect thermostat and controls
Check that the thermostat responds to adjustments and that the display presents accurate readings.
Tip: If readings differ from room temperature, calibrate or replace the thermostat. - 8
Check for obvious duct issues
Look for loose ducts or obvious leaks in accessible sections and seal small gaps with approved materials.
Tip: Record locations of any gaps for professional sealing later. - 9
Test cooling performance briefly
Restore power and run a short test cycle to confirm airflow and cooling behavior, listening for abnormal noises.
Tip: If operation is unequal or noises persist, schedule a professional check. - 10
Document observations and plan next steps
Make notes on what you found and any actions you took. Prepare questions for your next service visit.
Tip: Include model/serial numbers and last service date. - 11
Decide if you need professional service
Determine whether issues are within DIY capability or require licensed repair, especially for refrigerant or electrical concerns.
Tip: When in doubt, contact a pro rather than risking safety. - 12
Schedule a follow-up or annual service
If you encounter any concerns, set up an annual professional inspection to maintain performance and efficiency.
Tip: Put the appointment on your calendar now to ensure consistency.
Common Questions
How often should I service a home air conditioner?
Most homes benefit from annual professional service, with DIY maintenance like filter changes every 1-3 months depending on use and environment. Regular care reduces the chance of unexpected breakdowns.
Most homes should have a yearly professional service, with DIY tasks like filter changes every few months depending on use.
Can I perform maintenance myself safely?
Basic tasks like changing filters, cleaning the outdoor unit, and inspecting accessible components are generally safe if you follow power-off procedures. Do not attempt refrigerant work or electrical repairs beyond your training.
Yes for simple tasks like replacing filters, but don’t touch refrigerant or electrical repairs unless you’re trained.
What are signs I need a professional service?
Signs include ice on the coil, unusual noises, weak cooling, rising energy bills, or frequent cycling. If you notice these, schedule a professional evaluation promptly.
If you see ice, hear unusual noises, or cooling drops, call a professional.
What maintenance steps exist for homeowners?
Steps include thermostat checks, filter replacement, outdoor unit clearing, coil inspection, and basic duct inspection. These help maintain efficiency and comfort without expensive services.
Check the thermostat, replace filters, and clear the outdoor unit; that keeps you comfy and efficient.
Is spring the best time to service?
Spring is commonly recommended to prepare for the cooling season. However, anytime you notice issues or before heavy use is a good time to service.
Spring is a popular time to service, but you can do it anytime you spot issues.
What should I tell a technician ahead of a visit?
Record symptoms, dates of onset, noises, smells, and any DIY actions you performed. Include model/serial numbers and access details for the unit.
Tell the tech what you’ve observed and when it started, plus model information.
Watch Video
The Essentials
- Perform regular maintenance to extend system life.
- DIY tasks improve efficiency but know your limits.
- Filter care and coil cleanliness matter for comfort.
- Document maintenance events to track performance.
- Plan a yearly maintenance schedule with a professional.