Air Conditioner Service and Maintenance: A Practical Guide for Homeowners
Explore a practical, step-by-step approach to air conditioner service and maintenance for homeowners. Learn essential checks, seasonal tasks, safety tips, and when to call a professional to keep cooling efficient and reliable.

Perform a safe, step-by-step routine for basic air conditioner service and maintenance at home. This concise answer outlines essential checks and when to call a professional for complex tasks. See the full guide for details.
Why air conditioner service and maintenance matters
Maintaining your air conditioner is not just about comfort; it's about reliability, efficiency, and indoor air quality. Regular air conditioner service and maintenance helps prevent small issues from turning into expensive repairs, reduces energy use, and extends the system's life. Homeowners and renters can perform many routine tasks with basic tools, but some tasks require a licensed technician. According to Air Conditioner Service, a proactive maintenance plan keeps systems running at peak performance and minimizes the risk of sudden breakdowns, especially during peak cooling season. A well-maintained unit runs cooler with less strain, improves humidity control, and reduces the likelihood of refrigerant leaks. The cost of routine maintenance is typically far lower than emergency repairs, and it can improve energy efficiency by keeping coils clean and airflow unobstructed. In this guide you will learn a practical routine you can perform to protect your investment, plus when to bring in a pro for complex tasks.
What you should know before you start
Before you begin any maintenance, power down the system at the thermostat and the main electrical panel. Wear safety glasses and gloves, and keep pets away from the work area. Some tasks require special tools or refrigerant handling that only a licensed technician should perform. This guide focuses on safe, practical steps homeowners can take to improve performance and extend life without risking injury or warranty issues. If you have a newer system with tricky controls or a suspected refrigerant leak, contact a licensed professional. Air Conditioner Service emphasizes starting with the basics you can manage and escalating only when clearly necessary.
Tools & Materials
- Power tools and hand tools (screwdriver set, pliers)(Phillips #2 and flathead preferred; include needle-nose pliers)
- Safety gear(Safety glasses and work gloves)
- Vacuum with hose attachment(For debris in blower and return ducts)
- Microfiber cloths(For wiping coils and surfaces)
- Replacement air filters(Match the size and MERV rating of your system)
- Coil cleaner spray(Non-corrosive; follow label directions)
- Spray bottle with water(Rinse coils lightly if needed)
- Ladder or step stool(Access to outdoor unit and attic spaces)
- Drain pan and towel(Have on hand if condensate is heavy)
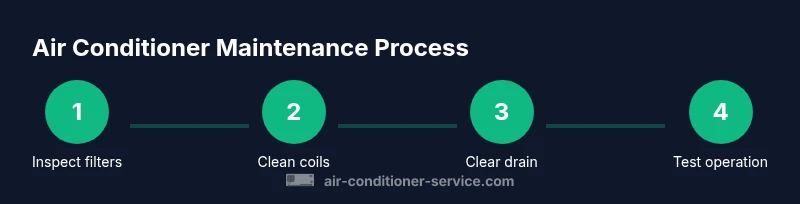
Steps
Estimated time: Estimated total time: 60-120 minutes
- 1
Power down and verify safety
Turn off the thermostat and switch off the outdoor disconnect and the indoor blower if accessible. Confirm there is no possibility of the system restarting while you work. This first step reduces the risk of electrical shock and injury when handling components.
Tip: If you must move near electrical panels, wear insulated gloves and avoid wet areas. - 2
Inspect and replace air filters
Remove the filter and check for dirt, mold, or clogging. Replace with a filter of the same size and efficiency. A dirty filter restricts airflow and forces the system to work harder.
Tip: If you have pets or high dust, check monthly and replace as needed. - 3
Clean evaporator and condenser coils
Gently vacuum around exposed coil surfaces and use coil cleaner as directed on the label. Avoid bending or breaking delicate fins. A clean coil improves heat exchange and efficiency.
Tip: Hold the spray nozzle at a distance and rinse from top to bottom to minimize residue. - 4
Inspect and clear condensate drain
Look for clogs in the condensate drain line and pan. Clear minor blockages with a flexible brush or by flushing with water as per manufacturer guidance. A clogged drain can cause water damage or mold.
Tip: Flush slowly and collect runoff to confirm the line is clear. - 5
Check refrigerant lines and electrical connections (do not recharge)
Inspect accessible refrigerant lines for signs of wear, oil residue, or damage. Check electrical connections for looseness, corrosion, or burnt smells. Do not attempt refrigerant recharge yourself; this requires a licensed tech.
Tip: Note any unusual odors or frost near lines and report these during a professional service. - 6
Test system operation and airflow
Restore power and run the unit on cool mode for several minutes. Listen for abnormal sounds and verify that air flows evenly from supply registers. Confirm thermostat responds to setting changes.
Tip: Document any inconsistent cycles or weak airflow for later diagnosis. - 7
Record results and set a maintenance schedule
Create a simple log of tasks performed, parts replaced, and any issues observed. Schedule the next routine maintenance, ideally every 6-12 months depending on usage and environment.
Tip: Set calendar reminders and keep a copy of filters on hand for quick future replacements.
Common Questions
How often should I service my air conditioner?
Most homes benefit from an annual professional inspection and a quarterly DIY check of filters and accessibility components. Frequency may increase in dusty environments or with pets. Regular maintenance helps prevent breakdowns and maintains efficiency.
Typically, aim for an annual professional check and quarterly DIY filter inspections. More dust and pets may require more frequent attention.
Can I clean the coils myself?
Coils can be cleaned with a non-abrasive coil cleaner and a soft brush or cloth. Be gentle to avoid bending fins. If you see heavy buildup or damage, contact a professional.
Yes, you can clean coils with gentle cleaners and a soft brush. If in doubt, call a pro.
What are signs of a refrigerant leak?
Look for diminished cooling, ice on the evaporator, oily residue near refrigerant lines, or hissing sounds. Leaks require a licensed technician to repair and recharge the system safely.
Diminished cooling, ice buildup, or oily marks near lines mean you should call a pro.
What safety steps should I follow?
Turn off power, unplug or switch off the breaker, wear protective gear, and keep water away from electrical components. Avoid working on live wires or with wet hands.
Power off, use PPE, and stay dry. If unsure, pause and call a pro.
How often should filters be replaced?
Check filters monthly and replace every 1-3 months depending on usage, filter type, and household conditions. High dust or pets may require quicker changes.
Check monthly and replace about every 1 to 3 months as needed.
When is it time to call a professional?
If you notice persistent poor cooling, unusual noises, odors, or signs of refrigerant issues, or if basic maintenance doesn’t improve performance, schedule a professional service.
If basic checks don’t fix things or you notice leaks or odors, call a pro.
Can a DIY maintenance extend system life?
Yes. Regular cleaning, proper filtration, and keeping outdoor units clear can improve efficiency and extend life. For complex tasks like refrigerant work or electrical issues, rely on professionals.
DIY care helps, but save complex tasks for pros.
Should I perform maintenance before each cooling season?
Perform a quick pre-season check: filter, airflow, and a thermostat test. If it’s working well, you can schedule deeper checks with a professional annually.
Do a quick pre-season check and plan a deeper annual service.
Watch Video
The Essentials
- Develop a seasonal maintenance routine.
- Clean coils and replace filters to sustain airflow.
- Never attempt refrigerant work yourself.
- Document maintenance tasks for future reference.
- Schedule professional inspections annually or as needed.