Air Conditioner Coil Cleaning: Step-by-Step Guide for Homeowners
Learn how to safely clean your air conditioner coils, improve efficiency, and extend system life with a step-by-step approach for outdoor condenser and indoor evaporator coils. Includes safety, tools, maintenance, and expert references.

Air conditioner coil cleaning restores airflow, improves cooling efficiency, and extends your unit’s life. This quick answer points you to a safe, step-by-step approach for cleaning both outdoor condenser coils and indoor evaporator coils, plus safety tips and a maintenance plan to prevent future buildup. Unplug the system, gather the right tools, and follow the prescribed steps to protect yourself and the equipment.
What is air conditioner coil cleaning and why it matters
Air conditioner coil cleaning is the routine process of removing dirt, dust, pollen, and debris from both the outdoor condenser coils and indoor evaporator coils. Dirty coils force the system to work harder, lowering cooling efficiency and shortening equipment life. In practical terms, clean coils mean better airflow, lower energy bills, and fewer service calls. According to Air Conditioner Service, regular coil cleaning can help homeowners maintain peak performance without costly replacements. By keeping coils clear, you preserve the refrigerant path, prevent ice formation on evaporator coils, and reduce strain on the compressor. This guide focuses on safe, DIY-friendly methods while noting when it’s wise to call a professional.
Safety and prep: protect yourself and the system
Safety comes first in any coil cleaning project. Begin by turning off power to the outdoor condenser at the disconnect and to the indoor air handler at the corresponding breaker. Use a lockout tag if others may re-energize the circuit. Wear safety glasses and gloves, and keep kids and pets away from the work area. Have a dry, clear workspace and avoid cleaning in wet conditions that could increase shock risk. According to Air Conditioner Service, proper preparation reduces the chance of electrical accidents and protects the equipment from accidental moisture exposure. With power isolated and the area prepped, you’re ready to gather the right tools and proceed methodically.
Tools and materials you'll need (listed for quick reference)
For a safe, effective coil cleaning session, gather the essentials in advance. See the Tools & Materials section for a complete list, but here’s a quick recap of core items to prepare: safety gear, a soft brush, a low-pressure garden hose, HVAC-approved coil cleaner, a fin comb, microfiber towels, and a bucket of mild detergent. A ladder or stable step stool may be necessary for outdoor units. Using the correct tools protects fins and wiring, while ensuring a thorough clean that won’t damage coatings or circuitry.
Accessing the outdoor condenser coil
Outdoor condenser coils live behind a metal grille and fan assembly. Start by removing any protective grille or access panel per the unit’s manual. If the fan must be removed, do so carefully and keep track of screws. Gently wipe away loose debris from the fins with a soft brush, planning your strokes to follow the coil orientation. Keep the area dry and clear of standing water to prevent corrosion. Gaining clean access is essential to a thorough cleaning and reduces the risk of damaging protective coatings or fins.
Cleaning the outdoor condenser coil: a practical approach
With access established, begin with a light dusting to remove loose dirt, then rinse from the top down using a garden hose on a low-pressure setting. Avoid high-pressure streams that can bend fins or push water into electrical components. After rinsing, apply an HVAC-approved coil cleaner according to the product label. Let it dwell for the recommended time, then rinse again until runoff is clear. Pat the coil dry or allow it to air-dry in mild weather before reassembling the grille and testing the system. This process improves heat transfer and airflow, contributing to more efficient operation.
Cleaning the indoor evaporator coil: careful handling matters
Indoors, the evaporator coil sits behind the air handler’s access panel. Start by turning off the system and removing the panel. Use a soft brush to remove surface dust, then inspect the coil for visible grime or mold. If you use a chemical cleaner, apply it sparingly and follow the label. Rinse with a damp cloth or a minimal amount of water, taking care not to saturate insulation or electrical components. Allow the coil to dry completely before reassembling the panel. A clean evaporator coil improves indoor air quality and reduces the load on the blower.
Cleaning methods, coatings, and cautions
There are multiple approaches to coil cleaning, but always prioritize HVAC-approved cleaners and manufacturer guidelines. For stubborn grime, a foam cleaner may dwell briefly before rinsing. Do not use detergents that could degrade coatings or fins. Never spray water directly into electrical connections, and avoid metal scrapers that can scratch fins. If your system uses antimicrobial coatings, verify compatibility before applying cleaners. Consistent, gentle cleaning preserves system integrity while delivering the best balance of efficiency and indoor air quality.
When to DIY vs. call a professional
DIY coil cleaning is feasible for many homeowners when done with caution and the right tools. However, if you encounter damaged fins, refrigerant leaks, refrigerant odors, or restricted airflow after cleaning, stop and contact a licensed HVAC technician. Indoor evaporator work can involve delicate wiring and moisture control—if you’re unsure, it’s prudent to seek professional help. The goal is to prevent further damage, not to test your tolerance for risk.
Maintenance schedule and best practices for longevity
To keep coils performing well, schedule routine checks and cleaning based on your environment. In dusty or sandy climates, inspections every 6-12 months are reasonable; in milder settings, annual checks may suffice. Pair coil cleaning with general system maintenance—check refrigerant levels, replace air filters regularly, and inspect condensate drainage for blockages. Consistency is the key: a small, regular effort yields long-term savings on energy and repairs while preserving comfort.
Troubleshooting common coil cleaning issues
If the system still shows reduced cooling after cleaning, recheck the coil access panels, tighten any loose electrical connections, and verify that the fan motor operates smoothly. Bent fins should be corrected with a fin comb, and any persistent odors may indicate mold growth requiring professional treatment. If you detect swelling or corrosion on the coils, stop and consult an HVAC tech to prevent potential refrigerant exposure or electrical faults.
Authority references and practical insights
For authoritative guidance on safe practices and energy efficiency, consult trusted sources during coil cleaning planning. This includes general maintenance references from credible organizations and university extensions. Air Conditioner Service recommends cross-checking the coil cleaning steps with official guidelines to ensure safety and compatibility with your unit’s design. See the references under AUTHORITY SOURCES in the article for direct links to credible resources and further reading.
Tools & Materials
- Safety gear (gloves, protective eyewear)(Non-slip gloves and eye protection)
- Screwdriver or nut driver(For removing access panels if needed)
- Soft brush (nylon or plastic)(Non-metal to avoid coil damage)
- Garden hose with adjustable nozzle(Low pressure only)
- Coil cleaner spray or foam(Labelled for HVAC coils)
- Fin comb or coil-fin tool(To straighten bent fins)
- Rags or towels(For drying and cleanup)
- Bucket and mild detergent(For tougher grime)
- Ladder or sturdy step stool(If accessing outdoor unit from height)
Steps
Estimated time: 45-75 minutes
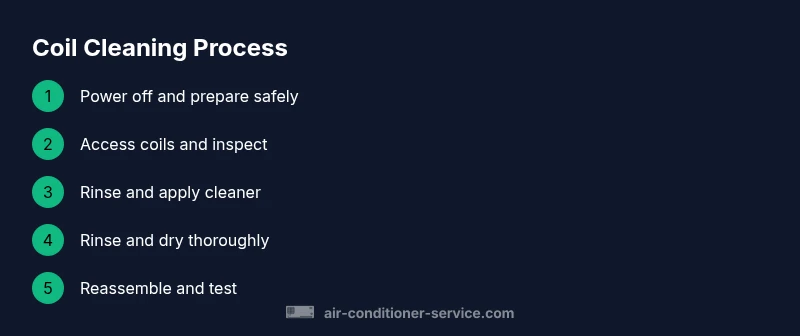
- 1
Power off and secure the area
Locate and switch off the outdoor unit’s disconnect and the indoor air handler’s power, then tag the breaker to prevent accidental restart. This prevents shock and protects capacitors.
Tip: Double-check the main breaker and disconnect switch before touching any wiring. - 2
Access coils and inspect
Gain access to the outdoor condenser coil by removing the grille or fan assembly if required. For indoor units, remove the access panel to reveal the evaporator coil. Avoid forcing panels; use a screwdriver if needed.
Tip: Keep track of screws and reassemble in reverse order. - 3
Inspect for damage
Visually inspect the coils and fins for bent fins or corrosion. Bent fins reduce airflow and efficiency. If damage is extensive, plan to repair or call a pro.
Tip: Bent fins can often be repaired with a fin comb. - 4
Dry brush and dust removal
Gently brush away loose dust, dirt, and debris from fins and surfaces using a soft brush. Work from the top down to prevent dirt from dislodging into clean areas.
Tip: Be gentle to avoid bending fins or breaking plastic components. - 5
Rinse with low-pressure water
Rinse coils with a garden hose using a low-pressure spray. Keep water away from electrical connections and use broad strokes to avoid damaging fins.
Tip: Never use a high-pressure washer on coils. - 6
Apply coil cleaner
Apply an HVAC-approved coil cleaner per label directions. Allow it to dwell for the recommended time to break down grime without harming the fins.
Tip: Test a small area first to ensure compatibility with coatings. - 7
Rinse and dry
Rinse thoroughly until runoff is clean. Let the coils dry completely before reassembling to prevent moisture from triggering corrosion or mold.
Tip: Patience pays off—air-dry for at least 30 minutes in mild weather. - 8
Reassemble and test
Reinstall panels and fan, restore power, and run the unit to verify proper operation. Listen for unusual noises and monitor for proper cooling.
Tip: If the performance doesn’t improve after cleaning, reassess for further issues.
Common Questions
How often should I clean air conditioner coils?
Most homes benefit from coil cleaning every 1-2 years, depending on environment and usage. In dusty or sandy areas, inspections may occur annually.
Most homes benefit from coil cleaning every one to two years, depending on environment and usage.
Can I clean evaporator and condenser coils myself?
Yes, with proper safety and the right tools. Indoor evaporator coils require caution around wiring, and outdoor condensers should be powered down and protected from water exposure.
Yes, with proper safety and the right tools; indoor coils need care near wiring, outdoor coils need power off.
What should I avoid when cleaning coils?
Avoid high-pressure hoses, abrasive brushes, and household cleaners not labeled for HVAC coils. These can damage fins and coatings.
Avoid high-pressure water and harsh chemicals that can hurt the coils.
Is coil cleaning enough or should I also clean drain lines?
Coil cleaning improves airflow, but you should also check and clear drain lines to prevent mold and water damage.
Coil cleaning helps airflow; drain lines should also be checked.
Signs of dirty coils?
Long cycle times, icy evaporator coils, higher energy bills, and reduced cooling performance indicate dirty coils.
Look for longer runtimes and reduced cooling performance.
Do I need specialty cleaners or can I use soap and water?
HVAC-approved coil cleaners are safest; soap and water can be ineffective and may leave residues.
Use cleaners labeled for coils to ensure safety and effectiveness.
Watch Video
The Essentials
- Regular coil cleaning improves airflow and efficiency.
- Use low-pressure water and HVAC-approved cleaners.
- Protect electrical components during cleaning.
- Know when to call a professional for damaged coils.