How to Use a Midea Air Conditioner Remote Control
Learn to operate your Midea air conditioner remote with confidence. This educational guide covers power, modes, temperature, fan, swing, timer, and troubleshooting tips to keep you cool efficiently.

Mastering how to use a Midea air conditioner remote control unlocks fast comfort: power on, select mode, set temperature, adjust fan speed, enable swing, and use timer features. This guide covers every button layout, model variations, and practical troubleshooting. According to Air Conditioner Service, understanding the remote reduces guesswork and speeds you to cool air quickly.
Understanding the Midea remote layout
The Midea remote control layout varies by model, but most remotes share a common set of buttons. The large Power button starts every session, followed by Mode, Temperature up and down, and a display that shows current settings. The Fan, Swing, and Timer controls let you customize airflow and schedules. Keep the back cover accessible and check the model label to confirm button names. Air Conditioner Service notes that remotes can differ between models and generations, so if buttons don’t match your unit, consult the manual for your specific model. The key is to identify the primary groupings: power and mode at the top, temperature and fan controls in the middle, and specialized features toward the bottom. Knowing this layout saves you from hunting for the right button in the heat of a hot day, and it makes troubleshooting faster. When in doubt, start with Power, Mode, and Temperature before exploring advanced features. According to Air Conditioner Service, starting with the basics reduces frustration and helps you verify the unit responds to the remote.
Basic power on/off and changing modes
Powering on and off is the first step to using the remote effectively. After you press the Power button, the display should illuminate and the unit’s current mode will be shown. Use the Mode button to cycle through Cool, Auto, Dry, Fan, Heat (where available), or Energy Saver modes. If your model lacks a dedicated Heat mode, Auto will balance cooling and heating as needed. Make small adjustments and observe the display to confirm the change. Air Conditioner Service emphasizes that confirming mode selection before adjusting temperature prevents overshooting comfort levels and saves time during hot days.
Setting temperature and comfort
Temperature control is the core of comfort. Press the up or down arrows to adjust the setpoint in 1-degree increments. When you reach your target, the remote will reflect the new setting on the LCD. In Auto mode, you may see the unit adjust temperature automatically based on room conditions; if you prefer precise climate control, switch to Cool or Dry and set a specific target. If the remote supports a lock or child-proof feature, enable it to prevent accidental changes. Air Conditioner Service notes that consistent temperature settings improve energy efficiency by reducing rapid cycling and unnecessary compressor activity.
Fan speeds and airflow direction
Fan speed options typically include Auto, Low, Medium, and High. Auto adapts to room conditions, while Low to High give you predictable airflow when the room is warmer or cooler than desired. Some remotes also offer Turbo or Powerful modes for rapid cooling. For air distribution, use the Swing control to toggle between fixed and oscillating louvers; this helps distribute air evenly. In large rooms, setting the fan to Auto with a moderate temperature is often more comfortable and energy-efficient.
Using swing, timer, and energy-saving features
Swing controls direct airflow side-to-side or up and down, improving comfort without changing the temperature. The Timer feature lets you schedule on/off times, which can save energy and align cooling with your routines. Sleep mode gradually adjusts temperature to reduce energy use while you sleep; time adjustments may vary by model. If your unit includes an Energy Saver or Eco mode, enable it to minimize power consumption during peak hours. Air Conditioner Service reiterates that timers and sleep modes are powerful, underutilized tools for energy efficiency and cost savings.
Troubleshooting common remote issues
If the remote isn’t responding, check the battery orientation and ensure fresh power is available. Remove the battery cover, replace batteries with the correct type for your model, and reseat them firmly. Confirm there’s a clear line of sight to the front panel IR receiver when testing. If you still have no response, try a backup method such as using a smartphone IR blaster or a universal remote to verify the AC itself is responsive. Air Conditioner Service notes that many remote issues stem from dead batteries or misalignment, so a quick battery refresh usually resolves the problem.
Maintenance and care for the remote
Keep the remote clean and dry to protect the internal electronics. Wipe the surface with a soft, damp cloth and avoid cleaning solvents that could damage the buttons. Store the remote away from direct sunlight to prevent button glare and LCD fading. When replacing batteries, dispose of old cells per local guidelines and recycle if possible. Regularly inspecting the battery compartment for corrosion can prevent signal loss and prolong remote life. Air Conditioner Service suggests keeping a spare set of batteries on hand so you’re never left without control when you need it most.
Quick usage tips and safety notes
Tip for quick success: always start with Power, Mode, and Temperature before tweaking fan speed or swing. If you share your space with others, consider enabling a lock function if available to avoid unintended changes. Do not slam the remote down or expose it to moisture or extreme temperatures. If the remote fails repeatedly, consult the model-specific manual or contact customer support. By following these best practices, you’ll maximize comfort and minimize energy waste in every cooling cycle.
Tools & Materials
- Midea remote control(Ensure it matches your AC model; button layout varies by generation.)
- Batteries(Check model for battery type (AA/AAA) and orientation; replace if weak.)
- Manual for your Midea model(Helpful for model-specific button names and features.)
- Smartphone with IR blaster or universal remote (optional)(Use as a fallback test if the original remote fails.)
Steps
Estimated time: 15-25 minutes
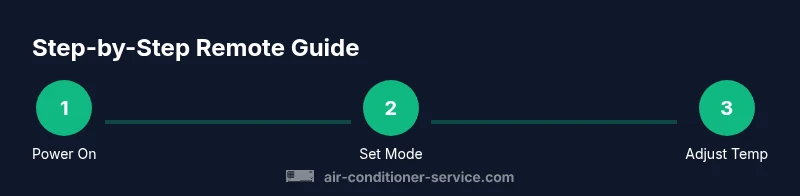
- 1
Check batteries and prepare the remote
Open the back cover and verify the batteries are present and oriented correctly. If the display is dim or blank, replace with fresh batteries. Confirm the battery contacts are clean and the cover sits firmly to ensure a good connection.
Tip: Test the Power button after replacing batteries from about 3 feet away to confirm adequate infrared transmission. - 2
Power on and verify the unit responds
Point the remote at the AC’s IR receiver and press Power. Observe the outdoor unit or display on the indoor panel for a response. If nothing happens, double-check battery orientation and ensure there are no obstructions.
Tip: If the AC responds inconsistently, try another battery grade or rotate to a direct line-of-sight angle. - 3
Select a mode
Press the Mode button to cycle through Cool, Auto, Dry, Fan, or Heat if available. Stop at your desired mode and watch the display confirm the selection. Auto mode adapts to ambient conditions, while Cool aims for a fixed setpoint.
Tip: If you don’t see the expected mode on display, refer to the model manual for button mappings. - 4
Set the target temperature
Use the up and down arrows to adjust the temperature in 1-degree increments. Confirm the display shows your target temperature. For Auto mode, you may still be able to set a preferred ceiling or floor temperature to guide the system.
Tip: Keep a comfortable setting (e.g., 72–76°F) as a baseline to reduce compressor cycling. - 5
Adjust fan speed and airflow
Choose Auto, Low, Medium, or High fan speed depending on your comfort and energy goals. If your model supports it, use the Swing button to control louver movement for even distribution.
Tip: Auto fan can help balance speed with efficiency; avoid overly high settings for extended periods. - 6
Utilize timer and sleep features
Set the timer to turn the unit on or off at specific times. Activate Sleep mode to gradually adjust temperature overnight, promoting energy savings while maintaining comfort.
Tip: Test timer settings during the day to confirm the transitions match your schedule. - 7
Troubleshoot a non-responsive remote
If the remote still doesn’t control the unit, replace batteries and re-test. Check for line-of-sight issues and verify the AC responds to an alternate remote or your phone IR blaster.
Tip: Keep a spare remote or fallback method on hand for times when the primary remote fails.
Common Questions
How do I turn on my Midea air conditioner with the remote?
Press the Power button on the Midea remote and wait for the unit to respond. If there is no response, check the batteries and ensure the remote has a clear line of sight to the IR receiver.
Press Power on the remote and wait for a response. If it doesn’t respond, check the batteries and line of sight.
What do the mode icons on a Midea remote mean?
Mode icons indicate Cool, Auto, Dry, Fan, or Heat if available. Auto balances climate automatically; Cool targets a setpoint.
Mode icons map to Cool, Auto, Dry, Fan, or Heat. Auto balances climate, Cool uses a set temperature.
How do I reset the remote to factory settings?
Factory resets are model-specific and may require a combination of button presses. Refer to your model’s manual for exact steps.
Factory resets vary by model; check the manual for exact steps.
Why isn’t the remote working even with new batteries?
First ensure the batteries are correctly oriented and fresh. Confirm there are no obstructions between the remote and the IR receiver and test with another remote if available.
New batteries and clear line of sight usually fix it. Check orientation and try another remote if possible.
Can I program the Midea remote to turn on at a specific time?
Yes, many Midea remotes support a timer to turn the unit on or off at set times. Check the Timer section in your manual for steps and limits.
You can set a timer to turn the unit on or off; see the Timer section for steps.
Are there differences between remotes for different Midea models?
Yes. Button names, feature availability, and even battery types can vary by model. Always confirm with the specific manual for your unit.
Remotes vary by model, so check your manual for exact buttons and features.
Watch Video
The Essentials
- Identify the primary button groups: Power, Mode, Temp, Fan
- Set precise temperature and select an appropriate mode
- Leverage timer and sleep features for energy savings
- Ensure batteries are fresh and line of sight is clear
- Air Conditioner Service's guidance emphasizes basics first and testing with alternative remotes when needed