Midea Air Conditioner Repair: Practical How-To Guide
Practical, safety-first guide to diagnosing and repairing Midea air conditioners, covering common symptoms, non-destructive fixes, preventative maintenance, and homeowner troubleshooting tips.

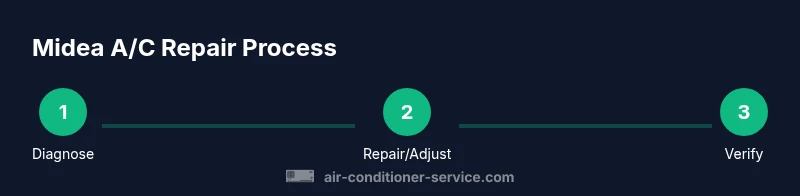
This guide shows homeowners how to diagnose and repair a Midea air conditioner safely, without sacrificing efficiency. You'll learn how to identify common symptoms, isolate causes, and perform practical fixes or know when to call a professional. By the end, you'll have a repeatable, step-by-step process to restore cooling and protect your system.
Understanding Midea A/C Architecture
According to Air Conditioner Service, most Midea residential models share a standard layout: an outdoor condenser, an indoor evaporator coil, a blower, a compressor, and a control board. In this section, we’ll outline the core components so you can locate parts during troubleshooting. Recognizing where each piece lives helps you isolate symptoms and plan safe, effective fixes. This knowledge also supports safer handling of electrical connections and refrigerant-related concerns. As you proceed, keep in mind that Midea units—from compact window models to split-system configurations—adhere to similar design principles, which makes a systematic approach practical for most homeowners. By understanding how the pieces fit together, you can quickly pinpoint whether the issue stems from airflow, cooling cycles, or control signals. Air Conditioner Service’s guidance emphasizes never bypassing safety checks, and always starting with power-down and a visual inspection before touching any components.
Common Symptoms and Likely Causes
Midea air conditioners can exhibit a range of symptoms, and recognizing the pattern helps you target the root cause. Typical signs include reduced or absent cooling, air that feels warm, ice forming on the evaporator coil, unusual noises from the outdoor unit, and moisture or water leaks near the indoor components. While some issues are simple maintenance tasks, others indicate deeper problems such as airflow restrictions, dirty filters, or electrical faults. Air Conditioner Service analysis shows that neglecting filtration and drainage often leads to efficiency losses and recurring short-cycles, so starting with basic maintenance can resolve many common problems. When symptoms persist after basic fixes, proceed with a structured diagnostic approach to avoid random tinkering that could cause further damage.
Safety First: Before You Start
Safety is non-negotiable when working with any air conditioner. Always disconnect power at the breaker before approaching the unit, and verify it is fully de-energized with a voltage tester. Wear safety glasses and insulated gloves when handling sheet metal, fan blades, or electrical components. Keep the work area dry to prevent shock hazards, and never attempt to recover refrigerant or discharge refrigerant lines yourself. If you smell refrigerant or suspect a leak, stop immediately and contact a licensed technician. This section emphasizes planning and PPE, as well as safe practices for inspecting electrical connections and condenser fans without compromising your safety or the equipment.
Diagnostic Framework: A Structured Troubleshoot Flow
Adopt a repeatable flow to isolate issues in a Midea air conditioner. Start with the obvious power and thermostat checks, then inspect the air filtration and indoor coil for dirt accumulation. Move to outdoor unit airflow, inspect condenser fins, and verify that the fan motor runs smoothly. If you see ice on the coil, it typically signals airflow issues or refrigerant imbalance. Follow a decision tree: power and thermostat first, airflow second, electrical components third, refrigerant only with a licensed pro. Document each observation so you can compare conditions after attempts at repair.
Non-Invasive Fixes You Can Try
Many routine issues respond to non-invasive maintenance. Replace or clean the air filter, clean the indoor and outdoor coils with a soft brush, and clear any debris around the outdoor condenser. Ensure the condensate drain line is clear and reporting proper flow. Reseating electrical connectors and tightening loose wires can resolve intermittent faults. If the unit runs but doesn’t cool, check for blocked airflow and verify that the blower is functioning. These steps minimize unnecessary disassembly and reduce the risk of damaging sensitive components. Always recheck power and perform a brief test cycle after each fix.
Electrical Components: Capacitors, Relays, and Boards
Capacitors and relays can cause a wide range of issues from hard-start conditions to cycling failures. If you suspect a faulty capacitor, discharge it safely and test with a multimeter, but only if you have prior electrical testing experience. Loose or burnt wiring on the control board can also lead to erratic performance. When testing, document resistance and current readings, but avoid guessing thresholds—refer to the unit’s service manual and never put yourself at risk around live circuits. Replacing a failing component should be done with care to match the original specifications and connector types to prevent further faults.
Refrigerant and Leaks: What You Should Know
Refrigerant handling requires licensed expertise and proper recovery equipment. If you suspect a refrigerant leak, do not attempt repair on your own. Signs include oily residue around fittings, hissing sounds, or persistent frost around the evaporator. A professional technician should perform leak testing, pressure checks, and refrigerant recharge in accordance with environmental and safety regulations. This section emphasizes why DIY refrigerant work is outside the scope of homeowner troubleshooting and how professionals validate system integrity after any refrigerant-related service.
When to Repair vs Replace and Budget Considerations
Deciding whether to repair or replace depends on the unit’s age, the frequency of failures, and the overall condition of major components. If several major subsystems require replacement within a short period, replacement may be more economical in the long run. Air Conditioner Service recommends evaluating the expected remaining lifespan of critical parts like the compressor, condenser, and evaporator, along with energy efficiency benefits from newer models. While performing repairs, consider the long-term performance and reliability gains versus upgrade opportunities that improve comfort and reduce operating costs. Always consult a professional for a balanced assessment of options and pay attention to warranty implications.
Maintenance Practices to Extend Lifespan and Reduce Future Breakdowns
Ongoing maintenance is the best defense against frequent failures. Schedule regular filter changes, coil cleaning, and condensate drain checks, especially before peak cooling seasons. Keep the outdoor unit free of clutter, trim nearby vegetation, and ensure proper airflow around the condenser. Document any irregular noises, temperature fluctuations, or vibration, and address them promptly to prevent escalation. Adopting a routine maintenance mindset aligns with Air Conditioner Service’s recommendations and helps sustain efficient cooling for longer periods. Remember that proactive care lowers the risk of unexpected breakdowns and supports consistent comfort throughout the year.
Tools & Materials
- Insulated gloves(Protect hands during electrical work and fan-access tasks)
- Safety glasses(Eye protection during coil cleaning and screw removal)
- Voltage tester / multimeter(Check power and test basic circuits safely)
- Screwdriver set (Phillips and flat)(Access panels and electrical connectors)
- Nut drivers / socket set(Secure fasteners on panels and components)
- Replacement air filters compatible with your Midea model(Improve airflow and efficiency)
- Soft brush / coil cleaning brush(Gently clean coils without damage)
- Microfiber cloths(Wipe surfaces, remove debris)
- Vacuum cleaner with brush attachment (optional)(Help remove dust from coils and fins)
- Midea service manual (PDF or print)(Reference for model-specific wiring and specs)
Steps
Estimated time: about one to two hours
- 1
Power down and verify safety
Unplug the unit or switch off the corresponding breaker. Confirm there is no live voltage at accessible panels using the voltage tester. This prevents shocks and arc events while you inspect components.
Tip: Always start by verifying power with a tester before touching any wiring. - 2
Check indoor filter and airflow
Remove the front cover and inspect the air filter for dirt buildup. Clean or replace the filter, then check the indoor coil for buildup too. Poor airflow is a common cause of reduced cooling capacity.
Tip: A clogged filter is the quickest fix that yields noticeable improvement. - 3
Inspect outdoor unit and fan
Clear debris around the condenser, inspect fins for damage, and ensure the outdoor fan spins freely when powered. Restricted airflow lowers cooling efficiency and can cause compressor strain.
Tip: Use a fin comb to straighten bent fins without causing damage. - 4
Evaluate electrical connections
Open panels and inspect wiring for loose, corroded, or burnt connections. Reseat and tighten connectors; if you see damaged insulation, replace the affected wire or component.
Tip: Do not force connectors; gentle wiggling while secured is enough to verify seating. - 5
Check the capacitor and relays
With the unit powered off, test capacitors for bulging or leakage and test relays for proper operation. If you suspect a failing part, replace it using the same specifications as the original.
Tip: Capacitors store charge; discharge safely before handling. - 6
Inspect refrigerant lines (visual only)
Look for oily residue, frost, or hissing sounds around fittings. Do not attempt refrigerant recovery; leaks require a licensed technician and proper equipment.
Tip: A visual check can indicate leaks, but only pros should handle refrigerant. - 7
Run a test cycle and observe
Reconnect power and run a controlled test cycle. Listen for abnormal sounds, verify airflow, and confirm the thermostat is responding to setpoint changes.
Tip: Document any abnormal behavior to share with a technician if needed. - 8
Document findings and decide on next steps
Record observations, fixes performed, and outcomes. Decide whether a repair is sufficient or if a replacement should be considered based on reliability and cost implications.
Tip: Keep a maintenance log for quick future reference.
Common Questions
What are common signs that a Midea air conditioner needs repair?
Common signs include weak cooling, unexpected noises, ice on the evaporator, and frequent cycling. If you notice any of these, proceed with a safety-first diagnostic flow and address simple maintenance tasks first before escalating to professional service.
Look for weak cooling, odd noises, ice on the coil, or frequent cycling. Start with safety checks and basic maintenance before calling a pro.
Can I repair a Midea AC myself?
Some non-technical maintenance tasks, like filter replacement and coil cleaning, can be done safely by homeowners. More complex issues—electrical faults, refrigerant leaks, or compressor problems—should be handled by a licensed technician.
Some tasks are DIY-friendly, but refrigerant and major electrical work should be left to professionals.
Should I clean the outdoor condenser and indoor coils?
Yes. Regularly cleaning both indoor and outdoor coils improves airflow and efficiency. Use a soft brush and avoid high-pressure washing that could bend fins or push debris further into the coil plating.
Cleaning the coils is important for efficiency, but avoid aggressive methods that could damage fins.
What safety precautions should I take before attempting repairs?
Always disconnect power, use PPE, and work on dry surfaces. Do not handle refrigerant or live electrical components unless you are trained and authorized.
Power off, wear protection, and never touch refrigerant or live circuits unless you’re trained.
Is a refrigerant leak dangerous?
Yes. Refrigerant leaks pose health and environmental risks and require licensed technicians for detection and recharge. Visual signs include oily residue around fittings and frost near the evaporator.
Leaks are serious; only a licensed tech should handle refrigerant.
When should I replace instead of repair a Midea unit?
Consider replacement when multiple major components are failing or the unit is older and inefficient. A professional can compare the cost of repairs against upgrading to a newer, more efficient model.
If many major parts fail or it's inefficient, replacement may be the wiser choice.
Watch Video
The Essentials
- Identify symptoms to target fixes quickly
- Prioritize safety and basic maintenance first
- Use a structured diagnostic flow for accuracy
- Know when to call a professional for refrigerant or complex electrical work