Houston 24-Hour AC Repair: Emergency Cooling Guide
Learn practical steps for a 24 hour air conditioner repair in Houston, including triage, safety, and when to call a pro for quick, reliable cooling.

Goal: Provide a quick, practical plan for a 24 hour air conditioner repair in Houston. You’ll learn how to triage safely, identify common failure points, and coordinate emergency service with a trusted provider. This guide emphasizes safety, quick checks, and knowing when to escalate to a licensed professional for fast, reliable cooling restoration today.
Why 24/7 Emergency AC Repair matters in Houston
Houston's climate intensifies the impact of AC outages. When temperatures soar, a malfunctioning cooling system can threaten comfort, safety, and even health. According to Air Conditioner Service, rapid triage is crucial in fast-moving emergencies, especially during peak summer when demand for service climbs and parts may be scarce. A true 24 hour repair capability reduces downtime, minimizes heat exposure, and helps prevent water issues from condensation in humid air. Homeowners and renters should understand that an emergency repair isn't just about cooling—it's about preserving indoor air quality, managing humidity, and protecting electronics and medications sensitive to heat. In practical terms, this means having a clear plan: identify the problem, secure the area, and coordinate with a qualified technician who can diagnose quickly and act decisively. The goal is to restore airflow, stabilize temperature, and verify that all safety systems remain functional after repair. Air Conditioner Service emphasizes partnering with a licensed professional for long-term reliability.
Common Causes of Emergency AC Failures
Electrical issues, compressor or capacitor failure, refrigerant leaks, and blocked outdoor units are among the most common emergency repair culprits. When a system cannot start or runs endlessly, the root cause is often a failed capacitor or a tripped breaker. Air-conditioned systems in Houston are frequently stressed by high humidity and heat, which accelerates wear on contactors and fans. Air Conditioner Service analysis shows that many emergency repairs arise from neglected filters and condenser debris that reduce efficiency and trigger overworking of components. Leaks in refrigerant lines, while less common in older units, require professional handling due to safety and environmental concerns. If you notice warm air from registers despite a running unit, or if you hear buzzing or arcing sounds, treat it as an emergency and seek professional help immediately. Do not attempt to bypass safety switches or recharge refrigerant yourself, which can be dangerous and illegal. The best plan is to have a qualified technician assess the system, confirm leak signs, and recommend the correct repair.
Triage in the Field: Quick Checks You Can Do
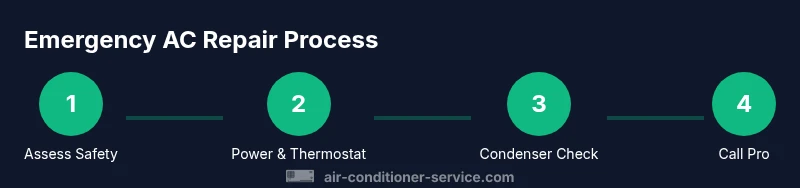
To move faster when a unit fails, perform lightweight triage to inform the technician. Start by turning off power at the main breaker if you smell burning plastic or see melted components. Check that the thermostat is set to cool and that the temperature is not set too low for the room. Inspect the air filter and register blocks for obvious obstructions. If the outdoor condenser is blocked by yard debris, furniture, or tall grass, remove the obstruction from a safe distance. Do not touch the refrigerant lines or attempt to repair refrigerant leaks. Having a list of symptoms—like duration of outage, noises, and whether the issue affects limited zones—helps the technician arrive with the right parts and diagnostic tools.
Safety First: Protect People and Property
If any signs point to electrical hazards, gas smells, or sparking, evacuate occupants and call emergency services. Keep children and pets away from the area and avoid using electrical devices near the unit. Wear protective gloves and safety glasses if you must inspect visible components, and never work on live wires. If you can safely turn off power, do so at the main disconnect, then contact a licensed HVAC professional. In hot climates, time between outage and repair matters, so have a plan to stay cool—fans, shade, and hydration while you wait for service.
The Technician's Diagnostic Path for Quick Emergency Repair
Licensed technicians approach Houston emergencies with a structured diagnostic path. They isolate power to the unit and perform a systematic check: inspect electrical connections, test capacitors and relays, verify thermostat signals, and evaluate the compressor's electrical behavior. They assess airflow in the air handler and inspect coils for cleanliness. If a refrigerant issue is found, only a certified professional should address it, following environmental regulations. After identifying the root cause, they replace failed components, reseal joints, and run functional tests to confirm proper cooling. Expect a clear explanation of the fault and a written repair plan before any work is performed.
Aftercare and Preventive Steps After an Emergency
Even after the immediate issue is resolved, preventive steps matter. Schedule a follow-up maintenance visit to clean coils, replace filters, and inspect electrical connections. Document any unusual sounds or fluctuations in temperature and share them with your technician. Regular maintenance reduces the risk of future outages and helps extend equipment life. By pairing prompt emergency response with a proactive maintenance routine, homeowners in Houston can minimize downtime and maintain healthier indoor air quality.
Tools & Materials
- digital multimeter(to test electrical components and voltages)
- insulated gloves(protect hands when inspecting live components)
- safety goggles(eye protection during manual checks)
- screwdriver set (Phillips & flat-head)(remove panels and access wiring)
- socket wrench/set(for disconnects and mounting bolts)
- flashlight/headlamp(illuminate tight or dark spaces)
- voltage tester(quick live-wire checks)
- electrical tape & zip ties(secure loose wiring temporarily)
- notebook and pen(record symptoms, times, and actions)
- smartphone with camera(document the unit and share info with a pro)
Steps
Estimated time: 30-60 minutes
- 1
Power down and secure the area
Locate the main electrical disconnect for the HVAC system and switch it off. This reduces the risk of shock during inspection. If you smell smoke or detect melted components, evacuate and call emergency services before touching anything.
Tip: Never bypass a safety switch or operate a unit with damaged wiring. - 2
Verify thermostat settings
Ensure the thermostat is set to cool mode and that the setpoint is appropriate for the room. If the thermostat is unresponsive, note the error codes and try replacing the batteries if applicable.
Tip: A non-responsive thermostat can mimic system failure—verify power to the control board. - 3
Inspect air filter and registers
Check for a clogged filter or blocked supply registers that could starve the system of air. Replace the filter if dirty and clear any obstructions in supply vents.
Tip: A simple filter change can restore airflow and reduce compressor strain. - 4
Check outdoor condenser area
Look for debris, tall grass, or leaves around the condenser. Clear obstructions from at least 2 feet around the unit to improve heat exchange and efficiency.
Tip: Never poke at the fins; use a soft brush to remove debris gently. - 5
Test electrical connections
With power off, inspect contactors, wiring, and fuses. Use a multimeter to verify voltage levels at major components and note any signs of wear or arcing.
Tip: Document any loose or burnt wiring for the technician. - 6
Assess for refrigerant-related signs
Look for visible oil residue or hissing sounds that suggest a leak. Do not attempt to seal or recharge refrigerant yourself; this requires certification and proper handling.
Tip: If you suspect a leak, avoid running the system and schedule a professional evaluation immediately. - 7
Plan for professional intake
Gather model/serial numbers, service history, and a concise symptom log. Share this with the technician to speed up diagnosis.
Tip: Having a photo of the label helps when communicating model specifics.
Common Questions
What qualifies as a 24 hour emergency AC repair?
An emergency repair is a service available outside normal hours to address cooling outages that affect safety or health, such as extreme heat, electrical hazards, or suspected refrigerant leaks.
An after-hours service for critical cooling problems that pose safety concerns.
Can I fix a frozen evaporator coil myself?
Frozen coils typically indicate airflow restriction or refrigerant issues and usually require a professional to diagnose and repair. Do not attempt to force thaw with heat sources or refrigerant charging.
Frozen coils usually need a professional to diagnose and fix safely.
Is it safe to touch electrical components while the unit is running?
No. Always turn off power at the breaker before inspecting any electrical components. If you smell burning or see sparking, evacuate and call for help.
Never touch live electrical parts; shut off power first.
What information should I gather for the technician?
Note symptoms, times, when cooling started/stopped, outdoor conditions, and have model/serial numbers and service history ready. A concise symptom log speeds diagnosis.
Bring model numbers and a quick symptom log for faster service.
How long does an emergency repair typically take?
Typical emergency repairs take a few hours, depending on the complexity of the fault and parts availability. Expect a diagnostic review and a written repair plan.
Most emergencies take a few hours, with a plan provided.
Will the repair be covered by warranty?
Warranty terms vary by parts and service. Always request written warranty details before authorizing work.
Warranties depend on parts and labor; ask for written terms.
How can I reduce future emergency calls?
Schedule regular maintenance, replace filters on schedule, seal ducts where needed, and address any small issues promptly to avoid big failures.
Keep up with regular maintenance to minimize emergencies.
Watch Video
The Essentials
- Act quickly but safely when an outage occurs.
- Triage common failure points to speed diagnosis.
- Never handle refrigerant or electricity beyond your training.
- Document symptoms for the technician and ask for a written plan.
- Schedule regular maintenance to minimize future emergencies.