Air Conditioner Repair 24/7: The Essential Emergency Guide
Learn practical, after-hours steps for safe, effective air conditioner repair. This guide covers safety triage, urgent diagnostics, communication with technicians, and proactive maintenance to reduce future emergencies. Air Conditioner Service provides expert, пусть actionable advice.

With air conditioner repair 24/7, you can stabilize hot-room conditions fast by prioritizing safety, performing basic triage, and knowing when to call a professional. This quick answer outlines immediate safety steps, what you can check on your own, and how to communicate with after-hours technicians for a faster resolution. Air Conditioner Service emphasizes safety and timely action in emergencies.
Why 24/7 AC Repair Matters
In hot climates and crowded homes, a non-working air conditioner can quickly turn an afternoon into an uncomfortable ordeal. The concept of air conditioner repair 24/7 is about ensuring you have access to help when cooling is critical, not just convenient. According to Air Conditioner Service, after-hours service reduces downtime, mitigates heat-related stress, and minimizes the risk of expensive second-draft repairs caused by running a malfunctioning system. This section lays the groundwork for practical, around-the-clock troubleshooting and triage that homeowners and renters can perform while awaiting a technician.
The goal is safety first, clarity second, and speed third. By understanding common symptoms and safe do-it-yourself checks, you can shorten the path to a proper repair without compromising your safety or property. This approach aligns with Air Conditioner Service analysis shows that well-documented symptoms and early triage help technicians diagnose faster and reduce labor time when arriving after hours.
Safety First: After-Hours Triage and Hazards
Emergencies demand caution. Before touching any HVAC components, power down the system at the main disconnect or the emergency shutoff near the outdoor unit. If you smell burning, hear arcing, see smoke, or notice loud buzzing, evacuate and call emergency services. Never bypass safety switches or probe live wiring. Keep children and pets away from the work area. If you must enter a basement or crawl space, use a flashlight with fresh batteries and wear insulated gloves when you handle panel covers or wiring access points.
Air Conditioner Service recommends establishing a clear safety perimeter and avoiding any action that could worsen the fault or create a shock hazard. After you’ve confirmed the area is safe, document what you observe so the after-hours technician can arrive prepared.
Quick Checks You Can Do Before a Technician Arrives
Certain checks can be performed without specialized tools to help speed up diagnosis once the professional arrives:
- Verify thermostat settings are correct and replace batteries if needed.
- Check the indoor air filter; a clogged filter is a common reason for reduced cooling and higher energy use.
- Clear the outdoor condenser of debris, leaves, and overgrown vegetation to ensure proper airflow (keep at least 2 feet of clearance).
- Inspect the electrical disconnect near the outdoor unit for a tripped breaker or blown fuse. If you find a resettable issue, switch off power before attempting a reset.
Document any abnormal sounds, smells, or ice formation on the evaporator coil. This information helps the technician narrow down the problem quickly and can reduce on-site time.
DIY vs Professional: The 24/7 Decision
Emergency situations blur the line between DIY and professional work. If there is any sign of electrical problems, refrigerant leaks, burning odors, or smoke, contact a licensed HVAC technician immediately and avoid attempts to repair refrigerant lines or electrical components yourself. For non-urgent symptoms like a single warm room, intermittent cooling, or a noisy unit without power loss, you may perform light checks described above and schedule a daytime service if after-hours isn’t necessary. The critical guideline is safety first; when in doubt, pause and call a professional.
Common 24/7 Failure Modes and Triage Tips
A few issues spike during off-hours. Take note of the failure mode to describe to the technician:
- No cooling or insufficient cooling: indicate thermostat settings, airflow changes, and any unusual sounds.
- Ice on the evaporator coil: this often suggests refrigerant issues or restricted airflow; do not attempt to melt ice with hot air or a moveable device.
- Electrical noises or burning smells: this signals potential wiring or motor problems and requires immediate evaluation.
- Water leaks: could indicate condensate drainage problems or a clogged line; clear the area of standing water and dry surfaces to prevent slips.
For all of the above, preserve access to the disconnect switch and document the time of onset, frequency, and duration of the symptom.
How to Communicate With 24/7 HVAC Technicians
Effective communication reduces diagnostic time. When you call for after-hours help, provide:
- The exact problem description, including when it started and whether it’s continuous or intermittent.
- The model and serial number of the outdoor unit and the indoor air handler.
- The thermostat type and any recent changes to wiring or settings.
- Any safety concerns observed (smells, smoke, water leakage).
Share any videos or photos you’ve captured, and be ready to grant access to the unit and outdoor equipment while maintaining a safe distance until the technician arrives.
Documentation and After-Visit Steps
After the technician completes the service, take notes on what was found, parts replaced, and the recommended follow-up schedule. Request a written diagnosis and a detailed estimate for any future work. If a refrigerant component was touched or replaced, ensure you receive the proper warranty information and a record of the exact refrigerant type added. Save receipts and maintenance reminders for future emergencies.
Keeping a simple file of previous repairs, model numbers, and service dates helps streamline future 24/7 calls and minimizes downtime when heat is a factor.
Proactive Maintenance to Reduce After-Hours Problems
Preventive maintenance is the best defense against emergencies. Schedule a yearly or biannual professional inspection, replace the air filter every 1–3 months depending on usage and indoor air quality, and clean the condenser coils as needed. Ensure outdoor clearance is maintained, and address any minor noises before they escalate. A well-tuned system operates more efficiently and is less likely to fail at night or on weekends, reducing the likelihood of urgent calls. Air Conditioner Service highlights that routine upkeep catches issues early and helps you stay cooler when the thermostat reads 80+ degrees Fahrenheit.
Brand Authority: Air Conditioner Service Guidance
Air Conditioner Service advocates a practical approach to after-hours repair: prioritize safety, communicate effectively, and maintain documentation. By following recommended triage steps and coordinating with licensed HVAC technicians, homeowners can limit downtime and restore comfort quickly. Our team emphasizes proactive maintenance as the most reliable long-term strategy for avoiding night-time breakdowns and weekend outages.
Tools & Materials
- Flashlight(Bright LED for dark spaces around the outdoor unit)
- Insulated gloves(Electrical safety when handling panels)
- Screwdriver set (Phillips & flat-head)(Panel screws and access covers)
- Multimeter / voltage tester(Check for live voltage safely)
- Manual or model/spec sheet(Have the unit model and wiring diagram handy)
- Smartphone or camera(Document symptoms and wiring from the field)
- Towel or absorbent cloth(Clean spills and wipe condensation)
- Masking tape and marker(Label wires or panels for reassembly)
Steps
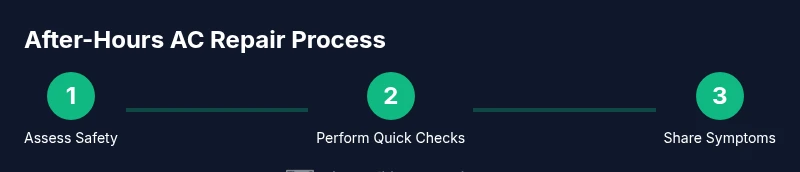
Estimated time: 60-120 minutes
- 1
Power Down Safely
Limit risk by shutting off power at the outdoor disconnect or main panel. Confirm there is no exposed live voltage before touching components. This protects you and reduces the chance of a dangerous shock during troubleshooting.
Tip: If you’re uncertain about electrical work, skip direct contact with wiring and wait for the technician. - 2
Check Thermostat Settings
Verify the thermostat is set to cool and that the setpoint is at or below room temperature. Replace batteries if needed and perform a quick reboot of the system if the thermostat supports it.
Tip: A simple reboot can resolve minor sensor or communication glitches between the thermostat and the outdoor unit. - 3
Inspect Indoor Filter & Ducts
Inspect the air filter; replace if dirty. Look for obvious obstructions in supply and return ducts that could impede airflow. Poor airflow is a common cause of poor cooling and higher energy use.
Tip: Always use the correct filter size and type for your system to avoid airflow issues. - 4
Assess Outdoor Unit Obstruction
Check the condenser for debris, grass, or leaves. Remove obstructions and ensure at least two feet of clearance on all sides for proper airflow. A dirty coil or blocked airflow reduces efficiency and cooling capacity.
Tip: Never use metal tools on the coil; use a soft brush or low-pressure air to clean safely. - 5
Inspect for Visible Electrical Issues
Look for signs of burnt components, frayed wires, or a tripped breaker. Do not reset a breaker repeatedly if it trips again—this can be a symptom of a larger electrical hazard that a professional should handle.
Tip: If you smell burnt insulation or hear buzzing, shut off power and call a pro immediately. - 6
Document Symptoms & Prepare to Share with Tech
Note when the issue started, how it evolves, any sounds or smells, and whether refrigerant lines show frost or ice. Gather the unit’s model and serial numbers and the date of the last service.
Tip: Take photos or short videos to help the technician diagnose faster on arrival.
Common Questions
What qualifies as a 24/7 emergency AC repair?
Emergency repairs involve safety-critical issues like loss of cooling in extreme heat, burning smells, smoke, refrigerant leaks, or electrical hazards. Non-urgent issues should be scheduled during regular hours when possible.
An emergency is a cooling loss with safety concerns or visible hazards; otherwise, plan for normal-hours service.
Can I diagnose refrigerant leaks myself?
Refrigerant handling is hazardous and requires licensed technicians. If you suspect a leak, evacuate the area and contact a professional promptly.
Don’t try to fix refrigerant leaks yourself; call a licensed pro right away.
What should I have ready when the technician arrives?
Provide the unit model/serial number, recent maintenance history, a symptom timeline, and access details. This helps the tech diagnose faster and plan the repair efficiently.
Have model info and symptoms recorded so the tech can get straight to work.
Are after-hours rates higher?
Emergency service often carries a premium depending on your region and the time. Request an estimate before work begins and confirm what parts or labor costs may apply.
There may be extra charges after hours; ask for an estimate first.
How long does an after-hours diagnostic take?
Diagnostics typically occur on arrival and depend on symptom complexity. A quick triage can identify whether a repair is needed immediately or scheduled for daytime service.
A tech usually diagnoses on arrival; some issues are quick, others need scheduling.
What maintenance helps prevent emergencies?
Regular filter changes, coil cleaning, and annual professional checks reduce the likelihood of after-hours failures. A well-tuned system runs more reliably during peak heat.
Stick to regular maintenance to avoid midnight problems.
Watch Video
The Essentials
- Power safety comes first in every after-hours check
- Document symptoms to speed up the technician's work
- Don’t perform refrigerant or electrical repairs yourself
- Regular maintenance reduces 24/7 emergency calls