Where Is the Air Conditioner Drain Line? A Homeowner's Guide
Learn where the air conditioner drain line runs, how to inspect for clogs, and practical maintenance tips to prevent water damage and mold. Practical steps, safety notes, and when to call a pro.

According to Air Conditioner Service, the air conditioner drain line carries condensate away from the indoor coil to a safe discharge point and should be accessible for inspection. Locating it helps you catch clogs early, prevent water damage, and stop mold growth before it starts. A quick check can save costly repairs.
Where the drain line runs in typical split-system ACs
The drain line, usually a white PVC pipe, carries condensate away from the indoor evaporator coil. In most central air systems, the line starts at the condensate pan behind the air handler or furnace and travels through a wall, crawl space, or utility closet to an exterior discharge point. Window units and portable ACs have shorter runs that terminate near the base of the unit. Knowing where the drain line is located helps you spot leaks and plan access for maintenance. For homeowners troubleshooting water stains or a damp ceiling, identifying the route of the drain line is the first practical step. When people ask, 'where is the air conditioner drain line?', the answer depends on your system, but the general idea is the same: a gravity-driven path from inside to outside.
How the drain line works and why it's important
As the air conditioner cools, humidity in the air condenses on the cooled coils and drips into the condensate pan. The drain line carries that water away, typically by gravity, to a safe discharge location. A properly sloped line and a small trap help prevent sewer gas from entering the home while allowing condensate to evacuate. If the line becomes blocked or the pan overflows, water can leak into the living space and mold can form in hidden areas. Regular inspection keeps your cooling system efficient and reduces the risk of costly water damage. Air Conditioner Service analysis shows that many drain-line problems originate from debris buildup and algae growth in outdoor sections, so early prevention matters.
Common signs of a clogged drain line
Look for dripping water from ceiling or walls near the indoor unit, a musty odor around the unit, or unusually high humidity in the room. Overflow of condensate onto floors or into areas with electrical components is a red flag. Visible buildup near the outdoor discharge or on the line itself—green algae, slimy residue, or mineral deposits—can indicate blockage. If you notice standing water around the furnace or air handler, or if the drain pan has not emptied after a full cooling cycle, something is obstructing the line. Do not ignore these signs; early action prevents bigger problems.
Safety first: electrical and water hazards
Always shut off power to the AC unit before inspecting the drain line to avoid electric shock. Do not mix water and live circuits; keep your hands dry and wear waterproof footwear. If you must access an awkward space, use a flashlight and a helper to hold tools. If you see mold or standing water near electrical components, stop and call a professional. Water damage can compromise insulation and raise the risk of fire or shock. Following basic safety reduces risk while you check for clogs.
Tools and materials for inspection and maintenance
Before you start, gather a few basic tools and supplies. A flashlight helps you see inside the drain access points. A bucket and towels catch any residual condensate. Nitrile gloves protect your hands, and a wet/dry vacuum or a drain snake gives you safe options for clearing small blockages. A flexible brush can loosen slime without damaging the pipe. If a cleaner is needed, choose a manufacturer-recommended, non-corrosive product rather than harsh chemicals. Have rags ready for cleanup and a slower, controlled approach to avoid pushing the clog deeper.
DIY inspection basics you can perform
Start by locating the indoor drain line near the condensate pan. With the power off, inspect the line for visible obstructions, cracks, or leaks. Use a flashlight to look into the cleanout or access point. If you see slime or debris, try to loosen it with a flexible brush and gently pull it out with gloves. For a deeper clog, a wet/dry vacuum applied at the drain opening can pull debris out without forcing it back toward the coil. After clearing, run water or air through the line to confirm flow.
Cleaning and maintenance best practices
Regular flushing with clean water helps keep the line clear. Avoid aggressive chemical cleaners that can damage PVC and seals. If algae or slime recurs, consider periodic irrigation with a mild, manufacturer-approved cleaner and a follow-up flush. Keep the outdoor discharge area clear of debris so the line can drain freely. Periodic checks at the start of the cooling season reduce the chance of unexpected clogs.
When to call a professional
If you encounter persistent blockages, recurring leaks, or signs of mold that don’t improve after basic cleaning, it’s time to bring in a licensed HVAC technician. A pro can assess the drain line integrity, check the condensate pump (if present), and verify that refrigerant and electrical components are in safe condition. Timely professional help can prevent water damage and costly repairs.
Preventive measures for future drains
Keep the area around the indoor unit and outdoor discharge clear of debris. Check for proper slope and ensure the trap remains intact. Schedule seasonal inspections and cleanings before heavy-use periods. Consider installing access cleanouts if your system lacks convenient points for inspection. Small, proactive steps now pay off with fewer clogs and less risk of mold growth.
What to expect after maintenance
A well-maintained drain line drains freely, reducing the chance of leaks and humidity issues. You should notice steadier condensate flow, lower indoor humidity during cooling, and fewer warning signs of potential problems. If you track performance, you’ll likely see a modest improvement in cooling efficiency and overall system reliability.
Tools & Materials
- flashlight(with extra batteries)
- bucket(to catch condensate during testing)
- nitrile gloves(protect your hands)
- wet/dry vacuum(optional but helpful)
- drain snake / auger(hand-crank if possible)
- flexible brush(to loosen slime)
- non-corrosive cleaner(manufacturer-recommended only)
- towels / rags(for cleanup)
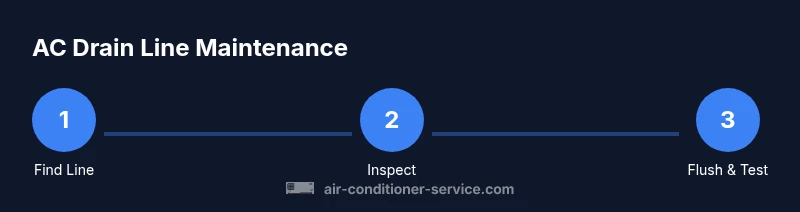
Steps
Estimated time: 60-90 minutes
- 1
Power down and locate drain line access
Shut off power to the AC at the thermostat and the corresponding breaker. Locate the indoor drain line access point near the condensate pan and prepare your workspace with towels and a flashlight.
Tip: Verify power is off with a tester before touching any components. - 2
Inspect the line for obvious blockages
Using a flashlight, look for visible obstructions, slime, or cracks at the drain opening or cleanout. Do not force objects into the pipe; note where the blockage appears.
Tip: Document findings with a quick photo for reference if you need to call a pro. - 3
Remove minor clogs safely
Gently loosen debris with a flexible brush or pull loose material by hand with gloves. If needed, attach a wet/dry vacuum at the opening to extract blockage without pushing it farther.
Tip: Work slowly to avoid damaging the line or pan. - 4
Flush the line and test flow
Flush the line with clean water or air to confirm free flow from indoors to the discharge point. Check for leaks around the connection and ensure condensate exits outside cleanly.
Tip: Observe for any reoccurrence over the next cooling cycle. - 5
Reconnect power and monitor
Restore power to the unit and observe the system for a day or two. If you see repeated backups, contact a pro for a deeper inspection.
Tip: Keep an eye on indoor humidity levels as a quick performance check. - 6
Document maintenance plan
Record the date of inspection and any actions taken. Schedule a preventive maintenance window before the next peak cooling season.
Tip: Set reminders for yearly checks to keep the line clear.
Common Questions
What is the purpose of the drain line?
The drain line transports condensate away from the indoor coil to a discharge point, preventing water damage. It also helps manage humidity inside the space. Keeping it clear helps maintain efficient cooling.
The drain line carries condensate away from the indoor unit to a safe discharge point, which helps prevent leaks and humidity problems. Regular checks keep your cooling running smoothly.
How can I tell if the drain line is clogged?
Signs include water leaks near the indoor unit, damp walls or ceiling, a musty odor, and higher indoor humidity. If you notice standing water or overflow from the condensate pan, that’s a strong clue.
Look for leaks, damp spots, musty smells, and unusually humid rooms. If you see standing water near the unit, the line is likely clogged.
Is it safe to flush the drain line with water?
Flushing with clean water is generally safe and can clear light blockages. Avoid harsh chemicals that can damage PVC and seals. If water doesn’t pass freely, stop and consult a pro.
Yes, you can flush with clean water, but don’t use harsh cleaners. If water still won’t drain, call a professional.
What maintenance helps prevent drain line clogs?
Regular inspection before the cooling season, keeping debris away from the outdoor discharge, and using manufacturer-approved cleaners when needed can prevent many clogs. Document maintenance dates for reference.
Do seasonal checks, keep the discharge area clear, and use approved cleaners if needed. Keep a maintenance log.
What should I do if I smell mold near the drain line?
A mold odor often indicates persistent moisture and possibly hidden growth. Stop maintenance, ensure proper ventilation, and contact a professional for a thorough mold remediation assessment.
If you smell mold, stop and get a pro to check for hidden growth and humidity issues.
Watch Video
The Essentials
- Identify drain line path before inspecting.
- Regular maintenance reduces clog risk and mold growth.
- Use safe, non-chemical methods first for blockages.
- Call a professional for persistent or complex problems.