When the Air Conditioner Is Not Cooling: Urgent Troubleshooting Guide
A practical, urgent troubleshooting guide to diagnose and fix not cooling AC units, from simple filter changes to professional refrigerant repairs.

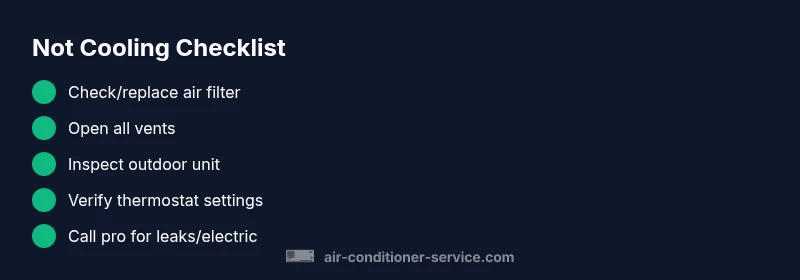
Most often, a non-cooling condition is caused by restricted airflow or a dirty filter. Start with the simplest fix: turn off the unit, replace or clean the filter, clear blocked vents, and ensure the outdoor condenser is free of debris. If airflow improves after cleaning, monitor performance; if not, proceed through the diagnostic flow for deeper checks.
Common Causes of Not Cooling
When the air conditioner is not cooling, homeowners often notice warm air coming from vents while the unit runs. According to Air Conditioner Service, the most frequent culprit is restricted airflow caused by a dirty or blocked filter. A simple filter change often restores cooling quickly. Other common causes include an off thermostat, closed or blocked supply vents, or a blocked outdoor condenser from leaves or debris. In some cases, the evaporator coil can freeze, reducing heat exchange, or the refrigerant charge can be low due to a slow leak. Identifying the precise reason requires a quick check of each subsystem: air intake, thermostat, airflow path, and outdoor unit. While some fixes are straightforward, others require professional attention to prevent damage or safety hazards. If you are uncomfortable working around electrical components or refrigerant systems, skip ahead to the professional section. This guide focuses on practical, safe steps you can take now to regain comfort and prevent further frustration.
Start with the Simplest Fixes
Often, the fastest route back to cooling is the easiest fix. Air Conditioner Service analysis shows that the majority of not cooling issues begin with a clogged or dirty filter and simple airflow restrictions. Begin by turning off the unit and replacing or cleaning the filter. Check the return vents and supply ducts for obstructions and ensure furniture or drapes aren’t blocking airflow. Next, verify the thermostat is set to Cool and the temperature is lower than the room temperature; if you have a programmable thermostat, ensure it isn’t in an energy-saving mode that limits cooling. Confirm the outdoor unit is free of leaves, grass, or debris and that the fan can spin freely. After these steps, turn the system back on and observe whether cooling improves. If not, proceed through the diagnostic flow for deeper checks and avoid running the unit if you hear unusual noises or smell burning.
Thermostat and Controls: Are You Cool?
Many not-cooling situations are tied to thermostat misconfigurations. Make sure the thermostat is on Cool, set to an appropriate temperature, and that the fan is set to Auto rather than On. If the thermostat is old or unresponsive, consider replacing it with a modern programmable model. For homes with multiple zones, check that the zone dampers are open and that the thermostat sensors aren’t shaded by direct sunlight or appliances.
Airflow, Filters, and Ducts
Restricted airflow is a leading cause of poor cooling. Replace disposable filters every 1-3 months depending on use and filter type. If the filter looks clean but airflow remains weak, inspect the return air grille and supply vents for blockages. Clean dust from registers and vacuum the duct openings if accessible. A dirty evaporator coil inside the air handler can also reduce cooling; if you see frost buildup on the coil or notice ice on the refrigerant lines, stop the unit and seek professional help. Clean air improves efficiency and reduces strain on the compressor.
Indoor Coil and Refrigerant Considerations
Low refrigerant or a frozen evaporator coil can cause warm air despite the compressor running. Signs of low refrigerant include hissing sounds, oily residue near copper lines, or ice formation on the outdoor lines. Do not attempt to recharge refrigerant yourself; only a licensed technician should handle refrigerant. If you suspect a leak, turn off the system and call a pro immediately. Regular maintenance helps prevent leaks and keeps coils clean.
Outdoor Unit, Wiring, and Electrical Safety
Inspect the outdoor condenser for debris buildup, overgrown vegetation, and a clear 2-3 foot radius around the unit. A dirty condenser coil reduces heat transfer and can cause the system to shut down early. Listen for excessive fan noise or vibration, which can indicate a faulty fan motor. Check the power supply at the disconnect switch and at the main panel; a tripped breaker will prevent cooling. If you notice buzzing, burning smells, or a breaker that trips repeatedly, stop using the unit and call a professional.
Diagnostic Path: Symptom-to-Diagnosis-to-Solution
Use this flow to determine the likely cause and fix. Start with the most common and easiest checks: is power present and the filter clean? If yes, move to thermostat and airflow checks. If airflow improves after these steps, continue monitoring; if not, examine the outdoor unit and refrigerant status. This path helps you decide whether you can safely fix a problem or if professional service is required to avoid costly damage.
When to Call a Professional and Prevent Future Issues
Some problems require licensed technicians, especially refrigerant-related leaks or electrical faults. The Air Conditioner Service team recommends scheduling a professional if not cooling persists after basic fixes. To prevent future breakdowns, implement a regular maintenance schedule: replace filters on time, clean the outdoor unit seasonally, and have a pro inspect refrigerant lines every year. Keeping a written maintenance log helps catch issues early and maintains efficiency.
Steps
Estimated time: 60-90 minutes
- 1
Power safety check
Turn off at the breaker and unplug the unit if accessible. Inspect the disconnect and main power; look for obvious signs of damage. Do not continue if you smell burning or see melted wires.
Tip: Always cut power at the source before touching electrical components. - 2
Inspect or replace the air filter
Open the return air panel and remove the filter. If it’s visibly dirty or discolored, replace it with a filter of the same size and efficiency. If you have a reusable filter, wash it thoroughly and let it dry before reinstalling.
Tip: A higher-efficiency filter can improve air quality but may restrict airflow if your system isn’t sized for it. - 3
Check thermostat settings
Confirm the thermostat is set to Cool and the temperature is sufficiently lower than room temperature. If it’s a programmable unit, ensure it isn’t in an energy-saving or call-for-heat mode.
Tip: If you have a smart thermostat, try toggling it off and back on or forcing a manual cooling cycle. - 4
Assess airflow paths
Ensure all vents are open and unblocked. Check for furniture or drapery obstructing returns or supply grills. Vacuum dust from registers and inspect duct openings if accessible.
Tip: Even small blockages can dramatically reduce effective cooling. - 5
Inspect the outdoor unit
Clear leaves, grass, and debris from around the condenser. Ensure the fan spins freely when power is on and listen for unusual noises.
Tip: Provide at least 2-3 feet of clearance around the unit for proper airflow. - 6
Check for ice or frost
Inspect the evaporator coil for ice buildup. If you see frost, turn the system off and wait for it to melt before running again; a frozen coil requires professional diagnosis.
Tip: Low refrigerant or airflow problems commonly trigger coil freezing. - 7
Test cooling after fixes
Turn the system back on and observe for improved cooling and airflow. If performance remains weak, proceed to more advanced checks or call a professional.
Tip: Document symptoms and fixes to share with a technician. - 8
Know when to escalate
If you notice refrigerant smells, hissing sounds, or hot air persists after basic fixes, discontinue DIY attempts and contact a licensed technician immediately.
Tip: Electrical or refrigerant issues can be dangerous; safety first.
Diagnosis: Not cooling when thermostat set to cool
Possible Causes
- highPower issue (tripped breaker or unplugged)
- highAirflow restriction (dirty filter, blocked returns, closed vents)
- mediumThermostat/control fault or incorrect setting
- lowOutdoor unit blocked or condenser fan malfunction
- lowRefrigerant leak or low charge
Fixes
- easyCheck and reset the circuit breaker; ensure the unit is plugged in
- easyReplace or clean the air filter; clear blocked vents and reopen dampers
- easyTest thermostat settings or replace when unresponsive; recalibrate sensors
- easyInspect outdoor condenser for debris and verify fan operation; remove obstructions
- hardIf refrigerant leak is suspected, contact a licensed technician for leak repair and recharge
Common Questions
Why is my air conditioner not cooling even though the fan is running?
Common causes include a dirty filter, thermostat mis-set, and refrigerant issues. Start by replacing the filter and checking the thermostat settings, then inspect airflow and outdoor unit. If cooling still fails, a professional diagnosis may be needed.
Common causes are a dirty filter, thermostat settings, or refrigerant issues. Start with the filter and thermostat, then check airflow; if still not cooling, call a pro.
How often should I replace my AC filter?
Most homes benefit from changing filters every 1-3 months, depending on usage, filter type, and whether you have pets. A clogged filter reduces airflow and cooling efficiency.
Most people replace filters every 1-3 months depending on usage and filter type. A clogged filter hurts cooling.
Can a dirty evaporator coil cause not cooling?
Yes. A dirty or frozen evaporator coil reduces heat exchange and cooling. Cleaning the coil requires professional service if you’re unsure how to access it safely.
Yes, a dirty coil can cause poor cooling; cleaning may require a professional.
Is a refrigerant leak dangerous?
Yes. Refrigerant leaks can be hazardous to health and can damage the system. Do not attempt to recharge; contact a licensed technician promptly.
Yes, leaks are dangerous. Don’t recharge yourself—call a licensed technician.
When should I call a professional for not cooling?
If basic fixes don’t restore cooling or you suspect refrigerant or electrical problems, it’s time to call a licensed HVAC technician. Early professional evaluation can prevent further damage.
Call a professional if basic fixes don’t help or you suspect refrigerant or electrical problems.
Watch Video
The Essentials
- Start with simple fixes before diagnosing deeper issues
- Verify power, thermostat, and airflow first
- Don’t ignore ice, leaks, or burning smells
- If not cooling persists, schedule professional help