Replace Capacitor in Air Conditioner: A Practical DIY Guide
Learn how to safely replace a capacitor in an air conditioner with step-by-step guidance. This practical guide covers safety, matching ratings, removal, installation, testing, and maintenance for homeowners and renters.

Power off the AC at the breaker and discharge the capacitor before handling. Locate the unit’s capacitor (run or start), check the label for voltage and microfarad rating, and replace it with a matching part. Reconnect wires to the same terminals, secure the capacitor, restore power, and test the AC for proper operation. If the unit still won’t run after testing, seek professional help.
What a capacitor does in an air conditioner
A capacitor in an air conditioner stores electrical energy and helps start and run the motor. In most residential units you’ll find a run capacitor that stays connected to the compressor and fan to smooth voltage and provide a burst of energy when starting. A start capacitor is less common in modern units but serves a similar purpose during startup. When a capacitor fails, symptoms include slow or reluctant starting, a buzzing sound from the outdoor unit, or no cooling at all. Replacing the capacitor in air conditioner is a straightforward repair when you verify the part’s rating and observe proper safety steps. If you are preparing to replace capacitor in air conditioner, proceed with caution. According to Air Conditioner Service, a correctly rated capacitor is essential for safe and reliable operation. With the right part and careful handling, you can restore reliable cooling and avoid more costly failures.
Signs of a failing capacitor
A failing capacitor often reveals itself through several telltale signs. If the outdoor fan struggles to start or runs intermittently, the unit may cool less efficiently or stall altogether. Bulging, swelling, or leakage on the capacitor body is a clear physical indicator that replacement is needed. You might also hear a buzzing or hum from the outdoor unit when power is applied, or you may notice the compressor does not engage. In some cases the thermostat will show cooling, but the compressor will not start. If you observe these indicators, it is time to inspect the capacitor and consider replacement. Remember, a correct replacement requires matching voltage and microfarad rating to the original part and the unit’s specifications. This is a common AC troubleshooting task that, when done properly, can resolve not-cooling symptoms and extend the life of the system.
Safety first: power off, PPE, and hazards
Safety is non-negotiable when dealing with electrical components inside an air conditioner. Before touching any wires, cut power at the main breaker and, if accessible, lock out the switch to prevent accidental re-energization. Wear insulated gloves and safety glasses, and keep a dry work area. Never approach a capacitor with wet hands or metal tools that could bridge contacts while the system is powered. Capacitors can retain dangerous charges even after power is removed, so confirm complete de-energization before handling. If you’re unsure about the steps, consult a qualified technician. Air Conditioner Service emphasizes following proper shutdown procedures and using the right PPE to minimize shock risks and arc flash hazards.
Reading the capacitor label and selecting a replacement
Capacitors are labeled with three key pieces of information: the microfarad rating (µF), the voltage rating (V), and the tolerance. The exact rating must match the original part to ensure proper starting torque and motor operation. If the label reads something like 40 µF 440V, you should replace with a capacitor of the same µF and voltage, ideally with the same tolerance. Some units use dual run capacitors with three terminals labeled C (common), FAN, and HERM (compressor). Make sure the replacement has compatible terminals and a secure mounting footprint. If you’re unsure about the rating or type (run vs. start), refer to the unit’s nameplate or the existing capacitor. Remember: substituting an incorrect rating can cause overheating, reduced efficiency, or damage to the compressor.
Tools, workspace, and prep
Before you start, prepare a clean, dry workspace with good lighting. Gather your tools and a replacement capacitor that matches the existing unit’s rating, plus labels or tape to mark wires. A non-conductive tool for loosening terminals and a multimeter or capacitor tester are useful for verification. Clear the area around the outdoor unit and keep pets away. Disconnect any power to the indoor unit if accessible, and avoid working with the unit during extreme heat. Proper planning reduces mistakes and speeds up the replacement process, making the job safer and more efficient.
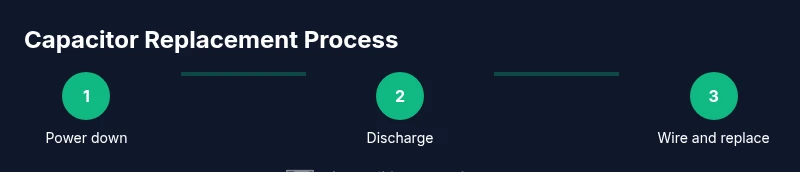
Step-by-step overview: what you’ll do (high-level)
Here is the logical sequence you’ll follow during the replacement. First, you will verify power is off and identify the capacitor you’ll replace. Next, you’ll discharge the capacitor safely and remove its wiring from the terminals. Then you’ll install the new capacitor in the same orientation and reconnect the wires to the matching terminals. Finally, you’ll seal the housing, restore power, and run a short test cycle to confirm proper operation. This overview aligns with the detailed steps that follow and ensures you understand why each action is necessary.
Discharging and removing the old capacitor safely
Discharge the capacitor before handling by briefly bridging the terminals with an insulated tool or resistor designed for this purpose. Do not touch both terminals at once with bare hands. Once discharged, label each wire so you can reconnect them to the same terminals on the new capacitor. Remove the clamps or mounting screws and gently lift the old capacitor out of its housing. Inspect the capacitor for bulging or leaks as physical signs of failure, which corroborate the need for replacement. If the unit is old or shows other electrical signs of wear, consider replacing related components as a precaution.
Installing the new capacitor and wiring correctly
Install the new capacitor in the housing, ensuring it sits securely and aligns with its mounting points. Reconnect each wire to its corresponding terminal (C, FAN, HERM) exactly as it was on the old unit. Tighten connections firmly but avoid overtightening that could strip terminals. After wiring, reattach the capacitor to its mount and reassemble any panels. Work carefully to avoid pinching wires or creating loose connections that could cause arcing or premature failure.
Restore power and perform a test run
With the housing secured, restore power at the breaker and switch on the unit. Listen for the fan and compressor as they engage; a normal start typically produces a brief hum followed by steady operation. Observe the air flow and cooling performance for several minutes. If the unit cycles normally and maintains temperature, the replacement is successful. If you notice continued starting difficulty, unusual noises, or tripping breakers, power off immediately and reassess or call a professional.
Post-replacement checks and maintenance tips
After a successful replacement, check for warm or smoky smells, which would indicate electrical issues. Keep the area clean and free of moisture to extend capacitor life and prevent corrosion on terminals. Regularly inspect the capacitor for signs of swelling or leakage, especially after hot or humid weather. Schedule periodic maintenance to catch capacitor wear early and prevent unexpected outages. Small checks now can prevent bigger failures later and help maintain HVAC efficiency.
Disposal and environmental considerations
Dispose of old capacitors responsibly. Many electrical components contain materials that should not be thrown into regular trash. Take the old capacitor to an electronics recycling center or a local hazardous waste facility. If you’re replacing multiple components, consider coordinating disposal with a professional service. Proper disposal reduces environmental impact and keeps your home safe from potential chemical leakage.
Tools & Materials
- Insulated screwdriver (non-conductive handle)(Used to disconnect terminals safely)
- Voltage tester or multimeter(Confirm zero voltage before touching wires)
- Replacement capacitor (same rating)(Match µF, voltage, and type (run/start))
- Wire labels or painter's tape(Label wires before removal)
- Non-conductive gloves(Protection when handling charged parts)
- Safety glasses(Eye protection from arc or debris)
- Pliers and small drips of dielectric grease(Assist with rewiring and prevent corrosion)
- Rags or towels(Clean up spills and protect surfaces)
Steps
Estimated time: 60-90 minutes
- 1
Power down and verify safety
Close the home breaker for the outdoor and indoor units and wait several minutes for any stored charge to dissipate. Use a voltage tester to confirm there is no live power at the service panel. This ensures you cannot be shocked during capacitor work.
Tip: Always recheck for voltage after waiting; a false negative is dangerous. - 2
Open the access panel and locate the capacitor
Remove the panel that covers the outdoor unit's electrical compartment. Use a flashlight to identify the capacitor, usually a small can with two to three terminals labeled C, FAN, and HERM. Note its mounting orientation.
Tip: Take a quick photo of the wiring before you touch anything. - 3
Check capacitor rating on the label
Read the µF and voltage rating printed on the capacitor body or label on the unit. This determines the replacement part. If the rating is unclear, refer to the nameplate or the technician manual.
Tip: Do not rely on a guess; compatibility is essential for safe operation. - 4
Discharge the capacitor safely
Before touching wires, discharge the capacitor using an insulated screwdriver or a discharge tool. Briefly bridge the terminals while wearing gloves and avoid touching the metal blade to any terminal.
Tip: Never touch both terminals with bare hands; a short discharge is necessary. - 5
Label and remove wires from terminals
Label each wire with its terminal (C, FAN, HERM) and gently slide the connectors off. Use a non-conductive tool to avoid damaging the terminals.
Tip: Labeling prevents mis-wiring when installing the new capacitor. - 6
Remove the old capacitor
Unscrew or release the mounting bracket and lift the old capacitor away. Inspect for bulges, leaks, or cracks as signs of failure. Do not reuse a damaged capacitor.
Tip: Handle the capacitor carefully; it may still store charge. - 7
Prepare the replacement capacitor
Compare the new capacitor to the old one to ensure identical rating. Clean the mounting area and inspect the clamp or bracket for snug fit. Ensure the new part will sit properly in the housing.
Tip: Place the new capacitor in the same orientation to avoid cable strain. - 8
Connect wires to the correct terminals
Attach the wires to the corresponding terminals on the new capacitor (C, FAN, HERM). Ensure firm, clean connections and avoid cross-wiring.
Tip: Double-check each connection against your labeled wires. - 9
Secure and reassemble
Mount the new capacitor in its housing with the bracket and reinstall the service panel. Confirm there are no loose wires or tools left in the enclosure.
Tip: Ensure the panel seals properly to protect against moisture. - 10
Restore power and test briefly
Turn the breaker back on and run a short cooling cycle. Listen for normal compressor start and fan operation; observe for any unusual sounds or smells.
Tip: If the unit trips the breaker, power off and reassess wiring and capacitor rating. - 11
Assess performance and safety
Monitor the unit for stable operation over 5–10 minutes. If cooling is weak or the unit cycles abnormally, recheck connections or consider professional help.
Tip: Document any issues to reference if you call a pro. - 12
Final checks and disposal
Dispose of the old capacitor properly according to local guidelines. Keep spare parts and a simple maintenance log for future reference.
Tip: Record part numbers and dates for easier future replacements.
Common Questions
What is the difference between a run capacitor and a start capacitor?
A run capacitor stays in the circuit to smooth current and improve efficiency, while a start capacitor provides a surge of energy to help start the motor. Many modern units use a run capacitor only. If you’re unsure which type your unit uses, check the label or manual.
Run capacitors smooth current; start capacitors give the motor an initial boost. Check the label to know which one your unit uses.
Can I replace a capacitor myself without prior HVAC experience?
Yes, with proper safety precautions and the correct replacement part. If you are unsure about any step, consulting a professional is safest. A wrong rating or poor connections can damage the compressor or void warranties.
You can, but be sure you follow safety steps and have the right part. When in doubt, contact a pro.
How do I determine the correct capacitor rating?
Check the existing capacitor for the µF rating and voltage. If the old part is unreadable, refer to the unit’s nameplate or service manual. Always use a capacitor with the same µF rating and equal or higher voltage rating.
Look for the µF value and voltage on the old capacitor or the unit’s label, and replace with the same rating.
What safety steps are essential before starting?
Power off at the breaker, disconnect power to both outdoor and indoor circuits if accessible, and discharge the capacitor before touching any terminals. Wear insulated gloves and eye protection, and work on a dry surface.
Always power down, discharge, and wear PPE before touching the unit.
How long does capacitor replacement take on average?
For a typical residential unit, the replacement process can take about 60 to 90 minutes, depending on accessibility and whether any other components require inspection.
Most replacements take about an hour, depending on the unit and access.
What should I do if the unit still doesn’t start after replacement?
If starting issues persist, recheck all connections and terminal labels, test the capacitor with a meter, and verify the contactor and compressor are functioning. If unsure, call a licensed technician to diagnose additional problems.
Recheck connections and components; if in doubt, call a pro.
Watch Video
The Essentials
- Identify whether you have a run or start capacitor and match the rating.
- Always power down and discharge before handling capacitors.
- Connect wires to correct terminals (C, FAN, HERM) to ensure proper operation.
- Test the unit after replacement and monitor for safe operation.
- Dispose of old capacitors responsibly and document replacement details.