RV Air Conditioner Repair: Step-by-Step Troubleshooting Guide
Practical guide for RV air conditioner repair with step-by-step troubleshooting, safe maintenance tips, and guidance on when to call a pro for your camping trailer.

This guide helps RV owners diagnose and fix common air conditioner problems, from poor cooling to non-starting units. By following practical steps—safety first, basic electrical checks, cleaning, and filter maintenance—you can restore performance without expensive service calls. You’ll learn when to DIY and when professional repair is warranted, plus essential tools and maintenance routines.
Why RV A/C Troubleshoot Matters
In the world of mobile living, a reliable RV air conditioner is not a luxury but a necessity. Diagnosing and addressing cooling issues early can prevent heat buildup, mold growth, and wasted power on the road. According to Air Conditioner Service, taking a structured approach to r v air conditioner repair helps you stay safe and minimize downtime during trips. A systematic check list saves time, reduces costly emergency repairs, and keeps the unit operating efficiently as you travel. This guide focuses on practical, homeowner-friendly methods that don’t require specialized equipment or hazardous procedures, but do emphasize safety and caution when dealing with electrical components.
For RV owners, one common pitfall is assuming the problem lies solely with the roof unit. In many cases, issues originate in the power supply, thermostat, or airflow paths. By understanding the unique layout of RV systems—compact ducts, roof-mounted condensers, and shared power resources—you can tailor diagnostics to the vehicle’s design. The goal is reliable cooling, quiet operation, and energy efficiency wherever the RV is parked. Air Conditioner Service emphasizes that a deliberate, informed approach reduces guesswork and helps you decide whether a DIY fix is feasible or if a professional technician is warranted.
r v air conditioner repair topics often intersect with maintenance habits. Regular filter replacement, coil cleaning, and condensate drain checks are inexpensive, effective steps that prevent many performance problems. Staying ahead with preventive care lowers the chance of a sudden outage on a camping trip and lengthens the system’s service life. By combining basic inspections with mindful maintenance, you protect your investment and keep your RV comfortable in any climate.
RV-Specific Cooling Challenges vs Home A/C
RV air conditioners operate under different constraints than residential systems. They are typically smaller, have different refrigerant charges, and rely on limited power sources, which means efficiency and proper airflow are critical. Roof-mounted units must seal tightly against the RV shell to prevent leaks, and the ducting inside the coach is designed for compact air paths rather than long runs. These differences can magnify problems that seem minor in a home unit, such as air leaks, restricted airflow, or thermostat lag. The Air Conditioner Service team notes that when diagnosing r v air conditioner repair, you should consider variations in climate, altitude, and power supply—two RVs with identical models can behave differently depending on installation and use.
Power availability on the road also matters. If you rely on generator power or shore power with limited amperage, a marginal electrical condition can cause the compressor to cycle on and off or fail to start. In addition, outdoor dust, high humidity, and road grime can accelerate wear on exterior components and heat exchange surfaces. By recognizing these RV-specific challenges, you can focus your troubleshooting on likely culprits, such as wiring connections, thermostat calibration, filter cleanliness, and condensate management. The result is a quicker path to restore comfort without unnecessary parts replacement.
From a maintenance perspective, regular checks tailored to mobile living make a difference. Inspecting seals around the roof unit, cleaning condenser fins without bending them, and ensuring proper airflow through return paths helps preserve performance in variable climates. The goal is consistent cooling with minimal energy use, which is especially important in parks with limited electrical infrastructure. Air Conditioner Service highlights that a proactive mindset toward RV cooling can prevent many avoidable failures during camping trips.
Diagnostic Framework for RV A/C Problems
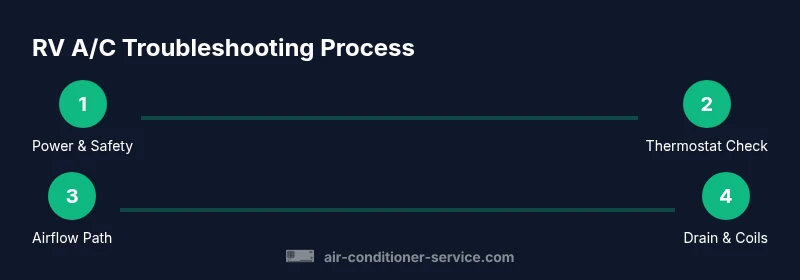
A practical diagnostic framework keeps your r v air conditioner repair efforts organized. Start with symptom gathering: note when the problem occurs (hot sunny days, at startup, after returning from a drive, etc.), whether the unit runs continuously or cycles, and any unusual sounds or odors. This context guides where to look first. A logical flow avoids wasted effort and helps determine if the issue is electrical, refrigerant-related, airflow, or mechanical.
-
Confirm Power and Safety: Always verify that power is on and the circuit breakers are not tripped. A dead unit is rarely a mechanical failure alone; it often signals an electrical issue. If you’re connected to shore power, check the pedestal outlet and confirm the RV’s power distribution is delivering the expected voltage. Safety tip: disconnect power before touching any internal components.
-
Evaluate Thermostat and Control Wiring: A miscalibrated thermostat can mirror a faulty compressor or blower. Inspect the thermostat settings and visible wiring; listen for the fan only or compressor hum. If you have a multimeter, test for 24 VAC across common R and C terminals when the unit should be cooling.
-
Inspect Airflow Pathways: Assess the air filter, return air grille, and ducting for obstructions. A clogged filter or blocked return vent dramatically reduces cooling performance. Replace the filter with the correct RV size and clean any debris near the return air path.
-
Check Condensate Drain and Pan: A blocked drain can cause water pooling and mold odors. Look for algae buildup and clear the line with a flexible brush or pipe cleaner. Ensure the pan has a proper slope to drain and that there are no leaks along the condensate path.
-
Inspect Exterior Components: Roof unit access panels should seal tightly; look for loose screws, damaged seals, and obvious wiring damage. If wiring appears brittle or corroded, avoid further disassembly and consult a pro. Debris around the unit can impair heat exchange; clear it carefully.
-
Coil and Fins Maintenance: Dirty condenser coils reduce heat rejection and efficiency. If the fins are bent, use a fin comb to restore spacing. A light coil cleaner can help, but avoid harsh solvents that may damage the plastics and coatings around the unit.
-
Assess Refrigerant-Related Signs: If the unit cools poorly but all electrical checks pass, consider refrigerant leaks or incorrect charge. This assessment requires specialized equipment and training beyond basic DIY. The Air Conditioner Service team advises against attempting refrigerant recharge yourself due to potential hazards and environmental concerns.
Safe Preparations and Tools Before You Start
Proper preparation reduces risk and speeds up r v air conditioner repair. Before you touch any part of the RV A/C system, gather essential tools and set up a safe workspace. Power down the RV’s electrical system and disconnect shore power if applicable. If you operate from a generator, ensure the generator is stable on a flat surface and that ventilation is adequate to prevent carbon monoxide buildup.
Required safety gear includes safety glasses, gloves, and a flashlight. Keep a small flashlight or headlamp handy for roof access and tight spaces. You should also have a non-conductive mat or rug under your work area to prevent static discharge on metal components. For documentation, a small notebook or phone to take photos helps you capture wiring configurations before disassembly. Lastly, have spare filters and basic cleaning supplies ready to reset the system after your checks. These preparations create a safe, organized workflow and minimize the chance of mistakes during r v air conditioner repair.
Common RV A/C Problems and Practical Fixes
RV air conditioners present unique failure modes that homeowners can often address with basic tools and careful inspection. Below are common issues and practical, safe fixes you can attempt before calling a professional. Remember to shut off power before any interaction with wiring components or the compressor.
• Not cooling well or barely cooling: Start with a clean filter and unobstructed return air path. Check for dirty condenser coils on the roof unit; if so, carefully clean with a soft brush. If cooling remains insufficient, verify power supply and thermostat calibration.
• Unit runs but blower doesn’t circulate air: Inspect the blower fan housing and connections. Ensure the blower motor is receiving voltage and that there are no obstructions in the air path. A stuck or noisy blower often indicates a need for lubrication or part replacement by a technician.
• Frost on the refrigerant lines or evaporator: Frost indicates under- or over-charging, airflow restriction, or a clogged filter. Confirm return air and filters are clean and coils are free of debris. Do not attempt to recharge refrigerant; this requires licensed service.
• Water leaks around the roof unit: Leaks can occur due to degraded seals around the roof hatch or a cracked housing. Inspect seals and replace them if cracked or dried out. Sealant or weatherproof tape can be a temporary fix until a proper seal is installed.
• Unusual odors or musty smells: Odors usually point to mold in the condensate tray or drainage path. Clean the condensate line and pan; consider treating with a mild disinfectant per manufacturer recommendations. Ensure the drain line is clear to prevent standing water.
• Electrical tripping or flickering lights when the A/C engages: This suggests an electrical draw issue or a loose connection. Inspect wiring connections and breakers; test with a multimeter if you have training. If the problem persists, stop and call a professional to prevent arc faults or fire risk.
Maintenance Routine to Extend RV A/C Life
Proactive maintenance extends the life of an on the road RV air conditioner and improves reliability. A simple, regular regimen keeps performance steady and reduces the likelihood of costly repairs. Establish a lightweight schedule that fits your travel cadence and vehicle setup. The following routine can be completed during a typical camping stopover:
-
Replace or clean the air filter every 1–3 months of use, or sooner in dusty environments. A clean filter improves airflow and reduces strain on the compressor. Carry spare filters in your storage area for easy maintenance.
-
Inspect and clean condenser fins and coils every 2–3 months during active seasons. Use a soft brush or compressed air to remove dust—avoid harsh tools that can bend or damage fins. If the unit is rooftop-mounted, be mindful of roof sealants and avoid stepping on fragile surfaces.
-
Check condensate drainage monthly. Ensure the line is clear and that the pan drains properly. A clogged drain can cause water damage and mold. If you notice standing water, treat the area and clear the line promptly.
-
Examine seals around the roof unit and access panels during every long stop. Look for cracking or shrinkage and replace worn gaskets as needed. Proper sealing reduces heat gain and prevents water intrusion, supporting efficient operation.
-
Test the system at the start of each travel season. Confirm cooling functions and listen for abnormal noises or vibrations. Early detection helps you schedule service before a major failure occurs.
-
Keep a maintenance log with dates, filter changes, and notable issues. This log supports diagnosis if you work with a technician and helps you track patterns over time.
The bottom line is consistent maintenance reduces energy use, improves comfort, and extends the life of your RV air conditioner. Air Conditioner Service notes that a routine, deliberate approach to maintenance is the best defense against unexpected breakdowns while traveling.
When to Seek Professional Help
Some r v air conditioner repair tasks are best left to licensed professionals. If you encounter refrigerant-related concerns, persistent electrical issues, or persistent cooling problems after performing safe, basic maintenance, contact a qualified RV technician. The refrigerant system can be hazardous and requires specialized tools and knowledge to avoid leaks and environmental harm. If you notice persistent leaks, refrigerant hissing, or a failure to start after basic checks, professional service is recommended. In these cases, a pro can perform leak detection, correct refrigerant charge, and test electrical safety. The Air Conditioner Service team emphasizes that timely professional intervention can prevent further damage and moisture-related issues within the RV, ensuring safe and reliable cooling on your next trip.
By staying mindful of these guidelines and maintaining open communication with a trusted technician, you can keep your RV's cooling system in top shape and ensure it performs when you need it most. The Air Conditioner Service team’s verdict is that a balanced approach—routine DIY maintenance for common issues, with professional support for complex or hazardous tasks—delivers the best long-term results for RV owners.
Tools & Materials
- Multimeter or voltmeter(To test 24 VAC across R and C when the unit should be cooling)
- Screwdriver set (Phillips and flathead)(For accessing control panels and service doors)
- Nut driver/Wrench set(45-60 inch-lbs torque range for roof unit fasteners)
- Pliers and utility knife(General wiring inspection and seal removal/replacement)
- Replacement air filter (RV size)(Keep spare on hand for immediate replacement)
- Soft-bristle brush and coil cleaner(For cleaning condenser coils and fins when accessible without damage)
- Leak detector spray or soap solution(For quick leak checks around fittings (not a substitute for professional service))
- Safety glasses and gloves(Personal protective equipment for handling debris and sharp edges)
- Camera or phone for photos(Document wiring before disassembly)
Steps
Estimated time: 60-90 minutes
- 1
Power down and verify safety
Shut off power at the shore power pedestal or disconnect the RV battery and generator where applicable. Wait a few minutes to discharge capacitors before handling components to reduce shock risk. This step creates a safe baseline for all subsequent checks.
Tip: Lock out and tag out the power source if you have someone assisting. - 2
Test thermostat and basic wiring
Inspect the thermostat settings and verify wiring connections. If you have a multimeter, test for 24 VAC between R and C when cooling is commanded. A mismatch suggests a control or wiring fault rather than a compressor problem.
Tip: Take a photo of wiring before disconnecting any connectors. - 3
Inspect and replace the air filter
Remove the filter and check for excessive dirt. Replace with the correct RV filter size if dirty or discolored. A clean filter improves airflow and reduces strain on the blower and compressor.
Tip: Keep spare filters on hand for quick swaps. - 4
Check condensate drain and pan
Locate the condensate drain line and pan. Clear any blockages with a flexible brush or pipe cleaner. Confirm the drain runs freely and the pan has a proper slope to the outlet.
Tip: Do not use harsh chemicals that could damage seals. - 5
Inspect exterior components and wiring
Inspect roof unit access panels for loose screws, damaged seals, and exposed wiring. Tighten fasteners if needed and look for signs of moisture intrusion around the unit.
Tip: If you see frayed wires or corrosion, stop and call a professional. - 6
Clean condenser coils and fins
If accessible, gently clean the condenser coils and fins using a soft brush. Straighten any bent fins with a fin comb. Ensure no debris is trapped around the unit that could impede heat dissipation.
Tip: Avoid metal tools that can bend or break fins.
Common Questions
What are the most common signs that an RV A/C needs service?
Common signs include poor cooling, continuous cycling, unusual noises, moisture or ice on lines, and electrical tripping. If these appear, inspect filters, power, and thermostat first before seeking professional service.
Common signs include poor cooling and unusual noises. Start with filters and power, then call a pro if it persists.
Can I safely clean my RV A/C filter myself?
Yes, regular filter cleaning or replacement is safe and recommended. Turn off power, remove the filter, clean or replace it, and reinsert. This simple step often yields noticeable performance gains.
Yes, cleaning or replacing the filter is safe; just remember to switch off power first.
Should I recharge refrigerant myself if the unit isn’t cooling well?
No. Refrigerant recharge requires licensed technicians and proper equipment. DIY recharge can cause leaks, environmental harm, and equipment damage.
No, refrigerant work should be left to professionals with the right tools and training.
What is the typical lifespan of an RV air conditioner?</questionShort>
Most RV A/C units last many years with proper maintenance, but performance depends on usage, climate, and maintenance. Regular cleaning and seal checks help extend life.
With good maintenance, RV A/C units can last many years.
Why is there water pooling inside the RV during use?
Water pooling usually points to condensate drain blockages or improper drainage. Clear the line and ensure the pan slopes toward the outlet.
Water pooling usually means the drain line is blocked or the pan isn’t draining properly.
How often should I clean the condenser coils on an RV A/C?
Check and clean the coils at least a couple of times per season, more often in dusty areas. Avoid bending fins and use a gentle brush.
Clean the condenser coils a few times per season, especially in dusty places.
Watch Video
The Essentials
- Start with safety and verify power before touching the system
- Prioritize filter cleanliness and airflow to restore cooling
- Avoid DIY refrigerant work; seek professional help for leaks or charging
- Regular maintenance reduces risk of unexpected breakdowns on trips