How to Make Air Conditioners Colder: A Practical Guide
Discover practical, safe steps to improve cooling: filter changes, airflow optimization, thermostat tweaks, and when to call a pro, with tips from Air Conditioner Service.

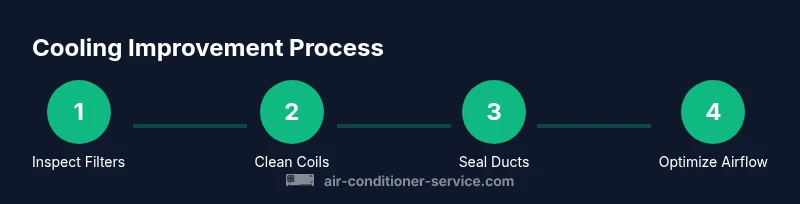
To make your air conditioner feel colder, start with simple, safe checks: replace dirty filters, clean coils, and ensure the outdoor unit has clear airflow. Check for blocked vents, seal leaks around windows and ducts, and set the thermostat to a consistent cooling level. If performance remains weak, call a qualified technician to inspect refrigerant and airflow.
Why your air conditioner struggles to feel colder
According to Air Conditioner Service, many homes experience a drop in cooling performance due to a handful of common, fixable causes. A clogged or dusty air filter slows airflow, making the evaporator coil work harder and reducing the perceived cooling. Dirty condenser coils outside limit heat rejection, while blocked vents or closed doors create hot pockets that your unit fights to overcome. Thermostat miscalibration and a home layout that traps heat indoors can also undermine performance. In some cases, a refrigerant leak or an aging compressor is the real culprit, but these issues require professional attention. This article explains practical checks you can perform safely and a plan to approach more complex problems without risking damage to the equipment. The goal is not only to feel cooler but also to boost overall efficiency and comfort for the long term. First, verify that the thermostat reading matches the room temperature and that the unit is cycling on and off normally. Next, inspect the air intake around the indoor unit for obstructions like furniture or curtains. Finally, check that the outdoor unit has at least a few inches of clearance all around and is free of debris.
Quick maintenance you can do today to improve cooling
Many cooling issues start with basic maintenance that homeowners can safely perform. Start by turning off power at the thermostat and the breaker before touching any components. Remove the air filter and inspect it: if it looks dirty or clogged, replace it with the correct size. A clean filter improves airflow and helps the evaporator coil absorb heat more efficiently. Vacuum or brush away dust from accessible components near the air handler, and clean the outdoor condenser coils from debris such as leaves or grass clippings. Ensure the outdoor unit has unobstructed airflow on all sides, and trim back any vegetation or furniture that could block heat rejection. If you have washable filters, rinse and dry them completely before reinstalling. These quick steps typically take under an hour and can yield noticeable improvements in cooling.
Boost cooling by improving airflow and duct health
Airflow is the lifeblood of an efficient AC system. Leaky or poorly sealed ducts can siphon cooled air into attic spaces or unconditioned areas, making rooms feel warmer. Inspect accessible ducts for visible gaps and seal them with appropriate material such as mastic sealant or metal tape. For long duct runs, consider insulating exterior sections to reduce heat gain. If you notice significant rattling sounds or signs of loose joints, schedule a professional inspection. In homes with extensive ductwork, a professional may perform a blower door test or use a smoke test to find leaks. Improving duct integrity and reducing leaks can often restore several degrees of perceived cooling without changing the thermostat setting.
Thermostat tricks and indoor layout to maximize cold air
A well-calibrated thermostat helps your unit maintain a stable cooling level. Ensure the thermostat is accurately reading room temperature and that it is not in direct sunlight or near heat-generating appliances. Use ceiling fans to distribute cool air evenly; run fans on a low setting to push cool air downward and toward living spaces. Keep interior doors open so air can circulate between rooms, or set up zones if your system supports it. Blocked vents or furnaces in the same space can impede airflow; making sure vents are open and unobstructed can make a noticeable difference in comfort without changing hardware.
When to call a professional and what to expect
If basic maintenance does not improve cooling, it may indicate a refrigerant leak, a dying compressor, or electrical issues. A licensed technician can perform a refrigerant charge check, pressure tests, and electrical inspections to identify the root cause. Do not attempt refrigerant handling or DIY charging, as these are hazardous and illegal without proper certifications. A professional assessment will typically include a safety check, system diagnostics, and a recommended repair plan with a cost estimate. Regular maintenance can prevent many call-outs by catching issues early.
Energy-saving practices that also help your AC feel cooler
You can feel cooler without cranking the thermostat higher by reducing heat gain and improving overall efficiency. Close blinds or curtains on sunny windows during the hottest parts of the day, and use reflective window films where appropriate. Run heat-producing appliances such as ovens and dryers at night or on cooler days. Use ceiling fans in tandem with the AC to improve air distribution instead of lowering the thermostat. Regular maintenance, clean airflow paths, and proper thermostat settings all contribute to a more comfortable indoor environment while keeping energy use in check.
Common myths about cooling and the truth
Myth: Closing vents in unused rooms saves energy. Truth: This can disrupt airflow and reduce efficiency. Myth: Turning down the thermostat drastically will cool faster. Truth: It can overwork the system and cause uneven cooling. Myth: Ice on the coils means the system is working harder. Truth: Ice usually indicates airflow restrictions or dirty coils and requires attention. Getting accurate information helps you troubleshoot effectively without risking damage to components.
Tools & Materials
- Replacement air filter(Choose the correct size by checking the existing filter or unit label)
- Soft-bristle brush(Gentle brush for coil fins and surrounding dust)
- Vacuum cleaner with brush attachment(Use on the blower area and accessible ducts)
- Non-abrasive coil cleaner(Follow manufacturer instructions; avoid acidic formulas)
- Mastic sealant or metal duct tape(Seal visible duct leaks and gaps)
- Screwdriver set(Phillips and flathead for panel access)
- Gloves and safety glasses(Protect hands and eyes during cleaning)
- Dry microfiber cloth(Wipe down surfaces and catches dust)
- Garden hose with spray nozzle(Low-pressure rinse for outdoor coil)
Steps
Estimated time: 90-120 minutes
- 1
Power down the system and safety check
Turn off power at the thermostat and the main breaker. Verify no voltage is present before touching electrical components. This protects you and the equipment from shocks or short circuits.
Tip: Use a non-contact voltage tester to confirm power is off. - 2
Inspect and replace the air filter
Remove the filter housing and inspect the filter. If dirty, replace with the correct size. A clean filter dramatically improves airflow and cooling efficiency.
Tip: Note the replacement date to remind future maintenance. - 3
Clean the indoor evaporator area
Gently brush off dust from accessible surfaces around the evaporator coil area. Do not spray water directly onto electrical components; use a vacuum to remove loose debris.
Tip: Be careful not to bend delicate fins. - 4
Clean the outdoor condenser coils
Clear debris from the condenser and remove obstructing vegetation. Lightly rinse with a low-pressure hose if permitted by the manufacturer, keeping water from sensitive components.
Tip: Never use high-pressure jets that can bend fins. - 5
Check for and seal duct leaks
Visually inspect accessible ducts for obvious gaps. Apply duct sealing material at joints and use foil tape to secure loose connections.',
Tip: A smoke pencil can help you detect leaks; look for air movement. - 6
Improve airflow with vents and fans
Open all supply vents and place a room fan to assist air distribution. Fans help push cooled air further into living spaces, enhancing comfort without extra cooling load.
Tip: Aim the fan to push air downward and toward occupied areas. - 7
Test performance and thermostat settings
Restore power and run the system for 15-20 minutes. Observe if rooms reach a more comfortable temperature and if cycles are normal.
Tip: Record indoor temperature after the test for comparison. - 8
Know when to call a pro
If you detect refrigerant smells, oily leaks, or persistent poor cooling, schedule a professional inspection. DIY refrigerant work is unsafe and often illegal.
Tip: Document any symptoms and timing to share with the technician.
Common Questions
Why is my air conditioner not cooling as well as before?
Common causes include a dirty filter, blocked vents, outdoor debris, thermostat miscalibration, or duct leaks. More complex issues like refrigerant leaks or a failing compressor require professional diagnosis.
If your AC used to cool better but now feels weaker, start with filters and airflow, then check the outdoor unit. For refrigerant or compressor problems, contact a licensed technician.
Can a dirty filter make the air feel warmer?
Yes. A clogged filter reduces airflow, causing the system to work harder and often feel less cool. Replacing the filter improves airflow and cooling performance.
A dirty filter blocks airflow and makes the system work harder, so replace it to regain cooling.
Is it safe to wash the condenser coils with water?
Lightly rinsing coils from the outside with a low-pressure hose is sometimes allowed by manufacturers, but never spray water into electrical parts. Follow the unit manual and avoid high pressure.
Use a gentle spray from the outside if allowed by the manual, and never soak electrical components.
How often should I replace the air filter?
Most systems benefit from a filter change every 1-3 months, depending on usage and indoor air quality. Check the label and replace when dirty or clogged.
Check the filter every month and replace when dirty; this keeps airflow steady.
Should I recharge refrigerant myself?
No. Refrigerant work requires licensed technicians and proper equipment. A refrigerant charge problem usually means a leak that needs professional repair.
Refrigerant work must be done by a licensed technician.
When should I consider replacing my old AC?
If cooling costs are rising, repairs are frequent, or the unit is very old, upgrading to a newer, more efficient model may be more cost-effective in the long run.
If repairs pile up and efficiency drops, it may be time to replace.
Watch Video
The Essentials
- Replace dirty filters to restore airflow quickly.
- Clear outdoor debris and seal duct leaks for efficiency.
- Use fans to improve air distribution and comfort.
- Calibrate or position the thermostat for stable cooling.
- Consult a professional for refrigerant or electrical concerns.