How to Fix Air Conditioner Fan Not Working
Learn how to diagnose and fix an air conditioner fan that won't run. Safe, practical steps for homeowners and renters with clear diagnostics, a step-by-step plan, and when to call a pro.

Most often, a not-working AC fan is caused by a failed start capacitor or a tripped circuit, followed by simple fixes you can perform safely. Start by turning off power at the breaker, then inspect obvious issues like a loose wire, a dirty air filter, or a blocked condenser. If the fan still won't run, professional help is recommended.
Understanding why the air conditioner fan not working
When the fan fails to turn, cooling efficiency plummets and indoor comfort suffers quickly. In many homes, the root cause is electrical or control-system related rather than a pure mechanical failure. The most common culprits are a failed start capacitor, a tripped circuit or breaker, loose wiring, or a malfunctioning thermostat or control board. Less obvious but important are obstructions around the outdoor condenser and blocked airflow after a dirty filter. By understanding these categories, you can prioritize checks and avoid unnecessary parts replacement. Keep in mind that some fixes involve high voltage and moving parts; safety comes first.
Throughout this guide, we’ll help you quickly distinguish between simple, do-it-yourself fixes and cases that require a licensed technician.
Safety first: power down, identify unit type, and prep tools
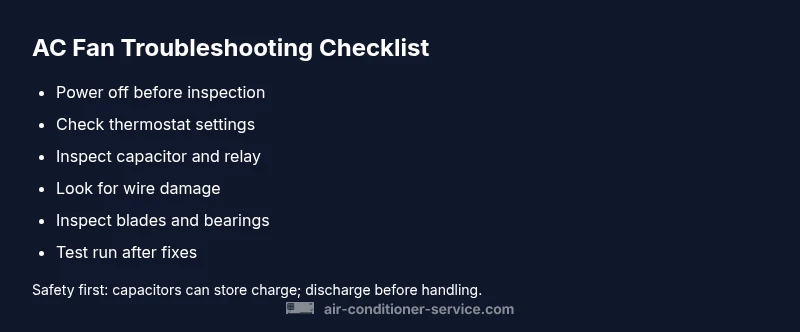
Before you touch any components, shut off power to the AC at the main service panel. For window and portable units, unplug the unit; for split systems, switch off the indoor and outdoor disconnects. Gather basic tools: a non-contact voltage tester, a screwdriver set, a multimeter, and a clean rag. Note your unit type (window, portable, or central) so you follow the correct disassembly steps. Wear safety glasses and gloves when handling electrical components, especially capacitors, which can retain a dangerous charge even when unplugged. Label any wires as you disconnect them to ease reassembly.
This upfront safety step reduces risk and ensures you can test ideas in a controlled, repeatable way.
Quick checks you can perform before calling a pro
Start with the easiest checks that don’t require tools. Verify that the thermostat is set to cooling and the fan is set to ON or AUTO as appropriate. Inspect the outdoor unit for debris, overgrowth, or a blocked grille. Replace or clean the air filter if dirty—restricted airflow can cause overheating and safety motors to shut down. Check the circuit breakers and fuses for the indoor and outdoor units; reset or replace if tripped or blown. Listen for any buzzing or humming sounds that could indicate a stuck relay or a seized motor. If you notice abnormal smells, heat, or signs of burning, stop immediately and call a pro.
These quick checks address the most common, low-effort causes and save time.
Electrical faults that commonly stop the fan
Electrical faults are the leading cause of a fan not starting. A failed start capacitor is a frequent culprit in many residential systems, causing the motor to fail to start or run weakly. A faulty relay on the control board can prevent the signal that starts the fan. Wiring loose or damaged connections, undersized or blown fuses, and worn contact points can also disrupt current flow. Thermostat misreads or a malfunctioning control board can misdirect signals, keeping the fan idle. Diagnose electrical faults with care, using a multimeter and, if needed, a professional testing protocol.
Remember: capacitors store charge and can shock you; never handle them with power on.
Mechanical and airflow issues to inspect
Even if electricity is sound, mechanical problems can stop the fan. Inspect the fan blades for obstruction, dings, or a bent hub. Worn bearings or a seized motor will emit grinding noises or overheat. A loose belt (in older systems) can slip and stall the fan. Debris in the condenser or around the fan can increase load and trigger thermal cutoffs. Finally, ensure there’s no ice buildup on the evaporator or condenser lines, which can break the normal cycle and stall the fan. Addressing mechanical issues often requires disassembly and careful reassembly.
Safety-focused troubleshooting workflow you can follow
Adopt a systematic approach to avoid missing steps or creating new problems. Start by verifying power and basic settings, then perform the simplest electrical checks (breaker, fuse, wire connections). If no fix, test the capacitor and relay with appropriate tools, ensuring the capacitor is discharged before handling. Inspect the motor and blades for wear or obstruction. Reassemble, restore power, and run the system for 10-15 minutes to observe status. If the fan remains inactive or you encounter any alarming signs, pause and seek professional service. Safety cannot be overstated when dealing with high-voltage components.
How to validate operation after fixes
After completing fixes, power the system back on and observe the fan operation. Listen for the fan engaging with a smooth startup, not a sluggish hum. Check for even airflow from the vents and verify that the indoor unit and outdoor condenser are cycling normally. If the fan starts but stops after a few minutes, recheck for overheating, blocked air passages, or intermittent electrical connections. If issues recur, document what you observed (sounds, smells, time to start) and share them with the technician for faster service.
When to call a professional and what they will check
If your checks don’t reveal a clear fault, or you encounter hazard signs (burning smell, exposed wires, refrigerant concerns), contact a licensed HVAC technician. Pros will test capacitors, relays, wiring with calibrated equipment, and measure motor current draw. They can also assess cooling performance, refrigerant levels, and the control board’s health. In many cases, a professional diagnosis prevents incorrect part replacements and ensures electrical safety. Regular maintenance can prevent future fan failures and improve efficiency.
Steps
Estimated time: 60-90 minutes
- 1
Power down and verify unit type
Turn off power at the main breaker and disconnect the unit. Identify whether you’re dealing with a window, portable, or central system to follow the correct disassembly steps.
Tip: Use a non-contact tester to confirm no voltage before touching metal parts. - 2
Check basic electricals”,
Inspect the indoor and outdoor disconnects, breakers, and fuses. Reset or replace as needed and recheck the status of the fan. This step often resolves tripped circuits.
Tip: Take a photo of panel labeling before resetting to remember where each breaker belongs. - 3
Inspect the capacitor and relay
Discharge the capacitor safely, then test if it holds a charge using appropriate equipment. Inspect the relay on the control board for signs of pitting or burning.
Tip: Capacitors can explode if mishandled; discharge fully and handle with insulated tools. - 4
Examine wiring and connections
Look for loose terminals, scorched insulation, or damaged wires around the fan motor and control board. Re-seat any loose connectors firmly.
Tip: Avoid pinching wires during reassembly; secure with zip ties if needed. - 5
Assess the fan motor and blades
Check for a stuck shaft, damaged blades, or excessive bearing play. Remove debris and ensure the blade spins freely by hand after power-off.
Tip: Do not run the motor if you hear grinding or see abnormal resistance. - 6
Test the system after reassembly
Reconnect power and cycle the system. Observe for normal fan operation and proper cycling of outdoor/compressor components.
Tip: Record any unusual behavior for the technician if you need to call one.
Diagnosis: Air conditioner fan will not start or the fan refuses to spin
Possible Causes
- highPower supply issue (tripped breaker or blown fuse)
- highFaulty start capacitor in the fan motor
- mediumWiring or relay problems in the control circuit
- mediumThermostat or control board failure
- lowMechanical blockage or motor bearing wear
Fixes
- easyReset trip breakers or replace blown fuses; restore power safely
- mediumTest and replace a faulty start capacitor
- mediumInspect and reseat wiring connections; replace damaged wires/relays
- hardReplace a defective thermostat or control board
- hardReplace seized motor or repair mechanical obstructions
Common Questions
What is the most common cause of an AC fan not working?
The most common causes are a failed start capacitor or a tripped breaker. These are typically resolved with a safe reset or a capacitor replacement by a qualified technician if needed.
The most common causes are a failed start capacitor or a tripped breaker. A reset often helps, but if the problem persists, a capacitor replacement may be needed.
Can a dirty air filter cause the fan to stop working?
A clogged filter can cause system overheating and trigger safety protections, which may stop the fan from running. Cleaning or replacing the filter often resolves the issue.
A dirty filter can overheat the system and trigger protections, which might stop the fan. Cleaning or replacing it usually fixes the problem.
Is it safe to check electrical components myself?
Only if you are trained and aware of electrical hazards. Always power down, discharge capacitors, and use proper tools. If unsure, call a professional.
Only if you're trained. Always power off, discharge capacitors, and use proper tools. If you're unsure, contact a professional.
When should I replace a capacitor?
Replace a capacitor if it cannot hold a charge, shows bulging, or after testing indicates it’s faulty. Do not reuse a damaged capacitor.
Replace the capacitor if it can't hold a charge, or looks bulged or damaged. Don’t reuse a faulty capacitor.
Can a faulty thermostat cause the indoor fan to stop?
Yes. A malfunctioning thermostat can fail to signal the fan correctly. Testing or replacing the thermostat may be necessary.
Yes. A bad thermostat can prevent the fan from starting. Testing or replacing it might be required.
Should I replace the fan motor or the control board first?
Diagnosis should guide the decision. If the motor shows wear or overheating, consider motor replacement; if signals fail at the control board, the board may need replacement.
If the motor is worn, replace the motor; if the control board signals aren’t reaching the fan, the board may need replacement.
Watch Video
The Essentials
- Start with power and thermostat checks to rule out simple issues
- Electrical faults, especially capacitors, are common culprits
- Inspect for mechanical obstructions and airflow problems
- Know when to call a professional for electrical or refrigerant work