Car Air Conditioner Clean: DIY Guide to Fresh Air
Learn safe, practical steps to clean your car air conditioner—from cabin filter to vents—improving airflow, removing odors, and preserving system life.

Goal: Learn how to safely perform a car air conditioner clean, focusing on the cabin air filter, vents, and accessible ducts. This guide covers inspection, safe cleaning methods, odor control, and maintenance to keep your vehicle’s interior air fresh and the A/C system efficient. Follow the steps and safety tips for best results.
Why the car air conditioner clean matters
A clean car air conditioner is essential for comfort and health during hot seasons. When you say car air conditioner clean, you’re addressing more than cosmetic deodorizing; you’re tackling the root causes of odors, poor airflow, and mold growth. Debris, dust, and moisture can accumulate in the cabin air path, and if left unchecked, the HVAC system may work harder to deliver cool air, increasing wear and energy use. Regular cleaning helps maintain good filtration, reduces allergens, and prolongs the life of components like the cabin air filter and evaporator. In practice, a proactive cleaning routine translates to a noticeable improvement in cabin feel and cooling performance. This section outlines why cleaning matters, how it benefits your daily driving, and what Air Conditioner Service recommends as baseline practices.
Safety considerations before you begin
Before you touch the car’s A/C system, take a moment to plan and protect yourself. Disconnect the car battery if you will be near exposed electrical components or if you need to access panels behind the dash. Work in a well-ventilated area and wear gloves and a mask to guard against dust and mold spores. Use a flashlight to inspect tight spaces, and avoid getting liquids on electrical connectors or exposed wiring. If your vehicle is under warranty, consult the owner’s manual or a professional; attempting certain procedures may affect warranty terms. The goal is a safe, controlled cleaning process that minimizes risk to you and the vehicle.
What you’ll assess: odors, airflow, and leaks
Begin with a quick assessment of what you’re dealing with. A musty odor often points to mold in the evaporator or ductwork, while reduced airflow can indicate a clogged cabin air filter or vent blockage. Listen for unusual noises when the A/C runs, and check for moisture or droplets around vents—these can signal leaks or condensation issues. Note how quickly cold air is produced and whether the blower motor maintains consistent performance. This baseline helps you decide which cleaning steps are essential and whether a professional inspection is warranted.
Tools and materials you’ll need
Having the right tools makes the car air conditioner clean process smoother and safer. Essential items include a replacement cabin air filter matched to your vehicle, a vacuum with a narrow nozzle, microfiber cloths, a soft brush, mild cleaning solution, a spray bottle for cleaners, protective gloves and a mask, and a flashlight. Optional tools such as a vent cleaning brush or a can of EPA-registered disinfectant can help with stain removal and sanitization. Organize everything within arm’s reach to keep chores efficient and reduce the chance of moisture creeping into sensitive areas.
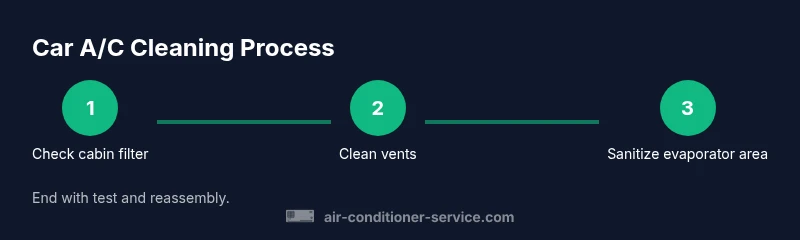
Step 1: Inspect the cabin air filter
The cabin air filter is your first line of defense against dust, pollen, and odors. Start by locating the filter housing, usually behind the glove box or under the dash. Remove the cover, take out the old filter, and inspect its condition. If it is densely packed with debris or discolored, replace it with a fresh filter. Even if it looks acceptable, replacing it as part of a car air conditioner clean routine can improve airflow and reduce strain on the blower. This step sets the foundation for the rest of the cleaning.
Step 2: Replace the cabin air filter
Install the new filter with the correct orientation, matching arrows on the frame to the airflow direction. Reattach the housing securely and test the blower at low speed before driving. A properly seated filter prevents debris from entering the ducts and minimizes odors. Keep the old filter in a sealed bag for recycling or disposal according to local rules. Taking this step ensures the subsequent cleaning stages are effective and that you maintain good air quality inside the cabin.
Step 3: Clean exterior vents and intake grilles
Dust and leaves can accumulate around the exterior vents and the intake grille, reducing airflow substantially. Use a soft brush or cloth to remove loose debris from the slats. For stubborn grime, dampen the cloth lightly with a mild solution and wipe along the edges of each vent. Avoid soaking into the dashboard or electronics. This preparation helps the interior cleaning stages reach the ducts more efficiently and reduces particulate intrusion during operation.
Step 4: Vacuum blower housing accessible area behind the dash
If you can access the blower housing (often behind the glove box), use a narrow nozzle attachment to vacuum visible dust and debris. Do not probe deep into sealed components; electricity and moisture are hazards. Vacuuming fresh debris improves airflow and reduces the chance of future buildup. For safety, power off the vehicle during this step and wait a few minutes if you smell any chemical residue from cleaners used later in the process.
Step 5: Treat and sanitize the evaporator area safely
The evaporator is a delicate component that can harbor mold and musty odors. Use a spray designed for automotive HVAC systems and apply it into the intake area from inside the cabin—avoid soaking electrical components. Let the product dwell for the time specified on the label, then wipe away any residue with a clean cloth. Do not spray water directly into the evaporator housing. This step addresses the most stubborn odors and prepares the system for deodorizing.
Step 6: Deodorize and quick odor removal
After sanitation, deodorize the interior using a product designed for HVAC applications or a simple fragrance sachet that won’t mask odors with moisture. Run the A/C on fresh air for several minutes to circulate the treatment through the ducts. If odors persist, repeat treatment or consider a professional fogging service designed for automotive use. This helps maintain a comfortable cabin environment until your next cleaning.
Step 7: Reassemble and test the system
Reassemble any panels you removed, ensure all connectors are properly seated, and replace the cabin air filter cover. Start the car and run the A/C on both low and high fan speeds with a cold setting to verify airflow and cooling efficiency. Listen for unusual noises and check for any leaks around the filter housing. A successful test confirms you’ve completed the car air conditioner clean routine effectively.
Maintenance schedule and when to call a pro
To keep the system performing well, schedule a light cleaning every 6–12 months, depending on usage and environment. If you notice persistent odors, reduced airflow, or moisture around vents, consult a professional HVAC service that specializes in automotive systems. A professional inspection can identify mold behind the evaporator core and ensure there are no refrigerant or duct leaks. As Air Conditioner Service notes, regular maintenance protects airflow quality and preserves component life.
Tools & Materials
- Cabin air filter (new)(Choose model-specific filter for your vehicle)
- Replacement cabin air filter(Same as above but additional backup if needed)
- Vacuum cleaner with narrow nozzle(Reach behind dash and into vent openings)
- Microfiber cloths(Lint-free for wiping and drying)
- Soft brush(Gently loosen debris from vent slats)
- Mild cleaning solution(Automotive-safe cleaner or diluted soap)
- Spray bottle(Mist cleaner lightly; avoid soaking)
- Protective gloves(Nitrile recommended)
- Face mask(Protect from dust and mold spores)
- Flashlight(Illuminate tight spaces)
Steps
Estimated time: 60-90 minutes
- 1
Inspect and remove the cabin air filter
Locate the filter housing behind the glove box or dash panel. Remove the cover, pull out the old filter, and inspect its condition. If dirty or discolored, replace with a fresh filter. This establishes the baseline for airflow and odor control.
Tip: Have a flashlight ready; note the filter orientation before removal. - 2
Replace the cabin air filter
Insert the new filter with the arrows pointing in the direction of airflow. Reattach the housing securely and run the blower at low speed to confirm proper seating. Proper installation prevents debris from entering ducts and reduces future odor issues.
Tip: Dispose of the old filter according to local guidelines. - 3
Clean exterior vents and intake grilles
Use a soft brush or microfiber cloth to remove loose debris from vent slats. If grime remains, dampen the cloth slightly and wipe along edges without soaking electronics. Clean vents improve air distribution and prepare duct access for deeper cleaning.
Tip: Avoid saturating the dashboard or electrical components with liquid. - 4
Vacuum blower housing accessible area
With power off, use a narrow nozzle to remove visible dust from the blower housing area behind the dash. Do not probe sealed components; moisture can cause damage. Vacuuming now reduces future buildup and makes later steps more effective.
Tip: If you sense chemical residue, pause and ventilate before continuing. - 5
Treat and sanitize evaporator area safely
Apply an automotive HVAC cleaner into the intake area from inside the cabin. Avoid soaking electrical components; follow label dwell times. Wipe residue with a clean cloth after the required contact time to reduce mold and odors.
Tip: Do not spray water directly into the evaporator housing. - 6
Deodorize and quick odor removal
After sanitation, use a dedicated HVAC deodorizer or a light fragrance that doesn’t introduce moisture. Run the A/C on fresh air briefly to circulate the treatment. If odors persist, repeat or seek a professional deodorizing service.
Tip: Ventilate while using deodorizers to avoid over-saturation inside the cabin. - 7
Reassemble and test the system
Reinstall any panels you removed and ensure connectors are secure. Start the car and test the A/C at low and high speeds with cold settings. Listen for irregular noises and check for leaks around the housing. A successful test confirms the job is done.
Tip: Document any unusual findings for future reference.
Common Questions
Is it safe to clean the car A/C at home?
Yes for basic tasks like filter and vent cleaning; deeper evaporator cleaning should be performed by a professional.
Yes for basic cleaning, but deeper evaporator work should be done by a pro.
How often should I replace the cabin air filter?
Refer to your vehicle's owner manual for guidance and replace when dirty or as recommended by the manufacturer.
Check the manual for your car and replace the filter when it looks dirty.
Can I clean the evaporator without removing the dash?
Direct evaporator cleaning typically requires professional disassembly in most vehicles; DIY options are limited and should be approached with caution.
Direct evaporator cleaning usually needs a pro; DIY access is limited.
What cleaning products are safe for car A/C cleaning?
Use automotive HVAC cleaners that are EPA-approved and follow label directions. Avoid harsh solvents near electrical parts.
Choose EPA-approved automotive HVAC cleaners and follow the label.
Why does my car A/C still smell after cleaning?
Persistent odors can come from lingering mold, evaporator contamination, or leaks. A deeper professional assessment may be needed.
If odors stay after cleaning, a deeper check by a pro may be necessary.
Watch Video
The Essentials
- Inspect and replace the cabin air filter for better airflow.
- Clean vents and accessible ducts to remove debris.
- Sanitize evaporator areas safely and allow proper drying.
- Test the system and set a maintenance schedule.