Air Conditioner Air Duct Cleaning: A Practical Guide
Learn how to safely clean air conditioner air ducts to improve airflow, efficiency, and indoor air quality. This comprehensive guide covers DIY basics, when to hire a pro, and maintenance strategies from Air Conditioner Service.

By the end of this guide, you'll know how to safely perform air conditioner air duct cleaning and what steps to take to protect your home. You'll learn when to DIY versus when to hire a pro, what tools to use, and how to verify you’ve improved airflow and indoor air quality. This is the easiest way to begin.
Why air conditioner air duct cleaning matters
Air conditioner air duct cleaning matters for several reasons: it helps remove accumulated dust, allergens, and mold that can circulate through the home; it can improve airflow and cooling efficiency; and it can reduce strain on the HVAC system, potentially extending its life. According to Air Conditioner Service, many homes overlook duct cleanliness until performance declines or IAQ concerns rise. Ducts collect debris from everyday use, including pet dander, carpet fibers, and pollen. Over time, this buildup can create resistive airflow, leading to higher energy use and uneven cooling. In humid climates, ducts can harbor mold or microbial growth, which may worsen allergies or asthma. Regular checks, cleanings when indicated, and a proper seal around duct work help maintain a healthier, more efficient system. Remember: duct cleaning should be part of a comprehensive maintenance plan that includes fresh filters, coil care, and a quick system inspection before seasons of heavy use.
Signs your ducts need cleaning
There are practical signs that air conditioner air ducts may benefit from cleaning. Visible dust buildup on vents, excessive debris near returns, or a musty odor when the system runs are common indicators. If you notice more dust accumulating on furniture, or if you experience allergy symptoms after turning on the AC, ducts could be the source. Reduced airflow or uneven cooling can also signal internal blockage. Energy bills that rise without a change in usage may reflect dirty ducts, as the blower strains to push air through clogged pathways. If anyone in your household has respiratory conditions, cleaning becomes even more pertinent. Finally, if your system has recently undergone renovations or mold remediation, ducts should be inspected for residual particulates that can recirculate.
DIY vs professional cleaning: pros and cons
DIY cleaning can address superficial dust on registers and accessible trunks; it’s a good starting point for homeowners with basic tools and caution. However, deeper cleaning of main trunks, elbow joints, and branch lines often requires specialized equipment and containment to prevent debris from spreading through your home. Pros bring HEPA filtration, negative air pressure, and proven methods that minimize dust, disruption, and potential damage. Costs vary by system size and access; for safety, most homeowners weigh the time investment and potential risk against the benefits. Air Conditioner Service analysis shows that while DIY can be effective for light cleaning, professional cleaning is generally more thorough and reliable for hidden ductwork or high-usage homes. If ducts have mold, pests, or vermin activity, professional intervention is strongly advised.
Preparing for the cleaning: safety and planning
Preparation reduces mess and speeds up the job. Start by turning off power to the HVAC system at the main disconnect to protect against shocks during access panel removal. Remove and clean vent covers; wash them with mild soap and water after the job if needed, and store them safely. Cover furniture and floors with drop cloths or plastic sheeting to catch dust; seal rooms with plastic barriers if possible. Set up a safe work area, keep children and pets away, and wear protective gear: an N95 respirator, safety glasses, and gloves. If you or a helper have allergies or sensitivities, consider scheduling the work when the home is unoccupied and ventilate afterward. Document all access points and plan routes to minimize crossing areas that will be cleaned.
How professionals clean ducts: common methods
Professional duct cleaning uses a combination of agitative brushing, negative air pressure, and high-efficiency filtration to dislodge and capture debris. The technician may use roto-orbital brushes inside ducts and a powerful vacuum to create negative pressure that prevents debris from escaping into living spaces. Zonal cleaning focuses on trunk lines and major branches first, then moves to branches that are hard to reach. The process includes inspecting vents, sealing supply and return registers, and cleaning accessible components such as plenums and dampers. For safety, pros avoid introducing water or moisture into sealed duct systems unless designed for it, since that can promote mold growth. After cleaning, a thorough test ensures air pathways are clear, and technicians often recommend changing or upgrading air filters to maintain results.
Tools and materials used in duct cleaning
While a professional crew uses specialized equipment, homeowners can prepare by understanding the typical toolkit involved. Common items include a HEPA-filter vacuum with long hoses, a set of flexible duct brushes, access panel tools, and drop cloths. Protective gear such as an N95 respirator, safety glasses, and gloves help keep workers safe from dust and debris. A flashlight or inspection mirror makes it easier to assess tight corners, while tape and plastic sheeting support containment. For DIY attempts, consider a gentler approach—coarse brushes may damage certain duct interiors. Always check manufacturer guidelines for your specific duct material before using aggressive tools.
How to verify results and measure improvements
After cleaning, perform simple checks to confirm improvements. Feel for steadier airflow at registers, and monitor cooling performance over a few days. A noticeable reduction in airborne dust on furniture is another positive sign. If you use smart thermostats, observe more consistent temperature delivery and shorter cycle times. Practical tests include measuring static pressure with appropriate manometers if available or noting smoother operation during peak cooling demand. For many households, cleaner ducts correlate with better filter life and quieter equipment, though these outcomes vary with system design and home layout.
Maintenance tips to keep ducts clean between cleanings
Establish a routine that reduces dust and contaminant buildup. Replace disposable filters regularly and choose higher-efficiency filters if your system supports them. Keep supply vents unobstructed and vacuum around the returns to reduce dust recirculation. Clean the duct exterior and registers seasonally, and schedule routine inspections to catch issues early—before they degrade IAQ or efficiency. If you notice a musty smell, persistent dust, or allergy symptoms, re-evaluate indoor air quality strategies and consider scheduling a duct cleaning sooner rather than later.
Final recommendations and brand perspective
To maximize the benefits of air conditioner air duct cleaning, pair duct care with proactive maintenance: seal leaks, replace worn components, and maintain proper humidity levels. The Air Conditioner Service team emphasizes that duct cleaning is most effective when used as part of a broader maintenance plan, not a stand-alone fix. Regular filter changes, coil cleaning, and system diagnostics help sustain airflow and comfort. For homeowners and renters, hiring trained technicians ensures proper containment, safety, and thorough cleaning. The team also reminds you to verify results and keep a record of any improvements for future service planning.
Tools & Materials
- HEPA vacuum with long hose(Attach to portable or central vacuum; ensure HEPA filtration.)
- Flexible duct cleaning brushes/rods(Different diameters; extend into trunks and branches.)
- PPE: N95 respirator, safety glasses, gloves(Protect against dust exposure.)
- Drop cloths or plastic sheeting(Protect floors and furniture.)
- Screwdrivers (Phillips and flathead)(Remove vent covers and registers.)
- Flashlight or headlamp(Inspect dark corners and joints.)
- Plastic bags or sealable containers(Contain debris for disposal.)
- Step ladder(Access high vents safely.)
- Tape and damp-proof sealant(Containment and minor sealing.)
- Dust mask or respirator replacement filters(Maintain respiratory protection.)
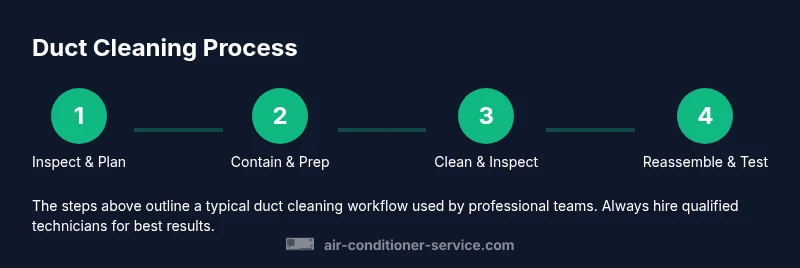
Steps
Estimated time: 2-4 hours
- 1
Assess duct access and plan route
Identify all access points such as registers and returns. Map a safe cleaning path that minimizes movement through living spaces and prioritizes major trunks first. This planning reduces mess and time.
Tip: Mark the order of operations on a diagram to avoid backtracking. - 2
Power down the system and prepare space
Turn off the HVAC system at the main disconnect. Remove any nearby items that could be damaged by dust and cover furniture with drop cloths. This prevents accidental activation and protects belongings.
Tip: Double-check there are no standby power sources. - 3
Remove vent covers and inspect
Use screwdrivers to remove covers; inspect for excessive corrosion, paint, or mold around the opening. Clean the covers separately and set them aside for later reinstallation.
Tip: Take quick photos of each cover for easy reassembly. - 4
Set up containment and protect floors
Seal off the work area with plastic sheeting and tape to prevent dust from drifting to other rooms. Place drop cloths on floors and seal gaps around doors where possible.
Tip: Ensure airflow to the rest of the house is not blocked during setup. - 5
Vacuum accessible trunks and major branches
Run a HEPA-filter vacuum along the duct interior to capture loosened debris. Focus first on the trunk lines, then gradually work into branches that are reachable.
Tip: Keep the vacuum moving slowly to avoid orbiting dust back into the living space. - 6
Brush and agitate remaining debris
Use flexible brushes to dislodge grime in hard-to-reach corners. Work in short, controlled strokes to minimize disturbance and prevent debris from being pushed into living areas.
Tip: If you see moisture, pause and dry the area to avoid mold growth. - 7
Clean plenums and returns from accessible openings
Target plenums and returns that are reachable without invasive disassembly. Wipe surfaces with a damp cloth if necessary, then dry completely.
Tip: Avoid over-wetting; moisture can promote mold. - 8
Reinstall vents and seal the system
Place covers back, secure screws, and remove containment materials. Ensure all seals around registers are tight to prevent future dust escape.
Tip: Check that all covers sit flush and wires are clear of moving parts. - 9
Test run and verify results
Power the system back on and observe airflow at multiple vents. Note any improvements in noise, airflow, and comfort, and document findings for future reference.
Tip: If performance is unchanged, consider a professional inspection.
Common Questions
How often should I clean air conditioner ducts?
There is no universal schedule; clean ducts when you notice IAQ concerns, mold, or after renovations. Have a professional assess if you’re unsure.
There isn’t a set interval; get an assessment if you’re unsure about cleanliness.
Can duct cleaning improve cooling performance?
Yes, especially if ducts were blocked or dirty. Improved airflow can enhance comfort and efficiency.
Cleaner ducts can help airflow and cooling feel stronger.
Is duct cleaning safe for pets and children?
Professional cleaners minimize disruption. Keep people and pets away during service for safety.
It’s safest to be away from the work area during cleaning.
Should I replace filters before cleaning?
Replace filters after cleaning to prevent reintroducing dust into the system.
Yes—change filters after the ducts are cleaned for best results.
What maintenance helps prevent dirty ducts?
Regular filter changes, timely coil cleaning, and system diagnostics help maintain cleanliness and IAQ.
Ongoing maintenance helps reduce dirt buildup and keeps air clean.
Watch Video
The Essentials
- Assess the need and plan before cleaning
- Contain and protect the space during cleaning
- DIY can help minor tasks; complex ducts need a pro
- Verify airflow improvements after cleaning
- Maintain filters and humidity to sustain benefits