Replacement Filter for Air Conditioner: Step-by-Step Guide
Learn how to choose, replace, and maintain a replacement filter for air conditioner. Practical steps, expert tips, and maintenance guidance from Air Conditioner Service.

By the end, you'll be able to identify the correct replacement filter size, install it properly, and set a replacement schedule. You'll need the unit's filter size, a compatible replacement filter, and basic tools. According to Air Conditioner Service, using the right filter and a regular change schedule improves airflow and energy efficiency.
Why replacement filter for air conditioner matters
A replacement filter for air conditioner plays a pivotal role in comfort, energy use, and indoor air quality. When filters clog, airflow drops, the blower works harder, and your system consumes more energy. Regular replacement protects coils and reduces wear on the fan motor. The right filter size and type matter because an ill-fitting filter can create gaps that bypass the filter, or cause air leaks into the return duct. For renters and homeowners, understanding these basics helps you avoid performance losses and higher bills. According to Air Conditioner Service, a clean filter is a low-cost, high-impact maintenance step that keeps your system running efficiently and helps improve indoor air quality for everyone in the home. By choosing the right filter and maintaining a simple replacement cadence, you reduce strain on the blower, minimize dust circulation, and extend the life of essential components.
To start, identify your unit’s filter slot location. In many central systems, the filter sits in a return-air grille or a dedicated filter rack near the furnace or air handler. Some smaller or newer units place the filter behind a removable panel in the cabinet. If you are renting, check your lease or the appliance manual for location specifics. Always power down the system before handling any part of the air intake to prevent injury or electrical shock. Keeping a simple maintenance log or reminder helps you stay consistent—read on for how to choose the right replacement and implement an easy, repeatable process.
Tools & Materials
- Replacement filter (correct size)(Match size to the slot; read the frame for measurements (length x width x depth) and ensure it fits snugly.)
- Soft cloth or vacuum with brush attachment(Use to clean the filter housing and remove loose dust without scattering dust into the air.)
- Mask or eye protection (optional)(Wear when working in dusty cabinets or if you have allergies.)
- Screwdriver (flathead or Phillips, if needed)(Some grills or panels are screws rather than clip-on panels.)
- Gloves (optional)(Protect hands while handling dirty filters.)
Steps
Estimated time: 15-25 minutes
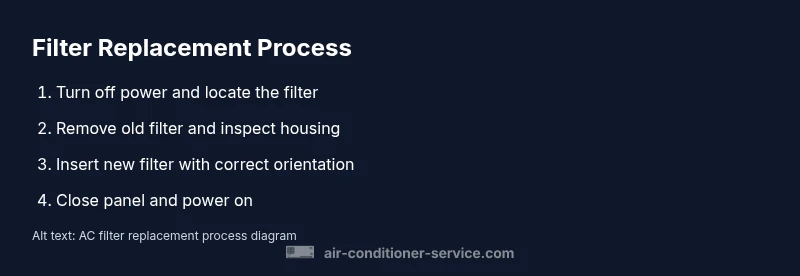
- 1
Power down and access the filter
Turn off the thermostat and switch off the system at the breaker if accessible. Locate the filter slot by following the return-air path to the grille or cabinet. This step ensures your safety and prevents unfiltered air from circulating while you work.
Tip: If you’re unsure where the filter is, consult the unit’s manual or take a quick photo before removing any panels. - 2
Remove the old filter
Slide the filter straight out without tilting to avoid dislodging dust into the air. Note the orientation arrows and the frame size on the edge of the filter. Handling carefully minimizes dust spread.
Tip: Keep the old filter in case you need to confirm size or type before buying a replacement. - 3
Inspect and clean the housing
Check the housing for dust buildup, mold, or signs of moisture. Wipe the slots with a damp cloth or vacuum the area to remove debris. A clean housing helps the new filter seal properly.
Tip: If you find mold, stop and clean with a mild disinfectant, then let dry completely before inserting a new filter. - 4
Choose and verify the replacement
Select a replacement filter that matches the size and has a compatible MERV rating for your needs. Verify the frame orientation so the arrows point toward the blower.
Tip: Avoid filters that are too tight or too loose; a snug seal prevents air bypass. - 5
Insert the new filter
Slide the filter into the slot with the arrows pointing toward the unit. Ensure it sits flat and fully covers the opening without gaps. Recheck fit from the grille side or the access panel.
Tip: Give the filter a gentle push to ensure full seating and prevent air leaks. - 6
Reassemble and power on
Close the access panel or grille. Restore power at the breaker and switch the system back on. Listen for normal airflow and check for any unusual noises.
Tip: If the system runs unusually loud or air comes out weak, recheck the filter seating or orientation. - 7
Document the change and schedule the next replacement
Note the date of replacement and set a reminder for the next change based on usage, environment, and manufacturer guidance. This creates a sustainable routine and reduces guesswork.
Tip: A simple calendar reminder or smartphone alert helps you stay consistent.
Common Questions
How often should I replace my air conditioner filter?
Most homes replace filters every 1-3 months, but frequency depends on usage, environment, and filter type. Homes with pets or smokers may need more frequent replacements. Always follow the manufacturer’s guidance and check the filter monthly to assess dirt buildup.
Most homes should replace filters every 1-3 months, but check monthly for dust buildup and adjust as needed.
What size replacement filter do I need?
Measure the existing filter frame or refer to the unit’s manual to determine the exact size (length, width, and thickness). Use the size printed on the frame if available. If in doubt, remove the old filter and bring it to a hardware store for comparison.
Measure the frame or check the manual to confirm the exact size before buying a replacement.
Can I wash or reuse disposable filters?
Most disposable filters should not be washed and reused. Some washable filters exist, but they require proper cleaning and drying before reinsertion. Always follow the manufacturer’s instructions for reusable options.
Don’t reuse disposable filters unless they’re specifically labeled washable and reusable with clear cleaning instructions.
What if the system doesn’t seem to improve after replacement?
If airflow remains weak after replacement, check for obstructions in the return air path, inspect for a blocked duct, or consider a higher-MERV filter if the system supports it. If problems persist, consult a professional.
If airflow doesn’t improve after replacement, check for blockages and confirm the filter orientation, then seek professional help if needed.
Is a higher-MERV filter always better?
Higher MERV filters capture more particles but can restrict airflow in undersized systems. Ensure your unit can handle the filter without reducing airflow, and balance air quality with system performance.
Higher MERV isn’t always better—make sure your system can handle it without reducing airflow.
Watch Video
The Essentials
- Check filter size before buying
- Install filters with correct orientation
- Set reminders to replace regularly
- Keep a maintenance log for each unit
- Avoid running the system with a dirty or missing filter