Air Conditioner Maintenance Checklist: Practical Guide for Homeowners
Learn how to use an air conditioner maintenance checklist to keep cooling efficient, extend equipment life, and prevent breakdowns. Step-by-step guidance, tools, and safety tips for homeowners and renters.

This guide provides an air conditioner maintenance checklist you can follow seasonally to keep your cooling system efficient and reliable. It covers filters, coils, condensate drainage, electrical connections, and performance checks. Gather basic tools, ensure safety, and follow the steps below to inspect and refresh key components. Use the checklist regularly to prevent breakdowns and optimize energy use.
What is an air conditioner maintenance checklist
An air conditioner maintenance checklist is a practical, repeatable set of tasks that keeps your cooling system operating at peak efficiency. For homeowners, using a checklist helps ensure you don’t miss critical steps between seasons. The goal is not to overhaul the system every time, but to perform small, consistent actions that prevent dirt buildup, airflow restrictions, and minor faults that can escalate into expensive repairs. According to Air Conditioner Service, a practical maintenance routine empowers you to take control of comfort and costs, while still keeping safety at the forefront.
First, identify the parts you regularly inspect: filters, condensate drainage, coils, fans, and electrical connections. These components directly influence performance and energy use. A clean filter reduces resistance and improves airflow; dirty coils reduce heat transfer; a blocked drain can lead to humidity problems and water damage. The checklist approach also helps you track what’s been done and when it’s due next. For renters, a checklist makes it easier to document maintenance to share with landlords or property managers and justify preventive steps.
When you’re starting, gather the tools and supplies you’ll need. Keep a dedicated storage bin with a spare filter, microfiber cloths, a soft brush, a small battery-powered vacuum, and a non-abrasive cleaner appropriate for coils and condensate pans. With the right plan, you’ll reduce energy waste, extend equipment life, and minimize nuisance outages during heat waves. The following sections describe why this approach matters, what to check by season, and how to perform the tasks safely and effectively.
Why regular maintenance matters for efficiency and longevity
Regular maintenance is more than good habits; it’s a proactive approach to keeping your air conditioner running efficiently and reliably. When you remove dirt and debris, improve airflow, and verify refrigerant and electrical health, your system can reach its design cooling capacity with less effort. A well-kept unit tends to consume less energy, stays cooler, and experiences fewer unexpected outages during peak heat.
Air Conditioner Service analysis shows that households with a consistent maintenance routine report fewer emergency service calls and a lower likelihood of performance decline over time. While we avoid claiming exact percentages here, the takeaway is clear: consistent upkeep helps you protect comfort and avoid costly repairs. The maintenance cadence matters too: some tasks benefit from a pre-season push, while others are better spaced through the year. By scheduling these checks, you’ll identify worn components early and plan replacements before a breakdown occurs. The result is a more predictable cooling experience and a longer life for compressors, fans, and coils. You’ll also benefit from better air quality as dust and mold are kept under control, which matters for households with sensitive occupants.
Seasonal tasks and a practical maintenance schedule
A practical maintenance schedule aligns with how you use your air conditioner through the year. In spring, you’ll prepare for the upcoming cooling season: replace or clean air filters, inspect the outdoor unit’s fins, and verify drainage paths. In peak summer, you’ll focus on airflow and condensate handling, monitor thermostat performance, and confirm proper refrigerant flow when safe to do so. In autumn, you’ll check for signs of wear on belts or fans and prepare for lower demand. In winter, you’ll keep the system idle for longer cleaning windows and ensuring protective cover removal if used, while checking humidity control and comfort settings.
To make this easy, you can set a simple cadence: perform a thorough filter check every 1-3 months, inspect and clean the outdoor unit twice per year, and schedule a professional inspection annually. The exact cadence depends on home use, presence of pets, allergies, and whether your system is ducted or a ductless mini-split. Use the checklist as a living document and update it after each seasonal task.
How to run the maintenance safely and effectively
Safety first: never service electrical components while the system is energized. Start by powering down at the thermostat and the outdoor disconnect, then verify with a non-contact voltage tester if available. With safety confirmed, inspect and replace the air filter if dirty or clogged. Self-serve cleaning of accessible coils, fans, and the condenser area can be done with a vacuum, microfiber cloths, and a soft brush. Use a coil-safe cleaner following manufacturer instructions and avoid abrasive scrubbers.
Next, check the condensate drain for blockages and ensure water flows freely into the Pan or tray. If you find standing water, clear the line with a safe method such as running a small amount of water and using a wet/dry vacuum from the drain opening. Inspect electrical connections for signs of wear, corrosion, or loose terminals. If you’re unsure about capacitors or refrigerant lines, call a pro. Finally, test the system by turning the power back on and letting it reach normal temperature; listen for unusual noises, and observe airflow and temperature drop.
Troubleshooting tips and warning signs
Even with a routine maintenance checklist, you may notice issues that require professional attention. Common warning signs include poor cooling performance, unusual noises, frequent cycling, frozen evaporator coils, or water leaks around the indoor unit. If your air conditioner is not cooling as expected, check the thermostat settings and verify that air is flowing through all supply vents. A dirty filter or blocked coil can reduce performance quickly, so address those first. Keep in mind that refrigerant leaks and electrical faults demand licensed technicians.
Pro tip: document the date of each maintenance task and the observed conditions so you can compare seasonal performance. Note: if you see ice on the coil, turn the unit off and consult a pro; running an iced system can cause compressor damage. Also avoid using high-pressure water on coils; pressure can bend fins and cause short-circuits. If you’re unsure about any step, pause and call for help.
When to call a professional and how to maintain cadence
Some tasks exceed DIY scope and require a licensed technician. If you notice persistent cooling issues after cleaning, an unusual smell, refrigerant concerns, or electrical buzzing, contact a pro promptly. Schedule a professional inspection at least once a year, ideally before the cooling season begins. A pro can verify refrigerant charge, diagnose compressor performance, test electrical components, and ensure ductwork is sealed and leak-free.
Use your maintenance checklist to create a diagnostic trail. Keep a log of service items, dates, and outcomes, so the next technician has a clear history. When you maintain an ongoing cadence, you’ll extend equipment life, improve energy efficiency, and keep your home comfortable even during the hottest days.
Tools & Materials
- Screwdriver set (Phillips #2 and flathead)(Used to remove access panels and secure screws)
- Vacuum with brush attachment(Clean dust from filters, coils, and trays)
- Soft bristle brush(Loosen debris from coils and fins without bending them)
- Microfiber cloths(Wipe surfaces and dry components after cleaning)
- Replacement air filters (MERV 8-11)(Keep spares on hand for seasonal changes)
- Non-abrasive coil cleaner(Follow manufacturer directions; avoid harsh chemicals)
- Gloves and safety glasses(Protect hands and eyes during handling and cleaning)
- Non-contact voltage tester (optional)(Safely confirm power is off before service)
Steps
Estimated time: 60-90 minutes
- 1
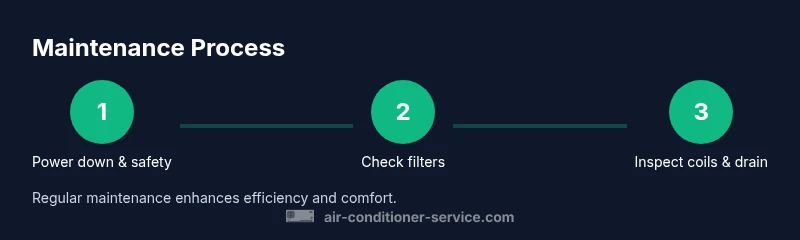
Power down and safety verification
Turn off the thermostat and outdoor disconnect. If available, use a non-contact tester to confirm there is no live power at the unit. This prevents shock and protects you during inspections.
Tip: Double-check that both indoor and outdoor power sources are disconnected before touching any components. - 2
Inspect and replace air filter
Remove the old filter and inspect its condition. Replace with a new filter suited to your system’s airflow needs. A clogged filter reduces efficiency and can cause coil icing.
Tip: If you have pets or allergies, consider replacing filters more frequently. - 3
Clean coils and fins
Gently vacuum the evaporator coil and accessible condenser fins. Use a soft brush to lift embedded dust without bending the fins. Apply coil cleaner if needed per manufacturer directions.
Tip: Work from the inside out and avoid bending thin fins; a fin comb can help restore straightness if needed. - 4
Check condensate drain and pan
Inspect the condensate drain for blockages and ensure water flows freely into the pan or drain line. Clear minor clogs with light probing or a small amount of water, then vacuum any residual moisture.
Tip: A blocked drain can cause moisture damage; address it promptly to prevent water problems. - 5
Inspect electrical connections
Look for loose terminals, signs of corrosion, or burnt smells near the disconnects and control boards. Do not touch live wiring; if you see issues, call a professional.
Tip: If you’re unsure about capacitors or refrigerant lines, skip this step and contact a pro. - 6
Test system performance
Restore power and set the thermostat to cool mode. Confirm airflow, listen for unusual sounds, and verify temperature differential between return and supply air.
Tip: Record any anomalies for the next service visit and note outdoor temperature for reference.
Common Questions
How often should I perform the air conditioner maintenance checklist?
Most homes benefit from a seasonal check, with a deeper review before the cooling season. Adapt frequency based on usage, pets, and local conditions. Following a regular cadence will help you spot issues early and plan preventive actions.
Do a quick seasonal check, then a deeper one before the cooling season. Adjust according to usage and environment.
Can I perform maintenance without turning off power?
Power must be off before inspecting or touching any electrical components. Use a non-contact tester to confirm and never rely on switches alone.
Power off first; safety matters. Verify no power is present before starting.
What are signs that require a professional?
Persistent poor cooling, unusual noises, ice on the evaporator coil, or refrigerant smells indicate issues that a licensed technician should assess. Do not ignore refrigerant concerns or electrical buzzing.
If cooling is poor or you hear odd noises, call a professional.
How often should filters be replaced?
Replacement timing depends on filter type, usage, and household conditions. Check the filter monthly and replace it when dirty, following the manufacturer’s guidance.
Check monthly and replace when dirty, especially with pets or allergies.
Is it safe to clean outdoor coils myself?
Yes, with caution. Use a vacuum and soft brush, and avoid high-pressure sprays that can bend fins. If in doubt, consult a professional for coil cleaning.
You can clean coils gently, but avoid high-pressure water. Seek help if unsure.
What should I do if I suspect a refrigerant leak?
Refrigerant leaks require a licensed technician. Do not attempt to recharge or seal a leak yourself; this is a job for a pro with proper safety and equipment.
If you suspect a leak, call a licensed technician right away.
Watch Video
The Essentials
- Use the checklist to prevent missed maintenance.
- Regular cleaning improves efficiency and comfort.
- Seasonal tasks prevent unexpected outages.
- Safety always comes first during DIY checks.
- Document maintenance history for future service