How to Install a Portable AC Without a Window
Learn how to vent and install a portable air conditioner without a window. This step-by-step guide covers safe vent paths, required tools, and maintenance tips from Air Conditioner Service to keep your space cool and comfortable.

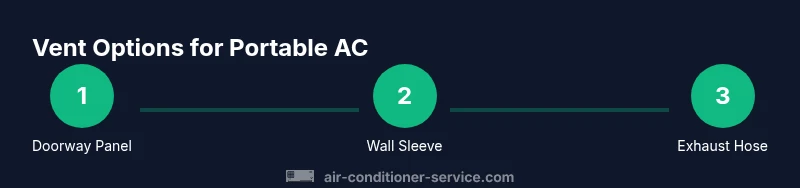
Goal: vent a portable air conditioner without a window using safe, code-compliant options. You can use a doorway or wall vent kit, a through-wall sleeve, or professional installation. Always ensure exhaust air exits outdoors and condensation is managed. This quick answer highlights safety, energy efficiency, and when to seek professional help from Air Conditioner Service.
Overview: venting a portable AC without a window
Venting a portable air conditioner without a window is not the typical setup, but it can be feasible with careful planning. According to Air Conditioner Service, homeowners often underestimate how much heat and moisture need to be expelled and how a proper vent path prevents re-entry of warm air. The goal is to exhaust hot air outdoors while preventing leaks and drafts that undo cooling. You’ll generally rely on temporary solutions like a doorway panel, a through-wall sleeve, or a professional vent kit. These methods can improve comfort in rooms without easy window access, but they may require modifications to doors or walls and could affect warranties or local codes. If you rent, obtain written permission. Plan for condensation drainage, power needs, and weather conditions that influence vent effectiveness. A thorough assessment up front saves time and protects your space from moisture and pests.
In this context, the right approach blends practicality with safety. You’ll choose a path that minimizes air leaks and maximizes exhaust efficiency. Remember that not every home is suited for non-window venting, and in some cases a window kit or a different cooling strategy may be the better long-term choice. Air Conditioner Service’s guidance emphasizes safety, code compliance, and energy efficiency as you evaluate options.
Safer Alternatives to Non-Window Venting
Before you cut or drill, explore safer, reversible options. A portable AC placed near a window with a temporary vent kit is often the simplest route. If the space allows, consider a dehumidifier or a dedicated fan to reduce moisture and improve comfort. For renters or multi-unit dwellings, a portable unit with a hose exit through a balcony, porch, or exterior door can be a practical compromise. Air Conditioner Service analysis suggests evaluating whether the added complexity of a non-window vent is truly necessary or if a different cooling approach will meet your comfort goals with less risk. Always check lease terms and local codes before making changes to walls, doors, or building exteriors.
Key considerations include ease of reversion (how easily you can restore the space to its original state), potential airflow restrictions, and the reliability of drainage. If you decide to pursue non-window venting, document the plan and ensure all components are rated for outdoor exposure to prevent corrosion and damage over time.
Venting Through a Doorway: Panel and Weatherstripping Essentials
A doorway vent panel can provide a temporary but effective vent path when a window is not available. Start with a sturdy doorway vent kit designed for portable AC exhaust hoses. Install weatherstripping around the door to seal gaps, and use a panel to direct the exhaust through the opening. The goal is to create a tight seal so cool air isn’t escaping back into the room and hot air isn’t leaking into adjacent spaces. This method is typically reversible and jurisdiction-friendly when you reverse the installation after the cooling season. Proper panel placement minimizes air leakage, improves efficiency, and helps maintain indoor humidity levels. Air Conditioner Service recommends verifying that the exhaust hose length stays within the manufacturer’s specification to avoid kinking or undue backpressure.
Begin by measuring the doorway, selecting a panel that accommodates the exhaust hose diameter, and preparing a clean edge for a snug fit. Then, secure the panel, attach the hose, and run a quick test to check for leaks. Finally, add foam gasket tape or weatherstripping along the panel’s edges for a tighter seal.
Through-Wall Venting: Planning, Sleeves, and Weatherproofing
Through-wall venting creates a more permanent vent path when you lack a window. Plan carefully: determine the closest outdoor area, check for plumbing or electrical lines in the wall, and choose a sleeve or vent kit rated for exterior use. Create a ventilation opening with precise measurements, install a sleeve or duct through the wall, and seal around the opening with exterior-grade caulk and interior foam insulation. Water intrusion is the biggest risk, so weatherproofing is essential. A properly installed sleeve keeps moisture out, minimizes drafts, and maintains efficiency. If you’re not comfortable with cutting drywall or masonry, consider professional installation. Air Conditioner Service notes that incorrect through-wall venting can lead to energy loss, mold growth, and potential warranty concerns.
This approach typically requires a professional assessment to ensure structural integrity and code compliance. If a through-wall installation is pursued, schedule a weatherproofing review to prevent leaks during rain or snow. You’ll also need to ensure proper condensation drainage so you don’t create standing water behind the wall.
Vent Kit Compatibility and Installation: What to Look For
Selecting the right vent kit is about compatibility with your unit’s exhaust hose, door type, or wall opening. Look for kits with adjustable hose diameters, rigid or semi-rigid ducts, and secure mounting options. The kit should include a foam gasket or weatherstripping to seal gaps and a clamping method that won’t crush the hose. Many kits come with a backdraft damper to prevent outdoor air from entering when the unit is off. Check for exterior-rated materials to withstand weather conditions. Always follow the manufacturer’s recommendations for hose length and elbow angles to avoid backpressure that reduces cooling efficiency. Air Conditioner Service suggests prioritizing certified kits that meet safety standards and local code requirements, even if you’re opting for a temporary solution.
Before you install, gather all components and lay out the steps. Don’t force connectors or force-fit parts, which can cause leaks. If you must modify a wall or door, proceed with caution and document changes for future reference.
Electrical Safety, Drainage, and Moisture Management
Portable AC units require a dedicated power source with appropriate amperage. Do not run hoses across walkways or through humid areas where electrical risks exist. Keep the exhaust hose away from electrical outlets and ensure cables are well-organized to prevent tripping hazards. drainage is essential; most units require a hose to a floor drain or a condensate bucket. If you’re using non-standard vent paths, verify that the hose does not create a backflow path or trap humidity in the room. Drainage and moisture management are critical to prevent mold growth and water damage. Air Conditioner Service underscores that proper venting and drainage not only improve comfort but extend the unit’s service life and safety.
Test the setup after assembly. Listen for air leaks, inspect seals, and check for any moisture accumulation around the vent and door panel or wall sleeve.
Performance, Energy Efficiency, and Long-Term Considerations
Vent paths without a window can affect efficiency. While a well-sealed non-window vent can perform comparably to window venting, any air leaks or improper seals will cause the unit to work harder and consume more energy. Expect some increase in cooling time and potentially more moisture removal in high-humidity climates. If you notice reduced airflow or excessive heat returns, reevaluate the vent path, seals, and drainage. Regular maintenance—cleaning filters, inspecting seals, and ensuring the exhaust path remains clear—helps sustain efficiency. Air Conditioner Service emphasizes that if you observe persistent performance drops, reassess the entire venting strategy and consider a professional assessment for long-term solutions.
For those planning a long-term non-window solution, budget for periodic inspections. A small upfront investment in a safe, properly sealed vent path can prevent costly damage from moisture intrusion and heat buildup later on.
When to Call a Professional and Code Considerations
If you’re unsure about cutting into a wall, creating a through-wall sleeve, or modifying a door, consult a licensed HVAC technician. Local building codes may restrict certain venting configurations or require permits. A pro can design a compliant vent path, seal against weather, and verify that drainage and electrical connections meet safety standards. If you’re renting or in a multi-unit building, consult building management before undertaking any non-standard venting. The goal is a safe, efficient cooling setup that doesn’t put you at risk or void warranties. Air Conditioner Service advises seeking professional help when structural alterations or code requirements are involved, ensuring you achieve reliable cooling without compromising safety.
Tools & Materials
- Exhaust hose and venting kit compatible with your portable AC(Ensure diameter matches your unit's outlet; avoid adapters that introduce leaks)
- Doorway vent panel or through-wall vent sleeve(Choose a kit rated for exterior use and for the height and width of your doorway or wall opening)
- Weatherstripping and foam gasket tape(Seal all gaps around the vent panel or sleeve to prevent drafts)
- Measuring tape and pencil(For precise cutting and alignment)
- Utility knife or drywall saw(Used for opening a doorway slot or wall hole; follow safety guidelines)
- Caulk or exterior sealant(Waterproof seal around the exterior vent opening)
- Insulation material (foam board or pipe insulation)(Helps reduce heat gain around openings)
- Drip pan or condensate catcher (if needed)(Use if the unit’s drainage hose cannot reach a drain)
- Safety gear (gloves, eye protection)(Wear during cutting and installation)
Steps
Estimated time: 90-120 minutes
- 1
Assess space and compatibility
Evaluate the room layout, door usage, and whether a non-window vent path is permitted by lease or code. Check your unit’s exhaust hose length and diameter to match with a vent kit. This ensures you don’t create backpressure or leaks that reduce cooling efficiency.
Tip: Document any required permissions and keep a copy of product specs for reference. - 2
Measure vent path and select kit
Measure the door opening or wall section where the vent will pass. Choose a vent kit with adjustable hose ports and a solid mounting frame. A precise kit prevents air leaks and simplifies installation.
Tip: If through-wall, plan for exterior clearance to avoid debris and ensure a weatherproof seal. - 3
Prepare vent opening or doorway
Mark and cut the doorway panel slot or wall opening as required by the vent kit. Use a sharp blade and steady hand to avoid jagged edges. Deburr any rough edges to prevent cuts and ensure a smooth fit.
Tip: Always wear eye protection when cutting; secure the area to prevent injury. - 4
Install vent panel or sleeve
Mount the vent panel in the doorway or install the wall sleeve according to the manufacturer’s instructions. Align the exhaust port with the unit’s hose. Tighten mounting screws without overtightening to avoid warping.
Tip: Seal the exterior edge with caulk to prevent water intrusion. - 5
Attach exhaust hose and seal
Connect the exhaust hose to the portable AC and the vent port. Use foam gasket tape around the joint and clamp securely. Check for any kinks in the hose that could restrict airflow.
Tip: Test fit before final sealing to confirm there are no obstructions. - 6
Set up drainage and power
Position the unit so the drainage hose can reach a drain or condensate container. Use a dedicated outlet with surge protection if possible. Keep cords away from moisture and traffic.
Tip: Do not improvise with extension cords; use a properly rated outlet or hardwire if required by code. - 7
Seal, insulate, and test
Apply interior foam where the vent passes through walls or doors. Seal exterior gaps with caulk and weatherstripping. Run the unit and verify that cool air is exiting outdoors and indoor air isn’t leaking back in.
Tip: Check for drafts after the first cooling cycle and adjust seals as needed. - 8
Evaluate performance and safety
Monitor humidity, temperature, and noise levels. If you notice reduced performance or excessive moisture, reassess the vent path and drainage. Consider professional assessment if issues persist.
Tip: Document any changes for future seasons and to support warranty compliance.
Common Questions
Can I vent a portable air conditioner without a window?
Yes, through a doorway or wall vent kit is possible, but it may involve modifications and code considerations. Always assess feasibility and safety first.
Yes, you can vent a portable AC without a window by using a doorway or wall vent kit, but check safety and local codes first.
Is venting through a door safe for long-term use?
It can be safe as a temporary solution if you seal gaps properly and manage drainage. For long-term needs, a through-wall installation may be more reliable and energy-efficient.
It can be safe as a temporary fix with good sealing and drainage, but for long-term use you may want a more permanent solution.
What about venting through a wall? is that risky?
Wall venting requires planning to avoid structural issues and moisture intrusion. Use a proper sleeve and exterior sealant and follow local codes. Consider professional help if you’re unsure.
Wall venting needs careful planning and proper weatherproofing; hire a pro if you’re unsure.
How do I handle drainage when venting non-window?
Connect the unit’s drainage hose to a drain or use a condensate bucket. Keep hoses elevated and check regularly for clogs or leaks.
Connect the drain hose to a drain or use a condensate bucket, and check for clogs regularly.
Should I hire a professional for non-window venting?
If you’re unsure about cuts, electrical safety, or building codes, a licensed HVAC technician can ensure a safe, compliant solution.
If you’re unsure about cuts or codes, hire a licensed HVAC technician.
Are there warranty considerations with non-window venting?
Some manufacturers require using approved venting methods; altering a unit or vent path may affect warranty. Check your warranty terms and consult the manufacturer if in doubt.
Check warranty terms, as inappropriate venting can affect coverage.
Watch Video
The Essentials
- Assess feasibility before cutting or drilling
- Choose a compliant vent kit with proper seals
- Seal all gaps to maximize efficiency
- Ensure proper drainage to prevent moisture issues
- Consult a professional if codes or safety are unclear