Why Is My Air Conditioner Leaking Water? A Practical Troubleshooting Guide
Struggling with a water leak from your AC? This practical, urgent troubleshooting guide walks homeowners through quick checks, common causes, and clear steps to stop leaks and prevent future water damage.

Most air conditioner water leaks come from condensate drainage issues or evaporator coil problems. The two most likely fixes are clearing a clogged condensate drain line and ensuring the unit is properly tilted so water flows to the drain. If you notice active moisture near electrical components, shut the system off and seek professional help immediately.
Understanding Why Your Air Conditioner Leaks Water
If you’re asking why is my air conditioner leaking water, the most common culprits are condensate drainage problems and evaporator coil issues. Air conditioners remove humidity from indoor air, and that moisture must have a clear path to exit. When the condensate line becomes blocked, or the unit isn’t tilted correctly, water can back up and puddle inside your space or around the outdoor cabinet. In some cases, a frozen evaporator coil melts and leaks water once the ice thaws. Understanding these paths helps you target the right fix fast. According to Air Conditioner Service, many leaks are preventable with routine checks and simple maintenance. By learning the flow of condensate and the coil’s role, you can reduce the odds of water damage and uncomfortable humidity levels in your home.
Key takeaway: start with drainage and airflow as the main culprits before moving to refrigerant or electrical concerns.
Common Causes of Water Leaks in Central and Window ACs
Water leaks aren’t always a sign of a single problem. The condensate drain line is the most frequent culprit; if it’s clogged or kinked, water will accumulate in the drain pan and spill over. A full overflow switch or a cracked drain pan can also trigger leaks. For units with evaporator coils, restricted airflow—often from a dirty filter or blocked return air—can cause the coil to frost and later drip excess water. Improper installation, such as an incorrect tilt or insufficient space for drainage, can exacerbate all of these issues. Finally, extreme humidity or high outdoor temperatures can increase condensate production, pushing a marginal drain beyond its capacity. Regular inspections can catch these issues early and prevent bigger problems.
Home Checks You Can Do Right Now
Begin with the simplest checks. Turn off the unit and inspect the indoor air handler: is there water pooling near the drain pan? Check the condensate drain line for visible clogs or kinks, and clear them if safe to do so. Inspect the air filter; a dirty filter reduces airflow and can contribute to coil freezing. Verify that the thermostat is set to cooling and that the unit is level—an uneven tilt can direct water to the wrong area. If you have a condensate pump, ensure it’s functioning. Finally, inspect the outdoor unit for debris and ensure it has adequate clearance for airflow. These quick checks can resolve many leaks without professional help, and they reduce the risk of further damage.
Frozen Evaporator Coils: How to Identify and Fix
A frozen evaporator coil is a common cause of water leaks after the ice thaws. You might notice reduced cooling, ice on the indoor coil, or frost along the refrigerant lines. The root causes are often restricted airflow from a dirty filter, closed or obstructed return vents, or low refrigerant charge due to a leak. Addressing airflow issues quickly can stop the coil from freezing and subsequent melting water from leaking. If the freezing continues after replacing a dirty filter and removing obstructions, the refrigerant system may have a leak or require a charge by a licensed technician. In such cases, safety and code compliance demand a professional assessment.
Clearing a Clogged Condensate Drain Line
A clogged drain line is the most common reason for indoor leaks. Start by turning off power to the unit and locating the drain line. Use a wet/dry vacuum to suck out the clog from the outlet end if water is backing up. You can also flush the line with a mixture of 1/4 cup white vinegar to 1 gallon of warm water, followed by plenty of clean water to push the blockage through. Do not use chemical drain cleaners, which can corrode the line and damage the system. After clearing, run the AC on a cool setting and observe the drain’s flow. If you have an overflow switch, test it by pouring a small amount of water near the drain pan to ensure it triggers correctly.
Overflow Pan and Float Switch: How They Fail
The condensate pan collects water and the float switch shuts the system off if the pan overfills. A cracked pan, rusted surfaces, or a stuck float can cause false shutoffs or failure to drain, leading to leaks. Inspect the pan for cracks and ensure the float moves freely. If the switch is faulty, replacing it is a straightforward, cost-effective fix compared to a full system replacement. Always power off the unit before inspecting electrical components, and if you’re unsure, call a professional to avoid an electric shock or water exposure.
Tip: Keep the area around the indoor unit clean and dry to prolong pan and switch life.
Tilt, Level, and Drainage Slope
A small tilt can significantly affect drainage. Most indoor units require a slight downward slope toward the condensate line. If the unit is not level, water can pool in the wrong spots and leak onto the floor. Use a level to verify the unit’s orientation and adjust support legs or mounting hardware as needed. If the unit is a window or through-the-wall type, confirm the sill angle ensures a proper drain line outlet. Poor installation is a common cause of persistent leaks and often requires professional remediation.
Safety First: When to Call a Pro
If you notice water near electrical components, strong odors, buzzing noises, refrigerant hissing, or the leak persists after basic at-home fixes, contact a licensed HVAC technician. Refrigerant leaks can be hazardous and require certified handling. Electrical faults pose serious shock risks. A pro can perform a refrigerant charge test, check electrical connections, verify correct airflow, test for refrigerant leaks, and inspect for duct or vent blockages that compromise performance. Timely professional intervention can prevent costly damage and ensure your system runs safely and efficiently.
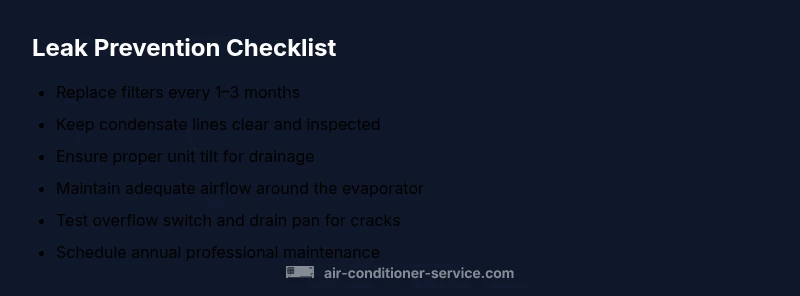
Maintenance and Prevention to Stop Leaks in the Future
Prevention is the best approach. Schedule seasonal maintenance, replace filters every 1–3 months, and keep condensate lines clear. Ensure the unit has proper clearance for airflow, and check for signs of corrosion or leaks in the drain pan. If your home has high humidity, consider upgrading to a higher-efficiency filter or adding a humidity control device. By making a habit of regular checks and cleanings, you’ll reduce the likelihood of leaks and extend the life of your system.
Steps
Estimated time: 45-60 minutes
- 1
Power off the system
Switch off the thermostat and unplug the outdoor unit’s disconnect box if accessible. This prevents shocks and ensures safe handling of water and electrical components.
Tip: Always double-check power at the breaker before touching any wires. - 2
Locate the condensate drain
Find the indoor drain line where water should exit. If you see a buildup at the pan, you’ll know the line is likely blocked.
Tip: Document the route so you can identify it quickly next time. - 3
Clear obvious clogs
Use a wet/dry vac or a plumber’s snake to remove blockages from the drain outlet. Do not force materials that might damage the pipe.
Tip: Wear gloves and eye protection when dealing with mold or debris. - 4
Flush the line
Flush with a vinegar solution (1/4 cup per gallon of water) followed by a good rinse. This helps break up organic matter without harsh chemicals.
Tip: Never use chemical drain cleaners in AC lines. - 5
Check the drain pan and float switch
Inspect for cracks and ensure the float operated freely. Replace if corroded or unreliable.
Tip: A faulty float switch can cause the unit to shut off unexpectedly. - 6
Inspect airflow and filter
Replace dirty filters, clean return vents, and ensure there’s no obstruction around the evaporator. Good airflow reduces coil freezing.
Tip: Plan monthly reminders to replace or clean filters. - 7
Test drainage and airflow again
Turn the unit on to verify drainage flow and that the coil does not start freezing again.
Tip: Pour a small amount of water into the pan to simulate condensation and observe drainage. - 8
When in doubt, call a pro
If the leak persists or you suspect refrigerant or electrical issues, contact a licensed HVAC technician for a thorough check.
Tip: Prompt professional help can prevent expensive damage.
Diagnosis: Water dripping or pooling around the indoor air handler
Possible Causes
- highClogged condensate drain line
- highFull condensate pan or overflow switch
- mediumFrozen evaporator coil due to restricted airflow
- lowImproper installation with poor slope
Fixes
- easyClear the condensate drain line and test drainage
- easyEmpty/clean the condensate pan and verify overflow switch
- easyReplace air filter and improve airflow to prevent coil freeze
- hardCheck refrigerant system for leaks and proper charge by a licensed tech
Common Questions
What causes an air conditioner to leak water inside the house?
Most leaks arise from a clogged condensate drain line, a full or faulty overflow pan, or a frozen evaporator coil due to airflow restrictions. Inspect these areas first before considering refrigerant issues.
Leaks usually come from the drain line, the overflow pan, or a frozen coil caused by restricted airflow.
Is it safe to use the AC if water is leaking?
Turn off the unit to prevent electrical hazards, especially if water is near wiring. If the leak is minor and the drain line is clear, you may resume operation after addressing the drain, but monitor for repeated leaks.
Turn the unit off and assess the drain line; if it keeps leaking, call a pro.
Can a dirty filter cause a leak?
Yes. A dirty filter restricts airflow, which can cause the evaporator coil to freeze and then thaw, creating water leakage after the ice melts.
A clogged filter can lead to a frozen coil and subsequent leaks.
What should I do if the condensate drain line is clogged?
Shut off the system, locate the drain, and remove the blockage with a vacuum or snake. Flush with a vinegar solution and plenty of water, then test drainage.
Clear the drain, flush it with vinegar, and test the flow.
When should I call a professional?
If leaks persist after basic checks, you suspect a refrigerant leak, or you notice electrical components getting wet, contact a licensed HVAC technician promptly.
Persistent leaks or suspected refrigerant/electrical issues require a pro.
How can I prevent leaks in the future?
Perform regular maintenance, replace filters on schedule, keep drainage paths clear, and have annual professional checkups to catch problems before they leak.
Regular maintenance and clean filters prevent many leaks.
Watch Video
The Essentials
- Check the condensate drain first when leaks occur
- A frozen coil often means airflow issues and needs quick attention
- Regular maintenance prevents most leaks
- Call a pro for refrigerant or electrical problems