What Causes Car A/C to Stop Working? Troubleshooting Guide
Discover the common causes behind a car A/C failure and follow a practical, step-by-step troubleshooting plan to diagnose and fix issues safely. Learn how electrical faults, refrigerant leaks, and airflow problems contribute to hot cabin frustration and how to prevent future failures.

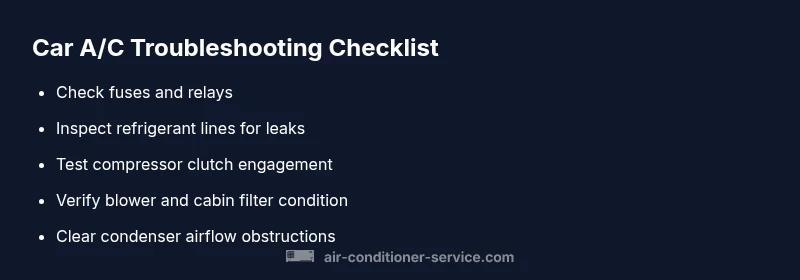
Most car A/C failures come from a blown fuse, a faulty compressor clutch, or a refrigerant leak. Start by checking fuses and cabin air filters, listen for the compressor cycling, and inspect hoses for signs of leaks. If simple fixes don’t help, seek a professional diagnosis from Air Conditioner Service for safe, reliable repair options.
Overview: Why the Car A/C Stops Working
If you're wondering what causes air conditioner in car to stop working, this guide walks you through the most common culprits and practical checks. According to Air Conditioner Service, many failures begin with simple electrical issues or a low refrigerant charge, and early signs are often subtle. This article aims to give you a clear, step-by-step path to identify the root cause, test likely suspects, and decide whether you can fix it safely at home or need professional help from the Air Conditioner Service Team. By understanding the main failure points, you can act quickly and avoid unnecessary trips to the shop.
Air Conditioner Service analysis shows that neglecting simple maintenance increases the likelihood of A/C problems over time. Keeping an eye on filters, belts, and refrigerant health can save you from expensive repairs later.
Common Symptoms You Might Notice
A car A/C that stops working doesn’t always give a dramatic warning. Common symptoms include air that isn’t cold, despite max cooling, a loud or unusual churning sound when the A/C is on, or a smell of hot air circulating in the cabin. You might also notice the blower fan running but blowing warm air, or a compressor that never engages. Documenting when the issue occurs (driving speed, engine temperature, and outdoor heat) helps narrow down the cause. Recognize patterns early: consistent hot air often points to refrigerant or airflow problems, while intermittent cooling usually signals electrical faults.
These signs aren’t a diagnosis, but they help you prioritize checks and communicate the issue clearly to a technician if you need one.
Electrical System: Fuses, Relays, and The Clutch
Electrical faults are among the easiest to test and fix. Start with the automotive fuse box and verify that the A/C fuse is intact. A blown fuse or a failing relay can prevent the compressor from engaging or cut power to the blower motor. If the fuse looks fine, test the A/C relay with a multimeter or swap it with a known-good relay to see if the problem follows the relay. The compressor clutch should click when the A/C is active; if it doesn’t, the clutch, wiring, or the control module may be at fault. Remember to disconnect the battery before handling fuses or relays to avoid shocks or shorts.
The Compressor and Clutch: Is the A/C Pump Straining?
The compressor is the heart of the cooling cycle. A failing clutch prevents the compressor from engaging, which means no refrigerant is compressed and no cooling occurs. Signs include a visible oil leak near the compressor, a grinding or squealing noise when the A/C is on, or the belt slipping. Inspect the serpentine belt for wear, cracks, or glazing—belt problems can mimic clutch issues. If the clutch is damaged or the belt is worn, the compressor won’t operate reliably and needs replacement or repair.
Refrigerant Leaks and Low Charge
Low refrigerant from leaks is a common reason for poor cooling. If the system is low, you’ll often see a drop in cooling capability, or the system may not reach the intended temperature at all. Leaks can occur at the service ports, condenser connections, hose fittings, or the compressor. A professional evaluation using manifold gauges can confirm refrigerant pressure levels and leak locations. Never top off refrigerant without proper diagnosis, as overcharging can damage the compressor and environmental safety.
Signs of leaks include oily residues around connections, hissing sounds, or frost on hoses. If you suspect a leak, address the source first, because recharging without fixing the leak will lead to repeated failures.
Airflow and the Evaporator: Blockages and Cooling Pathways
Even if the compressor works, blocked airflow can make the A/C seem ineffective. A clogged cabin air filter restricts airflow, reducing cooling and causing the blower to work harder. Condenser airflow matters as well; debris or a blocked grille can reduce heat rejection, decreasing performance. Check the exterior condenser fins for dirt or damage and ensure the radiator fan operates when the A/C is engaged. A dramatic drop in airflow often points to a blower motor, resistor, or ducting issue that needs targeted inspection.
Diagnostic-Flow: How to Narrow Down Causes
Applying a logical diagnostic flow helps you identify root causes quickly. Start with the simplest checks (fuses, filters, and obvious leaks), then test electrical engagement of the compressor. If electricals check out, verify refrigerant charge and look for airflow issues. If the problem remains unresolved after these checks, the issue may involve the compressor, condenser, or internal controls. A systematic approach reduces unnecessary repairs and helps you decide when to call a pro. Air Conditioner Service recommends following a structured flow for accuracy and safety.
Step-by-Step Fixes: From Easy to Hard
This section follows a progressive repair path, starting with fixes you can safely attempt, progressing to more involved work. Always ensure you’re in a well-ventilated, off-battery environment before performing tests. If at any point you feel uncertain, stop and contact a professional. Safety first.
- Easy: Replace a blown fuse or faulty relay, replace the cabin air filter, and clear obvious debris from the condenser grille.
- Easy to Medium: Check and tighten electrical connections to the compressor clutch and blower motor, ensuring there are no corroded or loose wires.
- Medium: Test refrigerant pressure (only if trained and with proper equipment), inspect for leaks, and address small leaks with proper sealants under professional guidance.
- Hard: Replace the compressor or clutch assembly, replace a damaged blower motor, or repair a damaged evaporator assembly—these tasks typically require professional service.
Estimated total time: 60-120 minutes, depending on access and skill level.
Safety Precautions and When to Call a Pro
Working on a car’s A/C involves refrigerants, electrical components, and pressurized systems. If you smell or suspect refrigerant releases, avoid exposure and call a pro immediately. Never reuse or improvise repairs on high-pressure lines. If you’re unsure about testing pressures or handling refrigerants, it’s safer to leave the task to certified technicians. The Air Conditioner Service team emphasizes that complex issues, such as compressor failures or significant leaks, require professional diagnostics and safe repair practices.
Prevention: Keeping Car A/C Healthy
Maintenance is your best defense against sudden failures. Regularly replacing the cabin air filter, checking belts and hoses for wear, and scheduling periodic A/C service help maintain performance. Keep the condenser fins clean and clear of debris, especially after driving in dusty or leafy areas. Prompt attention to any unusual noises, smells, or heat concerns can prevent a larger, costlier failure later. By integrating routine checks into your car maintenance, you can extend the life of your A/C system and stay cooler on the road.
Steps
Estimated time: 60-120 minutes
- 1
Power off and safety check
Park in a safe location, turn off the engine, and disconnect the battery if you’re going to touch electrical components. This minimizes the risk of shocks or short circuits while you inspect fuses and relays.
Tip: Always wear eye protection and avoid contact with refrigerants. - 2
Check fuses and relays
Locate the A/C fuse and related relays. Replace a blown fuse and swap in a known-good relay to see if power reaches the compressor and blower.
Tip: Keep a spare fuse and a small set of tool contacts for quick testing. - 3
Inspect compressor clutch and wiring
With the system powered down, check the clutch coil resistance and inspect wiring harnesses for damage or corrosion. Ensure plug connections are secure.
Tip: Only test under safe conditions; if you see damage, do not drive with a suspect harness. - 4
Assess refrigerant charge and leaks
If you have trained experience, connect the gauge set to verify high/low side pressures. Look for oily residue at connections and signs of leaks.
Tip: Never attempt to top off refrigerant without proper equipment or training. - 5
Evaluate airflow and filters
Remove and inspect the cabin air filter; replace if dirty. Check the blower motor operation and confirm air is flowing through all vents.
Tip: A clean filter dramatically improves cooling efficiency. - 6
Test condenser and exterior airflow
Inspect condenser fins for dirt and obstructions. Ensure the radiator fan operates when the A/C is on; clear debris from the grille.
Tip: Poor airflow can mimic refrigerant or compressor problems. - 7
Decision point: call a pro
If the issue persists after these checks, schedule professional service. Complex problems like major leaks or compressor failure usually require professional repair.
Tip: Document symptoms and tests to help the technician diagnose faster.
Diagnosis: AC stops delivering cold air or blows warm air only
Possible Causes
- highElectrical issue (fuse/relay/clutch wiring)
- highRefrigerant leak or low charge
- mediumFaulty compressor or clutch engagement
- lowBlocked airflow (filter/condenser/blower)
Fixes
- easyCheck the A/C fuse in the fuse box and test/replace the relay if needed
- easyInspect the compressor clutch operation and related wiring; replace if not engaging
- mediumCheck for refrigerant leaks and verify system charge with a professional device
- mediumInspect cabin air filter, blower motor, and condenser airflow; clear blockages or replace components as needed
Common Questions
What is the most common reason car A/C stops cooling?
The most common causes are a blown fuse, a faulty compressor clutch, or a refrigerant leak. Start with electrical checks and move toward the refrigerant system if needed.
Common causes are blown fuses, a bad compressor clutch, or a refrigerant leak; start with electrical checks.
Can low refrigerant cause the A/C to stop cooling?
Yes. A refrigerant leak or low charge reduces cooling efficiency and may stop cooling altogether. Get a professional assessment to confirm leaks and proper recharge.
Yes, leaks or low refrigerant can stop cooling completely; a professional should assess and recharge if needed.
Is it safe to recharge refrigerant myself?
No. Refrigerant handling requires proper equipment and training. Incorrect charging can damage the system and pose risks.
No, don’t recharge refrigerant yourself; it’s hazardous and needs a pro.
What maintenance helps prevent A/C failures?
Regular maintenance like filter changes, belt inspections, and leak checks reduces the chance of A/C failures.
Regular maintenance helps prevent many A/C problems.
How long does a typical A/C diagnostic take?
Time varies with the issue. Simple electrical checks are quick, while leaks or compressor problems may take longer.
Diagnosis time depends on the problem, from quick checks to more involved tests.
Should I drive with a malfunctioning A/C?
If required for short trips, you can drive, but avoid overheating and monitor engine temperature. Prolonged use can harm the system.
You can drive short distances, but watch engine temps and get it checked soon.
Watch Video
The Essentials
- Check electricals first (fuses/relays)
- Inspect refrigerant and leaks before charging
- Ensure airflow (filters, blower, condenser) is clear
- Don’t DIY refrigerant handling—call a pro
- Regular maintenance prevents many car A/C failures