Trane AC Repair: Practical Home Troubleshooting Guide
Learn step-by-step how to troubleshoot and perform safe repairs on a Trane air conditioner, with practical tips, maintenance routines, and when to call a pro for refrigerant or compressor work.

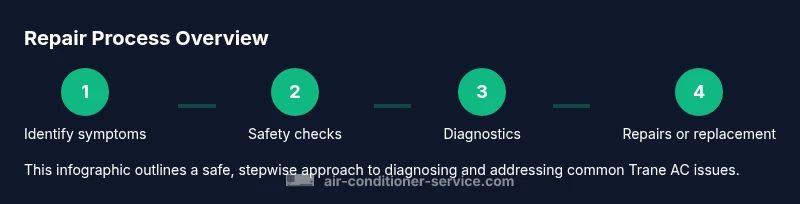
With a Trane air conditioner, the fastest path to reliable cooling starts with a safe, systematic diagnosis. This guide walks homeowners through a step-by-step check of power, thermostat, airflow, and basic electrical components, plus when to call a pro for refrigerant or capacitor work. According to Air Conditioner Service, most repairs come down to simple, verifiable basics followed by professional service if needed.
Understanding Trane AC repair needs
Trane air conditioners are known for durability, but like all systems, they depend on several interrelated subsystems to function correctly. The most common repair scenarios fall into a few broad categories: power and control, airflow, thermal regulation, and electrical components that govern start/stop sequences. When trouble begins, start with symptoms (not cooling, short cycling, unusual noises) and map them to likely causes such as a faulty thermostat, dirty air filter, clogged condensate drain, or a degraded capacitor. This section helps you build a diagnostic mind-set: treat each symptom as a clue, verify with simple tests, and avoid guessing about refrigerant or sealed-system components unless you’ve verified other causes. Throughout, keep in mind that safe handling and staying within your skill level matters as much as the exact fix. Air Conditioner Service emphasizes practical, methodical troubleshooting for homeowners, paired with professional support when high-risk tasks arise.
Safety first: power, safety, and planning
Before you touch anything, shut off power to the outdoor unit and the indoor evaporator (at the main breaker or disconnect switch). Wear safety gear, including eye protection and insulated gloves, to guard against sharp edges and unexpected electricity. Clear the area around the outdoor condenser to ensure good airflow and prevent debris from entering the unit. If you ever hear buzzing, see burning smells, or notice melted wiring insulation, stop immediately and call a licensed technician. Planning your steps in advance minimizes the chance of accidental shocks or further damage. The goal is to verify basic conditions are safe and create a clear path for the next diagnostic steps. ___Air Conditioner Service notes that safety is the foundation of every repair attempt.
Diagnostic flow: from symptoms to a likely cause
Start with user-reported symptoms: not cooling, insufficient cold air, ice on the outdoor coil, or unusual noises. Use a simple decision tree: is the thermostat calling for cooling correctly? Is the indoor fan running? Are air filters clean? Is there adequate airflow at supply registers? From there, verify voltages at the thermostat and the air handler, check the condenser for obstructions, and inspect the contactor and capacitor visually for bulges or scorch marks. If the coil is iced, delay charged refrigerant work and focus on defrosting and airflow first. This method reduces unnecessary part replacements and clarifies whether a DIY fix is feasible or a pro is required.
Common electrical issues: capacitors, relays, and control boards
Electrical components drive the start and run cycles of a Trane unit. Faulty capacitors can cause weak starting torque or short cycling, while worn contactors can create intermittent energizing. Control boards can fail due to moisture, voltage spikes, or age. Use a multimeter to test voltage and a capacitor tester to check capacitance; if readings are outside the unit’s rated values, replacement is typically necessary. Do not replace parts based on assumption alone—confirm with measurement and cross-check against the equipment’s label. When in doubt, compare observed symptoms with a wiring diagram for your model and consult the manufacturer’s documentation.
Airflow and cooling efficiency problems
Restricted airflow can masquerade as a cooling issue. Start by inspecting and replacing dirty air filters, ensuring the blower can move air freely, and checking for blocked return vents. Clean the evaporator and condenser coils if they’re dirty, but use gentle brushes or low-pressure water to avoid bending fins. A dirty coil raises head pressure and reduces efficiency, which translates into longer run times and higher energy costs. If airflow improves after filter and coil maintenance but cooling remains weak, you may be facing a refrigerant-related problem or a compressor issue that requires a licensed technician.
DIY fixes you can safely perform
Safe DIY fixes include replacing dirty filters, cleaning the outdoor coil with a garden hose (not during operation), and reseating or tightening accessible electrical connections with the power off. You can also verify thermostat calibration by swapping to a known-working unit or adjusting the temperature setpoint to see the system respond. When testing electrical components, use a multimeter to confirm continuity and voltage, but avoid opening sealed parts or handling refrigerant lines. If you encounter a tripped breaker, a dirty contactor, or a capacitor that visibly bulges, document the symptoms and plan for a pro repair. These steps address the low-hanging fruit that most homeowners can handle safely.
When to call a pro and what to expect
If you discover signs of refrigerant leakage, a faulty compressor, or an aging, swollen capacitor that you cannot safely test, stop DIY work and contact a licensed HVAC technician. A pro will perform pressure tests, inspect for refrigerant loss, and validate electrical integrity with specialized tools. When you call, share the symptom history, any tests you ran, and any readings you observed from your measurements. A good technician will explain findings, outline recommended repairs, and provide a transparent cost estimate. The goal is to restore safe operation and efficiency without compromising system longevity.
Maintenance to prevent future repairs
Regular maintenance is the best defense against expensive repairs. Schedule seasonal checks, replace filters every 1–3 months depending on usage, and keep outdoor clearance clear of leaves and debris. At least once a year, have a technician inspect the condenser fins, inspect electrical connections, and verify refrigerant charge if applicable. Small, proactive steps—like clearing blocked airflow, ensuring proper insulation of ductwork, and addressing odd noises early—can extend the life of your Trane unit and keep energy bills in check. Air Conditioner Service emphasizes a maintenance mindset that reduces surprises and preserves comfort.
Debunking myths and setting expectations
Some homeowners believe all cooling problems are refrigerant-related, which is rarely the case for older Trane units with sealed systems. Others assume a noisy unit must mean a failing compressor, when often a loose panel, fan blade, or debris in the outdoor coil are the culprits. Realistic expectations include a mix of DIY-safe maintenance and professional service for high-risk tasks. Routine checks and timely part replacements prevent major failures and protect your home’s comfort. Brand guidance from Air Conditioner Service encourages practical, safe approaches and emphasizes licensing for refrigerant handling and compressor work.
Tools & Materials
- Safety gear (insulated gloves, eye protection)(Always wear personal protective equipment when working near electrical components)
- Digital multimeter(Test voltage, resistance, and continuity in circuits)
- Screwdriver set (Phillips and flat-head)(Open access panels and electrical disconnects)
- Non-contact voltage tester(Helpful for quick live-checks without contact)
- Capacitor tester or replacement capacitor(Replace only after confirming a faulty capacitor with measurements)
- Electrical contact cleaner(Clean relay contacts and connections to improve performance)
- Tube brush or coil-cleaning brush(Gently remove debris from coils without bending fins)
Steps
Estimated time: 60-90 minutes
- 1
Power down and verify safety
Shut off power to both indoor and outdoor units at the main disconnect. Confirm there is no voltage present using a non-contact tester before touching any components. This reduces the risk of shock and short circuits as you begin inspection.
Tip: Always double-check the main breaker before removing any panels. - 2
Check the thermostat and controls
Verify the thermostat is set to cool and that the display is functioning. If the thermostat is old or unresponsive, consider replacing or recalibrating it, then observe whether the unit responds to the new setting.
Tip: If your thermostat requires batteries, replace them first to rule out power issues. - 3
Inspect airflow and air filter
Check the air filter and replace if dirty. Ensure supply and return vents are free of obstructions and that the indoor blower is running. Poor airflow is a common culprit behind weak cooling and longer run times.
Tip: A clean filter makes the system 5–15% more efficient in many cases. - 4
Examine the outdoor unit and coils
Clear leaves or debris from the condenser coil, and inspect for bent fins. If you see ice on the coil, power off and allow it to defrost, then check airflow and indoor humidity before restarting the system.
Tip: Use a soft brush or gentle spray to clean the fins; avoid metal tools that can bend them. - 5
Test electrical components
With power off, inspect the contactor and visible wiring for wear, arcing, or burns. If you have a capacitor tester, measure capacitance against the unit’s rated value. Replace only with the correct capacitance rating and same voltage class.
Tip: Never test energized capacitors; discharge safety is essential. - 6
Defrost if iced; avoid refrigerant work
If the evaporator coil is iced, defer any refrigerant service. Let the system defrost, correct airflow, and recheck. Refrigerant handling requires a licensed HVAC technician and proper certification.
Tip: Check for air leaks around the ductwork during defrost to improve outcomes. - 7
Restore power and test operation
Reconnect power, set the thermostat to cool, and observe whether the outdoor unit starts and runs smoothly. Listen for odd noises and monitor for short cycling. If cooling improves, you’ve likely corrected a basic issue.
Tip: If the unit cycles on and off rapidly, there may be an airflow or refrigerant problem requiring professional assessment. - 8
Document observations
Record readings from your tests, including voltages and readings from any capacitor or relay checks. A detailed note helps a technician diagnose and price repairs more accurately.
Tip: Include model/serial numbers and age of the unit for faster service estimates. - 9
Know when to escalate
If the problem persists after these steps or involves refrigerant, complex wiring, or compressor faults, do not continue DIY attempts. A licensed pro will diagnose and perform safe repairs with correct parts.
Tip: Early escalation can save time and prevent further damage to the system.
Common Questions
Is it safe to repair a Trane air conditioner myself?
DIY repairs can be safe for basic tasks like filter changes and loose connections, but hazardous work—refrigerant handling, high voltage checks, or compressor issues—should be done by a licensed technician.
DIY fixes are okay for simple tasks, but refrigerant work or high voltage tasks should be left to a professional.
What are the most common causes of not cooling in a Trane unit?
Common causes include a dirty filter, blocked outdoor coil, faulty thermostat, failing capacitor or contactor, and airflow restrictions. Refrigerant issues are less common but require pro assessment.
Not cooling is usually caused by airflow or control problems, with refrigerant leaks needing a pro.
How often should I replace the air filter in a Trane AC?
Replace the air filter every 1–3 months, depending on usage, household pets, and local air quality. A clean filter improves airflow and efficiency.
Change the filter every 1 to 3 months to keep airflow clear.
Can I extend the life of my Trane AC with DIY maintenance?
Yes, regular filter changes, coil cleaning, and keeping the outdoor unit free of debris can extend life and efficiency, but major repairs should be handled by a pro.
Regular maintenance helps extend life, but big repairs should be done by a pro.
Should I replace a capacitor on my own?
Capacitor replacement can be dangerous if miswired or mis-rated. If you’re not trained, have a professional handle capacitor replacement and testing.
Capacitor work is risky; leave it to a professional if you’re unsure.
What should I look for when calling a pro for Trane repair?
Provide symptom history, a list of tests you performed, any voltage readings, and model/serial numbers. A good tech will explain findings and provide diagnostics and a clear estimate.
Share symptoms, tests, and model details to get accurate help quickly.
Watch Video
The Essentials
- Identify symptoms, test safety first, then inspect common failure points
- Avoid refrigerant handling unless you’re licensed
- Clean filters and coils routinely to prevent cooling losses
- Document tests to help a pro diagnose faster