Lennox Air Conditioner Repair: Step-by-Step Guide
Practical, safe guidance for Lennox air conditioner repair: diagnose common issues, perform essential checks, and know when to call a pro. Insights from Air Conditioner Service.

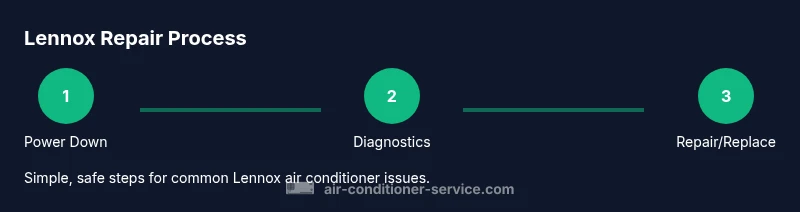
Discover how to diagnose and safely repair common Lennox air conditioner issues with this practical, step-by-step guide. You’ll verify power, test the capacitor and contactor, troubleshoot thermostat settings, inspect airflow, and determine when professional service is required. Safe, practical guidance is provided for homeowners and renters.
Why Lennox Air Conditioner Repair Requires Care
Lennox air conditioners are known for efficiency and longevity, but their repair requires careful, methodical work. According to Air Conditioner Service, homeowners can handle many routine diagnostics safely, but when in doubt, you should pause and consult a technician. The Lennox architecture combines specialized control boards, a capacitor-based start system, and refrigerant circuits that demand respectful handling. Before you begin any checks, set expectations: you want to restore cooling, protect electrical safety, and preserve warranty where possible. In this guide we focus on practical, do-it-yourself steps for common, non-pressurized issues such as overheating, uneven cooling, faulty thermostats, or a blower that won’t run. We avoid dangerous refrigerant handling and emphasize what you can verify with basic tools and proper shutoff procedures. Throughout, we’ll use the exact term lennox air conditioner repair to anchor your search and learning.
Common Lennox Repair Scenarios
Lennox units present a few recurring issues that homeowners often encounter. If the system won’t start, check the thermostat and outdoor disconnect first. Not cooling properly can stem from dirty coils, restricted airflow, or a failing capacitor. Unusual noises may indicate a failing blower motor, loose belts, or a failing compressor contactor. Ice on the evaporator coil usually points to airflow restrictions or refrigerant issues that require a licensed tech. In all cases, the goal is to restore safe operation and efficient cooling, while avoiding illegal refrigerant handling or warranty voiding actions. This section helps you recognize symptoms and decide whether DIY steps are appropriate or if professional service is needed. Lennox-specific components, such as the start capacitor and contactor, are common failure points worth inspecting with proper safety in mind.
Safety First: Power Off and PPE
Before touching any part of the air conditioner, power down the system completely. Shut off the outdoor disconnect, then switch off the thermostat and any power at the breaker panel. Wear safety glasses and insulated gloves to protect yourself from sharp edges and accidental shocks. Never attempt repairs with the system energized, and keep children and pets away from the work area. A quick test with a non-contact voltage tester can confirm there’s no live voltage present before you begin. Good lighting and clear, dry working conditions reduce the risk of mistakes. Safety is the foundation of effective Lennox air conditioner repair, especially when dealing with electrical controls and blower components.
Diagnose Power and Basic Electrical: Thermostat, Fuses, and Capacitors
A safe approach starts with verifying power and control signals. Check that the thermostat is calling for cooling, the outdoor disconnect is on, and the indoor air handler has power. Inspect fuses and circuit breakers for trips. If the system uses a start capacitor, test its value with a multimeter or substitute a known-good capacitor to isolate the problem. Loose connections or burned contacts in the contactor are common culprits and should be tightened or replaced. Keep notes of readings and ensure the common wire (C) is delivering 24V to the control board. This section focuses on non-invasive electrical checks that can reveal the root cause without disassembly of refrigerant circuits.
Inspect Cooling Components: Contactor, Capacitor, Blower, Ducts
The contactor in the outdoor unit and the run capacitor on the blower are frequent failure points. Rattling or buzzing noises, reduced cooling, or a blower that won’t start often signal these parts need replacement. Inspect the blower belt (if present) and ensure the blower wheel spins freely. Check for dirty air paths—stagnant air reduces efficiency and can cause the system to overwork. Clean coils carefully with a brush or vacuum (do not use water on electrical components). Pause to verify wiring integrity and secure terminals that may have loosened over time. Lennox-specific wiring diagrams aid precise testing without guesswork.
Airflow and Drainage: Ducts, Condensate, Filters
Restricted airflow is a major cause of poor cooling and ice formation on coils. Inspect air filters; a dirty filter reduces airflow and forces the system to work harder. Check supply and return ducts for obvious kinks or blockages. Inspect the condensate drain line for clogs that trigger overflow alarms. If you notice ice on the coil, turn off the unit and thaw the coil before continuing, addressing airflow and refrigerant balance. Regular filter changes and duct cleaning are practical maintenance steps that support Lennox performance and energy efficiency.
When to Call a Pro: Licensing, Warranty, and Red Flags
Some Lennox issues require professional service, especially when refrigerant handling, sealed system diagnostics, or compressor replacement is involved. If you encounter refrigerant odors, persistent low refrigerant levels, or high-pressure warnings, stop DIY work and contact a licensed HVAC technician. Be mindful of warranty terms; unauthorized repairs can void coverage. If the unit is under warranty, consult the Lennox warranty documentation and the installer’s report before performing extensive repairs. A professional can perform precise leak detection, reclaim refrigerant, and verify system performance with specialized tools.
Maintenance to Prevent Future Breakdowns
Routine maintenance reduces the likelihood of unexpected breakdowns and keeps Lennox units running efficiently. Schedule annual inspections, replace filters monthly or as needed, and keep the outdoor unit free of debris. Clean the condensate drain and ensure proper insulation of refrigerant lines. Check thermostat accuracy and recalibrate if necessary. Regular professional tune-ups complement DIY checks, ensuring peak performance and prolonging equipment life. Consistent maintenance also helps protect energy efficiency and indoor comfort.
DIY Troubleshooting Checklist
Keep this quick-reference checklist handy: 1) Power down and verify safety; 2) Confirm thermostat calls for cooling; 3) Inspect fuses, breakers, and the outdoor disconnect; 4) Test the capacitor and contactor with a multimeter; 5) Check for dirty filters, coils, and restricted ducts; 6) Look for ice on the evaporator coil and address airflow; 7) If issues persist, consult a licensed HVAC tech and share your test results. This quick guide helps you approach Lennox air conditioner repair methodically and safely.
Tools & Materials
- Safety gear (safety glasses, gloves)(Eye and hand protection for every check)
- Non-contact voltage tester(Verify there’s no live voltage before touching wires)
- Digital multimeter(Test voltage, resistance, and capacitor values)
- Screwdriver set (Phillips and flat)(Access panels and service screws)
- Nut drivers and wrenches(Secure electrical connections and blower components)
- Capacitor tester (or known-good capacitor)(Helpful for diagnosing capacitor health)
- Vacuum or compressed air can(Clean coils and blower components safely)
- Replacement parts (capacitors, contactors) (Only after proper diagnosis)
- Flashlight or headlamp(Illumination for panel and coil inspection)
Steps
Estimated time: 45-90 minutes
- 1
Power down and secure
Turn off the outdoor disconnect and the thermostat. Lockout any breakers that feed the unit and wait a few minutes to let residual voltage dissipate. This creates a safe baseline before probing any components.
Tip: Always confirm no voltage with a tester before touching wires. - 2
Identify symptoms and gather model info
Note symptoms, such as not cooling, unusual noises, or ice on coils. Record the Lennox model number and serial to match manuals and parts charts during diagnosis.
Tip: Documentation helps when you contact support or order parts. - 3
Check power supply and fuses
Inspect fuses and breakers for trips and ensure the outdoor disconnect is in the ON position. A tripped breaker often explains intermittent performance.
Tip: Reset a trip-fault once; if it trips again, stop and seek professional help. - 4
Test capacitor and contactor
With power off, test the start/run capacitor values if accessible, and inspect the contactor for pitting or welding joints. Replace with a known-good part if readings are outside spec.
Tip: Contactor wear often presents as a buzzing sound when energized. - 5
Inspect thermostat and wiring
Ensure the thermostat is calling for cooling, that wires are secure, and that the C-wire is connected correctly for a stable power supply to the control board.
Tip: Calibration or replacement of the thermostat can fix many false-cooling issues. - 6
Inspect blower and ducts
Check that the blower motor spins freely, belts are intact (if present), and ducts are unobstructed. Clean coil surfaces gently to restore airflow.
Tip: Restriction in ducts reduces efficiency and cooling capacity. - 7
Evaluate refrigerant safety and limits
Do not attempt refrigerant recovery or charging unless you’re certified. Leaks require a licensed technician to avoid safety and environmental hazards.
Tip: If you suspect a leak, schedule a professional leak test rather than attempting DIY charging. - 8
Run system and observe performance
Restore power, set to cool, and monitor for proper cycling and temperature balance. Listen for abnormal noises and watch for ice reformation on coils.
Tip: Give the system time to reach target temperature after adjustments. - 9
Document findings and plan next steps
Record readings, parts replaced, and any recommendations. Decide if DIY steps are sufficient or if a professional service is warranted.
Tip: Keep your notes handy for future maintenance and warranty claims.
Common Questions
Can I repair a Lennox air conditioner myself?
You can perform safe electrical checks and basic maintenance, but avoid refrigerant handling or sealed-system repairs unless you’re a licensed technician. Always consult the device’s warranty and local codes before DIY work.
DIY fixes are limited to safe electrical checks and maintenance; refrigerant work requires a licensed professional.
What are common Lennox repair symptoms I can diagnose at home?
Not cooling, unusual noises, ice on coils, uneven cooling, and thermostat misreads are common signs. Start with thermostat checks, power supply, and blower inspection before considering parts replacement.
Common signs include poor cooling, odd noises, or ice buildup; start with thermostat, power, and blower checks.
Do DIY repairs affect Lennox warranty?
DIY work can affect warranty coverage. Review the Lennox warranty terms and the installer agreement to determine what is allowed and what requires a certified technician.
Check your Lennox warranty terms before DIY fixes; improper work can void coverage.
When should I replace rather than repair a Lennox unit?
If reliability is poor, repair costs are high, or frequent issues persist after diagnostics, replacement may be more cost-effective. Compare the age of the unit, efficiency losses, and potential future repair costs.
If frequent problems persist or the unit is old, replacement may be a better option.
What maintenance can I do to prevent future Lennox problems?
Regular filter changes, coil cleaning, and annual professional inspections significantly reduce breakdowns and improve efficiency. Keep outdoor units clear of debris and ensure proper thermostat calibration.
Change filters regularly, clean coils, and schedule yearly professional tune-ups.
How soon can a professional diagnose a refrigerant leak?
If you suspect a refrigerant leak, contact a licensed HVAC technician promptly. Delays can worsen efficiency and may lead to higher repair costs.
Call a licensed tech quickly if you suspect a refrigerant leak.
Watch Video
The Essentials
- Power off before any inspection.
- Test capacitors and contactors first for common failures.
- Make airflow and duct checks a priority.
- Know when to call a pro—refrigerant handling requires licensing.
- Regular maintenance prevents many Lennox issues.