How to Tell When Your Air Conditioner Needs Regassing
Learn practical signs, tests, and steps to determine if your AC needs regassing and when to call a professional for safe refrigerant charging.

In this guide you’ll learn how to tell when your air conditioner needs regassing by checking pressure readings, cooling performance, and visible signs of leaks. Look for weak airflow, longer cooling times, and hissing sounds near service ports. Use proper safety steps, and know when to call a licensed technician for accurate refrigerant charging.
What regassing means for your air conditioner
Regassing, in the context of air conditioning, is the process of restoring the refrigerant level in the system after a leak or loss. It differs from a simple recharge: regassing includes confirming the system is leak-tight, evacuating moisture, and charging with the correct type and amount of refrigerant as specified by the manufacturer. When you ask how to tell when air con needs regassing, you’re looking for a mix of pressure readings, cooling performance, and physical signs such as oil around connections or a drop in suction pressure. In residential units, most regassing work is done by licensed technicians who also repair leaks to prevent future losses. The goal is not just to fill a bottle, but to ensure the system operates at the manufacturer’s intended pressures and temperatures. As you explore this topic, keep in mind that refrigerant handling is regulated and improper charging can damage components or harm you. Air Conditioner Service emphasizes safety, proper procedure, and adherence to local regulations.
Tools & Materials
- Manometer or gauge set(To measure refrigerant pressure on low/high sides)
- Electronic leak detector(Detects small leaks beyond naked-eye inspection)
- UV dye kit (optional)(Helps visualize leaks with UV light)
- Safety gear(Gloves and goggles for protection)
- Recovery machine(Captures refrigerant before opening system)
- Vacuum pump(Evacuates air/moisture after leak repair)
- Correct refrigerant type and model charge(Refer to nameplate and service manual)
- Torque wrench(Optional for sealed fittings)
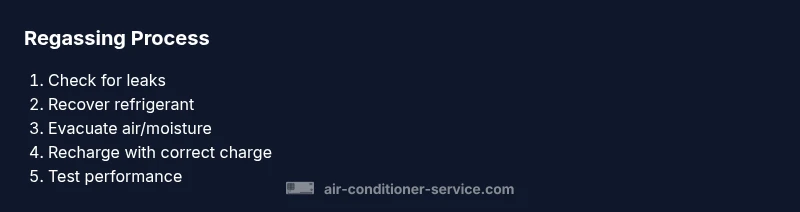
Steps
Estimated time: 60-120 minutes
- 1
Power down and verify safety
Shut off the outdoor unit and indoor blower and disconnect power. Confirm there is no voltage at the access panel and wear protective gear. This prevents electric shock and accidental start-up during service.
Tip: Use a non-contact voltage tester to double-check power is off. - 2
Connect gauges and recover refrigerant
Attach the manifold gauges to the service ports and recover any existing refrigerant using the recovery machine following local regulations. Do not vent refrigerant to the atmosphere.
Tip: Be mindful of environmental rules and use the recovery machine properly. - 3
Check system for leaks
Use an electronic detector and visual inspection to locate leaks. Look for oil residue and dye trails near connections, fittings, and the evaporator/condensing coils.
Tip: If you find a leak, mark it and plan repair before recharging. - 4
Evacuate air and moisture
If the system has leaks or has been opened, evacuate to remove air and moisture. A deep vacuum minimizes moisture-related corrosion and prevents poor refrigerant performance.
Tip: A deep vacuum typically requires 15-30 minutes of pumping at the deep vacuum level. - 5
Recharge with correct refrigerant
Charge the system with the exact refrigerant type and weight specified on the nameplate. Use calibrated gauges to verify target pressures.
Tip: Double-check oil compatibility and grade for the compressor. - 6
Test run and verify
Run the system in cooling mode and monitor suction/discharge pressures and outlet temperatures. Ensure the evaporator coil is cold and the outdoor unit is cycling normally.
Tip: Document the final charge and pressures. - 7
Document and monitor
Record the service date, refrigerant type, charge amount, and observed performance. Monitor for 24-72 hours for signs of residual leaks or performance changes.
Tip: Keep this record with the unit’s service manual.
Common Questions
What are common signs that refrigerant leaks are occurring in an air conditioner?
Common signs include reduced cooling performance, longer run times, ice on the evaporator, hissing noises near service ports, and oily residue around joints. A professional leak check is essential for confirmation.
Look for reduced cooling, longer cycles, and any leaks near the connections; a professional check is recommended.
Can I regas an air conditioner myself without calling a technician?
Regassing requires specialized tools and handling of refrigerant. Without proper equipment and knowledge, you can harm yourself, worsen leaks, and violate laws. Always hire a licensed technician.
Regassing isn’t a DIY job; it needs licensed technicians and proper equipment.
How do technicians determine the correct refrigerant charge?
Technicians determine the correct charge by consulting the nameplate, using calibrated gauges, measuring pressures and temperatures, and performing a final run test. They also account for oil charge and system refrigerant mix.
They use the unit’s label, precise gauges, and test runs to set the right charge.
How long does a regassing usually take?
A typical regassing visit lasts about one hour, but the total time can vary with system size, leak severity, and the need for leak repair.
Usually about an hour, depending on the system and leaks.
Is it legal to vent refrigerant if I don’t want to pay for service?
No. Venting refrigerant is illegal in many jurisdictions due to environmental impact and safety concerns. A licensed technician should handle recuperation.
Ventilating refrigerants is illegal; always use proper recovery methods.
Watch Video
The Essentials
- Look for multiple indicators of low refrigerant beyond just cooling loss
- Regassing must address leaks, not just top up the charge
- Never vent refrigerant—use proper recovery methods
- A licensed technician is essential for safe, compliant charging