How to tell if your air conditioner needs regassing
Learn the signs your air conditioner may need regassing, safe diagnostic steps you can take, when to call a licensed technician, and practical tips to prevent refrigerant leaks and future regassing.

Signs your AC may need regassing include reduced cooling, longer cycles, ice on the evaporator coil, and hissing sounds near refrigerant lines. If these occur, do not attempt a DIY recharge. A licensed technician must verify leaks, evacuate the system, and recharge with the correct charge using calibrated equipment and documentation.
What regassing means for an air conditioner
Regassing, in the context of air conditioning, refers to restoring the refrigerant charge in the system to the level specified by the manufacturer. Over time, leaks or improper initial charging can cause the refrigerant amount to drop, reducing cooling efficiency and potentially damaging components like the compressor. The task is not just about adding refrigerant; it requires confirming there are no leaks, evacuating air and moisture from the circuit, and charging to precise specifications. According to Air Conditioner Service, diagnosing regassing involves more than a single pressure reading—it requires a holistic assessment of performance, leak history, and system integrity. Homeowners should treat regassing as a professional service, particularly because refrigerant handling is subject to environmental and safety regulations.
What this means for homeowners is that you should focus on symptoms and operating behavior first, then involve a licensed technician for any charge work. The goal isn’t only to restore cooling, but to ensure the system is sealed, the refrigerant charge is correct, and the environment remains safe. In practice, you’ll use this information to decide when to schedule a service rather than attempting risky repairs yourself.
Key terms to know: refrigerant, charge, leak, evacuation, recovery, and recharge. Understanding these basics helps you communicate effectively with technicians and interpret the service report after the appointment.
Signs your AC may need regassing
When your air conditioner needs regassing, the symptoms are often noticeable but not always obvious. Common indicators include: weaker cooling performance compared with past seasons, as the system cannot absorb heat efficiently; longer runtime as the unit struggles to reach the desired temperature; cooling cycles that stop and start frequently; and occasionally ice or frost on the indoor coil or refrigerant lines. Hissing or bubbling noises near copper lines can signal a refrigerant leak, while oily residue at joints or under the outdoor unit may also appear. You might also see increased energy bills due to reduced efficiency, or the AC may run continuously without delivering comfortable temperatures. If you observe these signs, it’s important to avoid DIY refrigerant work. While some symptoms resemble simple maintenance needs, regassing requires precise measurements and equipment that a trained professional possesses. Air Conditioner Service emphasizes that diagnosing regassing should involve a leak search, pressure checks, and verification of the correct refrigerant charge.
In addition to equipment signs, consider the system age and service history. Older units are more likely to develop leaks or require charge verification as they accumulate wear. If a refrigerant leak has been repaired in the past, there is a higher chance that the system will require another recharge. The key takeaway is to treat uncertain symptoms as a call-to-action for a professional inspection rather than a DIY fix.
- Reduced cooling capacity or uneven cooling across zones
- Longer cycles and higher running times
- Ice formation on the evaporator coil
- Hissing or bubbling sounds near refrigerant lines
- Oily residue at line connections or on the outdoor unit
- Unusual noises, such as buzzing or whistling, during operation
Tools & Materials
- AC manifold gauge set(Used to measure high/low pressures and determine charge accuracy.)
- Digital refrigerant scale(Weighs charge added to ensure exact refrigerant amount.)
- Vacuum pump(Evacuates air and moisture from the system before charging.)
- Micron vacuum gauge(Helps verify a proper deep vacuum level after evacuation.)
- Personal protective equipment (gloves, goggles)( protects hands and eyes when handling refrigerant and tools.)
- Leak detection kit (electronic or UV dye)(Optional for identifying leaks before charging.)
- Refrigerant (appropriate for the system, handled by licensed tech)(Only a licensed technician should handle refrigerant.)
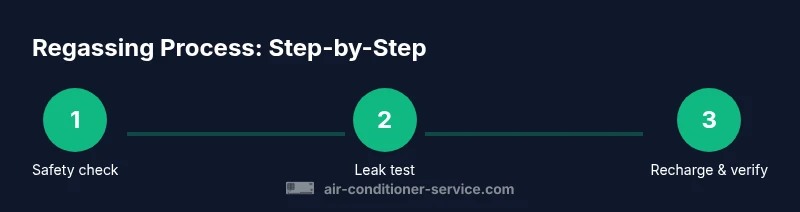
Steps
Estimated time: 90-180 minutes
- 1
Gather tools and safety gear
Collect the essential tools listed above and put on protective equipment. Confirm you have a clear work area and adequate lighting. Double-check that you are authorized to handle refrigerants and that you are following local regulations.
Tip: Never work with refrigerant without proper PPE and proper certification. - 2
Inspect exterior and lines for obvious leaks
Visually inspect the outdoor unit and refrigerant lines for oil stains, corrosion, and obvious damage. Look for crusty residues or oily patches that may indicate a leak. Do not touch or attempt to repair suspected leaks; this step is for documentation and planning a professional service.
Tip: Take clear photos of any signs of leakage to show the technician. - 3
Check indoor coil and airflow indicators
Observe airflow at vents and listen for unusual noises. If the indoor coil feels unusually cold or shows frost accumulation, it can indicate improper refrigerant level or moisture-related issues. Record temperature readings at the supply vent and compare to typical comfort levels for your space.
Tip: Use a thermometer to track indoor ambient temperatures for a few cycles. - 4
Limit DIY checks to safe observations
Do not attempt to open sealed refrigerant ports or discharge refrigerant. Avoid modifying electrical connections or running the compressor without proper control systems. Focus on non-invasive checks and preparing information for a professional visit.
Tip: Document symptoms with dates and times to help the technician reproduce the issue. - 5
Call a licensed HVAC technician for diagnosis
If symptoms persist or you are unsure, contact a licensed HVAC technician. They will perform leak testing, evacuate the system, and confirm the exact refrigerant charge with calibrated equipment.
Tip: Ask for EPA certification details and warranty terms before work begins. - 6
Professional leak verification and evacuation
The technician will locate leaks using approved methods, recover refrigerant, and evacuate air and moisture from the system with a vacuum pump. This ensures the system is clean before charging.
Tip: Recovery and evacuation are critical for safety and compliance. - 7
Recharge to the manufacturer’s specified charge
After confirming proper vacuum and leak-free conditions, the pro will recharge using a calibrated scale to the exact weight specified by the system’s label. They will verify pressures with the manifold gauges and monitor performance.
Tip: Ensure the service report lists the exact charge and test results. - 8
Test operation and monitor performance
Run the system and compare indoor temperatures, coil temperatures, and airflow after recharge. Check that the outdoor unit cycles normally and that there are no new leaks or unusual noises.
Tip: Keep monitoring for 24-48 hours and record temperature readings. - 9
Document results and plan preventive care
Keep a copy of the service notes, charge amount, and any leak repair details. Schedule a preventive maintenance visit to check seals, filters, and refrigerant levels periodically.
Tip: Preventive care reduces the likelihood of future regassing.
Common Questions
What commonly causes the need for regassing?
Regassing is needed when the refrigerant level drops due to leaks or improper initial charge. Leaks are the most common cause, and a technician must verify the system’s integrity before recharging.
Regassing happens mainly when there’s a leak or an improper initial charge. A pro will verify leaks and perform the recharge safely.
Can I detect low refrigerant without a gauge?
Reliable detection usually requires professional gauges and pressure readings. Home meters may not provide accurate results, and guessing can lead to overcharging or undercharging.
You really need proper gauges to tell if the refrigerant is low.
Is regassing legal for homeowners?
In many regions, handling refrigerants requires EPA certification. It’s best to hire a licensed technician who is authorized to perform recovery, evacuation, and recharge.
Legality varies by region; a licensed technician will be compliant with local rules.
What are common signs of a refrigerant leak?
Common signs include weak cooling, frost on the evaporator coil, hissing sounds near lines, and oily residues near connections. If you notice these, schedule a professional inspection.
Look for frost, hissing sounds, and oily spots to flag leaks to a pro.
How long does regassing take?
Regassing typically takes a few hours, depending on system size, leak status, and whether any repairs are needed. A technician will provide an estimated window.
It usually takes a few hours, depending on the job.
What should I ask the technician before they begin?
Ask about certifications, leak repair plans, the exact charge amount, and the expected warranty on the refrigerant and work. Request a written estimate and service report.
Ask for certification, a written estimate, and a detailed plan before work starts.
Watch Video
The Essentials
- Look for signs like reduced cooling and ice on the coil.
- Do not DIY refrigerant charging; leaks must be addressed first.
- Hire a licensed HVAC technician for evacuation, leak testing, and recharge.
- Regular maintenance reduces future regassing needs.