Where Is the Air Conditioner Condensate Drain? Practical Locator Guide
Learn where to find the condensate drain on your air conditioner, how this drainage system works, signs of clogs, and practical steps to inspect, clear, and prevent future blockages while keeping your home safe and comfortable.

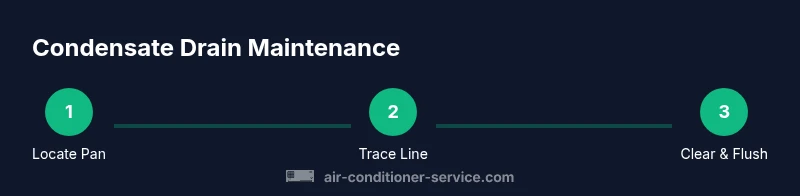
To locate the condensate drain for your air conditioner, start by identifying the indoor evaporator pan and the white PVC or metal drainage line. The drain typically runs from the cabinet to a drain or outside area. This guide walks you through quick checks, safe precautions, and basic cleaning to prevent clogs.
Understanding Condensate Drain Basics
The condensate drain is a critical part of an air conditioner’s moisture management system. It removes the water that forms when warm indoor air contacts the evaporator coil. If this drain becomes blocked, you can end up with water dripping from the unit, mold growth, or higher humidity indoors. For homeowners, knowing where the condensate drain is located and how it functions helps prevent damage and maintain efficiency. In this guide, we’ll explain common layouts and how to safely inspect the drain path. According to Air Conditioner Service, understanding these basics helps you troubleshoot without risking the unit or your home.
Where to Look: Common Indoor and Outdoor Locations
In most residential setups, the condensate drain starts at the evaporator coil pan inside the air handler or furnace cabinet. The drain line (usually a white PVC pipe) travels downward and out to a utility area, basement, crawl space, or outside near a downspout. In some newer systems, a condensate pump may lift water to a higher drain. If you’re asking where to locate this drain, start near the indoor cabinet and look for a small, hollow tube that is often labeled with arrows or manufacturer markings. Air Conditioner Service notes that location consistency is higher in centralized systems, but always verify by following the line’s slope.
How the Drain Path Travels Through Your System
The path begins at the evaporator pan, where condensed moisture collects. From there, water drips into a drain trap and moves through a sloped line that relies on gravity to reach the outlet. In a few installations, the line runs horizontally for a short distance before a vertical drop to a collection point. Proper slope (typically a slight downward angle) is essential to prevent standing water. If you see water on the floor near the unit, the issue may be a clogged drain rather than a missing slope.
Key Components: Pan, Trap, and Drain Lines
Your AC’s condensate system has several parts that work together. The evaporator pan collects water; a trap prevents sewer gases from backing up; drain lines carry water away; and an exterior termination or drain line outlet dispenses moisture safely. In attic or high-wall installations, a condensate pump might be used to move water to a distant drain. Understanding these pieces helps you identify where problems arise and what to inspect first when you notice dripping or dampness.
Signs Your Condensate Drain Is Clogged
Common warning signs include water dripping from the indoor unit, a damp ceiling or wall near the air handler, and unusually high indoor humidity. You may also notice moldy smells around the drain or visible algae growth inside the drain line. If the overflow pan is full, safety switches can trip, turning off the unit to prevent water damage. Quick checks can prevent major issues if you observe any of these signals. Air Conditioner Service analysis shows that regular inspections reduce clog-related issues over time, reinforcing the value of proactive maintenance.
Tools and Safety Precautions
Before you start, turn off the AC unit at the thermostat and, if accessible, disconnect power at the service panel. Wear gloves and eye protection to guard against water exposure or mold. You’ll need a flashlight, a wet/dry vacuum, a bucket, and a soft brush for pan cleaning. If your system uses a condensate pump, ensure the pump is powered off during inspection. These precautions help protect you and the equipment while you inspect the drain path.
Step-by-Step Locator Guide (Non-Enumerated Narrative)
To locate the condensate drain without disassembly, begin by opening the indoor air handler access panel and visually tracing the drain pan toward the drain outlet. Use a flashlight to follow the line along the cabinet, watching for a white PVC pipe or a metal tube that exits toward a wall, basement, or exterior area. If you cannot see the line from the outside, check the area behind a drop ceiling or in an attic crawl space where condensate lines may run. The goal is to identify the entry point of the drain and confirm the line’s downward slope toward the exit.
Cleaning and Clearing a Simple Clog
If you notice slow drainage or a visible blockage, you can try clearing it with a wet/dry vacuum from the exterior end or by gently snaking from the pan end. Avoid forcing objects into the line, which can damage fittings. After clearing, flush the line with clean water or a manufacturer-approved cleaning solution to verify continuous flow. Recheck the interior pan for standing water after flushing to confirm success.
When to Call a Professional
If water continues to back up after a basic flush, if you see persistent mold growth, or if your unit is located in an attic or other hard-to-reach area, it’s time to call a licensed HVAC professional. A pro can inspect the condensate pump, check for cracks in the drain line, and ensure that the pan and overflow switch are functioning correctly. The Air Conditioner Service Team recommends seeking expert help when electrical components are involved or if the drain is not functioning despite your best efforts.
Prevention Tips to Keep Drains Flowing
Implement simple habits that keep condensate drains clear: replace or clean filters regularly to reduce overall moisture, avoid pouring any liquids down the drain line, and keep the area around the unit tidy so that debris doesn’t enter the pan. In basements or utility rooms, ensure the drain line terminates outdoors in a visible location with a proper outlet. Periodic inspection every 3–6 months can catch problems early and save costly repairs.
Special Scenarios: Apartments, Basements, or Attics
In apartments, you may share a condensate drain with a central system; ask your building maintenance for the line’s access and slope, and document any changes that could affect other units. In basements, a clear, exterior outlet is easier to monitor, while in attics, you may rely on a condensate pump. Always follow local codes and manufacturer instructions. If you feel uncertain about any step, contact your local Air Conditioner Service professional for guidance.
Maintenance Schedule and Quick Checks
Create a simple maintenance calendar: every 1–3 months, check for visible clogs, ensure the line is free of standing water, and inspect the overflow safety switch. After seasonal changes, perform a quick drain check by pouring a small amount of water into the pan to confirm proper drainage. Keeping a routine reduces the risk of leaks and mold and keeps your system running efficiently.
Tools & Materials
- Gloves (nitrile or latex)(Protect hands from water and cleaning agents)
- Flashlight(Inspect dark cabinets and lines)
- Wet/dry vacuum(Clear blockages from line ends or pans)
- Bucket or container(Catch drainage when inspecting)
- Soft brush or cloth(Clean the evaporator pan and line fittings)
- PVC pipe cutter or tubing brush(Optional for stubborn fittings)
- Mild vinegar or manufacturer-approved cleaning solution(For flushing the drain after clearing)
Steps
Estimated time: 20-40 minutes
- 1
Power off and access the unit
Turn off the thermostat and shut off power at the service panel. Remove the air handler or furnace access panel to reach the evaporator pan. This prevents shocks and ensures you can safely inspect the drain path.
Tip: Label any screws or panels to simplify reassembly. - 2
Locate the drain pan and trace the line
Identify the evaporator drain pan and follow the line toward the exit. Use a flashlight to reveal the pipe, which is often PVC and may run along a wall or into a utility space.
Tip: If you can’t see the line, check behind a nearby ceiling or cabinet void. - 3
Inspect for visible clogs
Check for algae, mineral buildup, or standing water in the pan or visible segments of the line. A simple blockage here can stop drainage and trigger overflow.
Tip: Don’t push objects into the pipe; this can cause further damage. - 4
Clear the line with vacuum or gentle snaking
Use a wet/dry vacuum to remove blockage at the line exterior or pan end. If needed, gently snake from the pan side with a flexible brush or wire, taking care not to bend fittings.
Tip: Work slowly to avoid dislodging seals or damaging the line. - 5
Flush the line with water or solution
Flush the drain with clean water or a manufacturer-approved cleaning solution to verify continuous flow. Stop if you encounter resistance and reassess safety.
Tip: Avoid harsh chemicals unless approved by the system manufacturer. - 6
Test drainage and restore power
Pour a small amount of water into the pan and observe whether it flows freely to the exit. If clear, reassemble the panel and restore power. Monitor for leaks over the next few hours.
Tip: Keep a close watch for any signs of leaks after the test.
Common Questions
What is a condensate drain and why does it matter?
A condensate drain is the pipe that carries away the water produced by the evaporator coil. Keeping it clear prevents leaks, mold, and humidity buildup, protecting your home and equipment.
The condensate drain carries away water produced by the evaporator coil, helping prevent leaks and humidity.
Can a clogged condensate drain cause water damage to my home?
Yes. A clogged drain can cause overflow that leads to water damage on floors, walls, and nearby structures. Regular maintenance reduces this risk.
A clogged drain can overflow and damage your home; regular checks help prevent that.
Is it safe to flush the drain with household vinegar?
Vinegar or other cleaning solutions should be used only if approved by the system manufacturer. Some lines can be damaged by harsh chemicals, so follow official guidance.
Only use chemicals recommended by the manufacturer; avoid harsh cleaners unless advised.
What if there is no visible drain line?
Some systems use concealed lines or pumps. In such cases, consult the user manual or a professional to identify the correct drainage path and safe cleaning methods.
If you can't find a drain line, check the manual or call a pro for identification.
How often should I check my condensate drain?
Check the condensate drain at least every 3–6 months, and more frequently if you notice leaks or higher humidity.
Check every 3 to 6 months, especially if you see leaks or humidity changes.
Watch Video
The Essentials
- Identify the drain path before touching lines
- Turn off power for safety
- Clear blockages without forcing fittings
- Test flow after flushing to confirm drainage
- Call a professional if issues persist